
Finding Your Path — How To Win at the Pokemon TCG

I’m sure many of you reading this think you are fully aware of how to win a game of the Pokemon Trading Card Game. “Take six Prize cards, of course! You can also win by Knocking Out your opponent’s last Pokemon in play, or if your opponent runs out of cards in their deck. Everyone who’s read the rulebook can tell you that.” Yes, how silly of me. Everyone does know that. Any newcomer knows these win conditions just as well as the best player in the world. Yet, the best player in the world will win games more often than the newcomer. Why is that exactly? While both of these players know how to win, only the best player knows how to win; or, rather, knows the path to victory that is most likely to succeed. In fact, I would go so far as to say that knowing their path to victory directly contributed to making those players better — high-tier optimization came naturally as a result of playing towards their win condition.
A lack of direction isn’t just a problem for beginners, either. All the time I see mid-level players who are clearly not playing toward their easiest win condition. They’ll make plays that don’t help them win, or miss a key play that could have swung the game in their favor. This lack of awareness can cost you games that were in your control the whole time. On the other side of this spectrum, I have seen pro players make miraculous comebacks because they were able to identify their best win condition during the game and perfectly execute it.
How do they figure out that win condition, you may ask? That’s the question I intend to answer today. I will go over the method I use to determine the easiest way to win a game of Pokemon — a skill anyone can benefit from. First, though, I think it is necessary to define a few in-game concepts that will help you wrap your head around the complex puzzle that is figuring out your best path to victory.
Most of you reading this are probably unfamiliar with me, so let me introduce myself before I go any further. I’ve been playing this game casually since all the way back to 2001, but only in 2012 did I start participating in competitive tournaments in the Delaware area. Since then, I have achieved some great accomplishments in the Masters division, including winning the 2016 Pennsylvania State Championships, placing 19th at the National Championships the same year, winning half a dozen League Cups, and qualifying for the World Championships three times. I have also been a PokeBeach staff member since 2014, starting out as a forum moderator and eventually climbing my way up to co-head of the article program.
My deck-building skills have never been what sets me apart from my other local players — nor is it my metagaming or knowledge of specific matchups. No, my success is most commonly a result of my in-game fundamentals: I can pick up any deck, good or bad, and formulate a gameplan to defeat whomever I’m sitting across from. I’ve been able to pull games out of my… Grass Energy that I had no right to win — other times I fail horribly, especially if I’ve never played the deck before, but even in the games I lose I always have a plan, and I attribute that to the concepts I’m going to highlight in this article.
I’m sure you’re all eager to learn my tips and tricks, so let’s get started by going over three crucial definitions and how to apply them to your games:
The Prize Trade
Prize trade, noun
An event that begins once both players’ boards are established to the point where they can use relevant attacks in succession until one player wins the game. It is no longer considered a Prize trade if one player misses a relevant attack, either because they whiffed a necessary card or because the opponent disrupted them.
This term in action might be what you call a “back-and-forth game”. This back-and-forth starts at a specific point in the game, at which point it becomes a Prize trade. In most matchups, that point is usually the mid game, roughly turn three or four, but it doesn’t have to to be considered a Prize trade.
It’s important to understand the concept of the Prize trade because walking into one could lose you the game right there. If it’s inevitable that you’re going to get all of your Prize cards first, by all means, hit things until you win… but if your opponent is going to win first, you’ve sealed your own fate by engaging in a Prize trade. Unless you can somehow disrupt your opponent’s strategy, you’re falling right into your opponent’s trap.
How to Set Up For and Play Out a Prize Trade
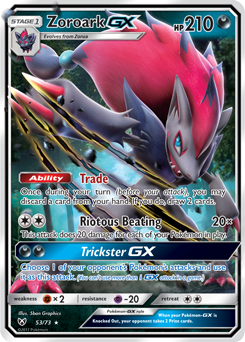
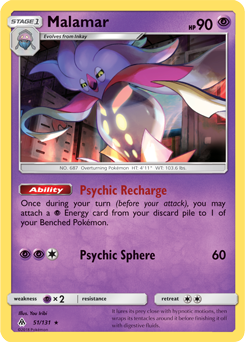
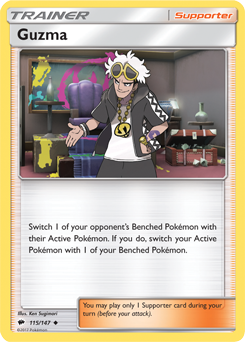
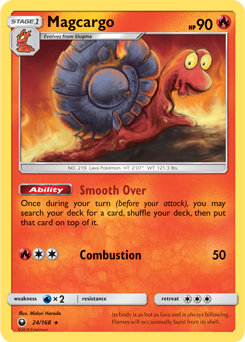
Setting up for a Prize trade is pretty simple. The biggest thing you will need to do is establish enough attackers to last for the whole game; this includes all the necessary Energy, Tools, Stadiums, support Pokemon such as Malamar, etc. that allow them to function. Then, make sure you have any cards you need to play at a specific time in your hand, such as Guzma. Setting up draw support Pokemon such as Zoroark-GX, Oranguru, or Magcargo can help you get those cards back if your hand is disrupted.
When to begin the Prize trade is more complicated. It’s always important to analyze the state of both players’ boards before doing so.
As I said earlier, don’t jump right into a Prize trade if you can’t keep up with your opponent. Instead of starting a Prize trade that you can’t finish, some things you can do are leave your attacker on the Bench and wait until you have a second one, spread out your Energy so your opponent can’t wipe out all of your attachments with one attack, or draw/thin more cards from your deck so you are more likely to draw what you need for the rest of the game. These are all greats tactics to help stabilize your board before a Prize trade begins.
You can still start a Prize trade if you don’t have all of your attackers set up; but if, based on your assumptions, you drawing what you need to win is less likely than your opponent drawing what they need to win, you may need to focus on finding the cards you’ll need for the rest of the game before going all in on grabbing those Prizes.
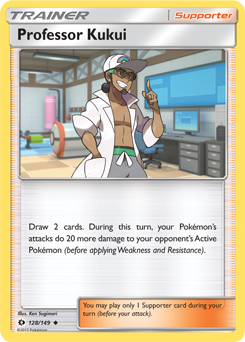
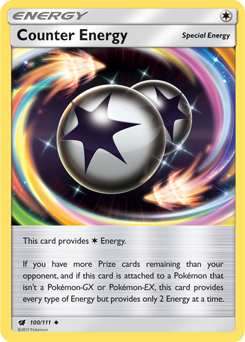
That’s all good if the Prize trade will work in your favor, but how should you go about entering a Prize trade if it favors your opponent? Even if your opponent’s ideal board would stomp yours, you may not have anything to worry about if they are currently unable to deliver ideal attacks. For example, if your opponent only has one attacker set up that is easy for you to Knock Out, or is unlikely to hit a specific card they need to confirm their next KO such as Professor Kukui or Counter Energy, going into a Prize trade may be a good idea.
Finally, there are a few things you can do during Prize trades to win them more often than not.
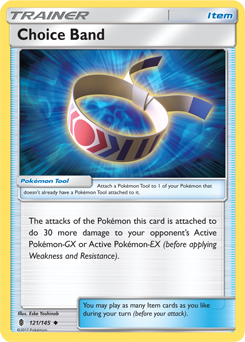
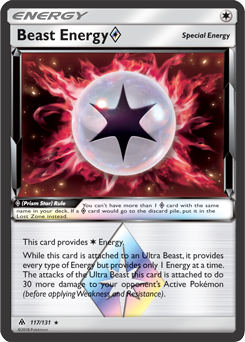
If you’re trying to turn around a Prize trade that’s not going in your favor, figure out what’s allowing your opponent to pull off their best attack every turn. Is it a support Pokemon? How about their large hand size? Maybe it’s the Choice Bands or Beast Energy Prism Star they already have in play? Always look for little ways to make your opponent more likely to whiff a Knock Out.
If you’re ahead on Prizes, make sure to patch up any holes in your board when possible. If you’re relying on a support Pokemon, a large hand, or cards in play, a good opponent is going to capitalize on that. Make sure you’re prepared to deal with your opponent’s disruptive tactics, or you might let a winning game slip out of your hands.
One reason the Prize trade isn’t going in your favor could be the attackers you’re using. Using bulky attackers that your opponent can’t OHKO or non-GX Pokemon is a great way to swing a game into your favor.
The key to any successful Prize-denying tactics is understanding your opponent’s deck enough that you know what will slow them down while also giving you an opening to gain the lead if needed.
Pressure
Pressure, noun
Any play that contributes toward that player’s win condition and does damage to/Knocks Out the opponent’s Pokemon that they need to win.
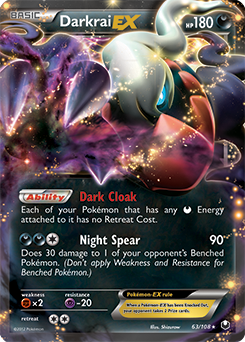
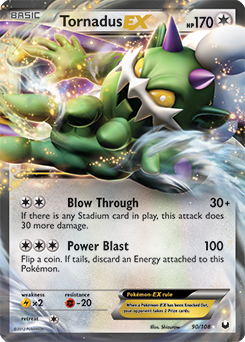
Pressure is one of the most effective tactics you can employ in a game of Pokemon. It’s been the primary strategy of countless tier-one decks throughout the history of this game, such as Buzzwole-GX / Lycanroc-GX, Darkrai-EX variants, Tornadus-EX variants, the original Haymaker, and so many more.
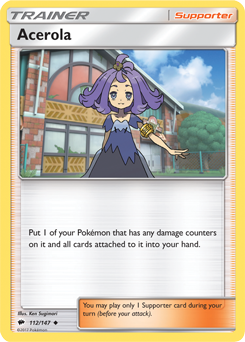
When one of your attackers or support Pokemon gets Knocked Out, you need to replace it. That means finding the Pokemon itself, the Energy or Tool needed to attack, and the replacement for it once it inevitably gets Knocked Out too. This may require playing a draw Supporter, meaning you can’t use a utility Supporter like Guzma or Acerola on the same turn; and, since drawing cards is inherently random, you may not find the cards at all despite going through a good chunk of your deck. But what makes pressure so scary is that your opponent is nabbing themselves some Prizes while they’re applying it. It’s effectively putting you on a clock: either you set up through the damage you’re taking and start taking Prizes, or you will lose in X amount of turns. Sometimes you’ll lose before you even have a chance to set up.
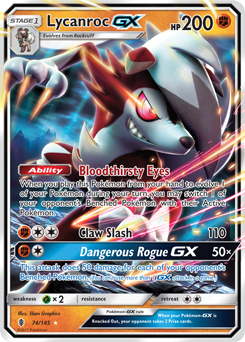
One deck in the current format that is excellent at applying pressure is Zoroark-GX / Lycanroc-GX. Riotous Beating does enough damage to Knock Out any evolving Basic Pokemon and two-shot almost any Pokemon-GX, and with 4+ gust affects available to the deck and a highly consistent engine, the deck will win on turn seven (a combination of six one-shots on non-GX Pokemon or three two-shots on Pokemon-GX, minus the first turn where it doesn’t attack) a good percent of the time. It can win even earlier if it can Knock Out a Pokemon-GX with Dangerous Rogue GX, Weakness, or damage modifiers like Choice Band and Professor Kukui. Of course, there are ways to prevent the deck from winning on turn seven, such as non-GX Pokemon that have enough HP to survive Riotous Beating, healing, or applying enough pressure of your own to cause them to miss an attack.
This is one reason why speed and consistency are so important in the Pokemon TCG. If you’re being put on a clock, you’ve gotta beat the clock — out-speeding your opponent’s pressure is an easy way to ignore the clock you’re being put under.
When Not to Apply Pressure
Applying pressure is great, and it’s usually a good move if you’re able to do it; but are there ever times when you shouldn’t?
The biggest downside of applying pressure is it can leave your attacker and the Energy needed to attack with it vulnerable. Being overly aggressive can backfire if your opponent set up as fast or even faster than you. You may want to save your attacker until you can get more value out of it, such as by giving it a Weakness Policy so it survives longer or finding a Guzma so it can attack something more valuable. However, if hitting your opponent’s Active Pokemon is the most value that attacker is going to get this game and you don’t need to put the necessary Energy elsewhere, there’s no downside in using it to apply pressure.
Threats
Threat, noun
Any Pokemon that is capable of allowing a player to win the game before their opponent, either directly or indirectly.
Pokemon in it’s simplest form is both players trying to stop each other from setting up threats while setting up threats of their own. Consistently setting up threats is one of the key elements that sets the tier-one decks apart from the unviable decks. Sometimes when I would build a rogue deck that didn’t work, I couldn’t wrap my head around why — I’m sure many of you can relate. When I look back on these decks now, not having good enough threats was often the reason they failed.
Figuring out if one of your Pokemon is a threat to your opponent’s deck is easy:
- Step 1: Figure out how many turns it will take for your opponent to knock it out, and how many Prize cards that Pokemon will take before that happens. Is the amount of Prizes it takes before it goes down enough to win you the game, either directly or indirectly? If the answer is no, then it’s not a threat. If the answer is yes, go to Step 2.
- Step 2: Apply Step 1 to each of your opponent’s Pokemon to figure out if any of them can win your opponent the game. If none of them can, then your Pokemon is a threat. If one or more of them can, go to Step 3.
- Step 3: Compare the most threatening Pokemon that both players have. If your opponent’s will win them the game before yours will win you the game, then your Pokemon is not a threat. If yours will win you the game first, then it is a threat.
There’s one matchup that I think explains the concept of threats — and how to deal with them — better than any other: the Zoroark-GX / Lycanroc-GX mirror matchup.
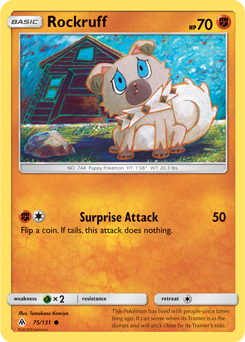
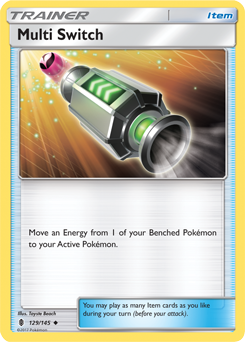
In this matchup, Lycanroc-GX is the biggest threat. If the Lycanroc-GX is never Knocked Out, it can use Claw Slash on two Zoroark-GX to take four Prizes, then Dangerous Rogue GX any of the opponent’s Pokemon-GX to win the game. Even if you can deal with the Lycanroc-GX, the mere fact that your opponent can use it to win in three turns makes it a threat. By powering one up, your opponent is basically telling you “you have to deal with this, or you lose.” This is why, if your opponent has a Lycanroc-GX with enough Energy to attack, the best course of action is usually to either two-shot it or one-shot it with your own Dangerous Rogue GX. Even better than Knocking Out a Lycanroc-GX after it’s taken Prizes is stopping your opponent from ever setting one up; the best ways to do this are by Knocking Out all of your opponent’s Rockruff, or targeting your opponent’s Energy so that they can’t attach an Energy from their hand and use Multi Switch to power up a Lycanroc-GX in one turn.
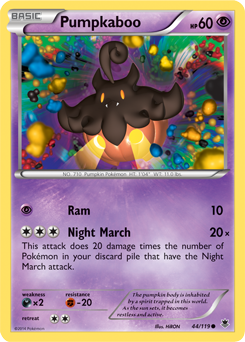
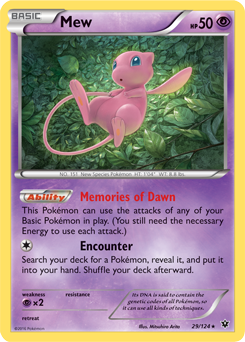
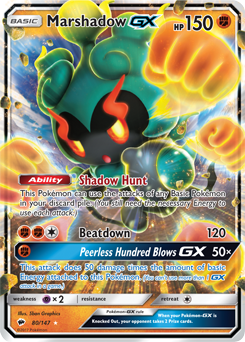
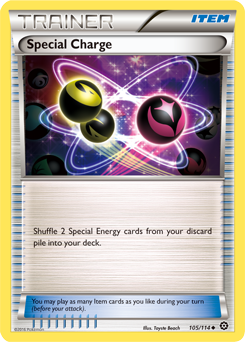
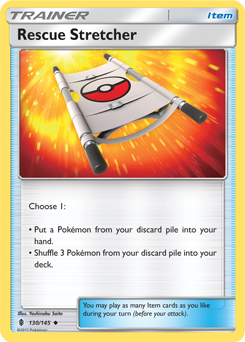
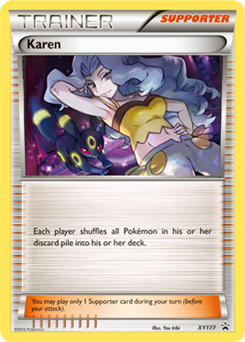
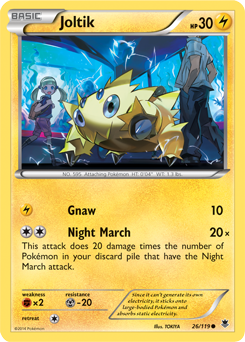
There are some decks that are built around having tons of equally strong threats — so many, in fact, that trying to remove all of them is impossible if the deck is drawing well. The best example of this is Night March. The deck is designed to stream six Joltik/Pumpkaboo/Mew/Marshadow-GX per game, all of which have equally threatening attacks. Cards like Special Charge, Rescue Stretcher, Shaymin-EX, and Teammates make this process a breeze. Against decks like this, it’s often better to try and take Prizes as quickly as possible rather than try to neutralize all of their threats by knocking them out. It should be noted, though, that you can make the Pokemon less threatening in other ways, such as by playing Karen.
How to Set Up Your Own Threats
When it comes to setting up your own threats, the thing you have to keep in mind is that they are easy to deal with if you only have one and you aren’t doing anything else. If you want to make sure your threat gets set up without interference, there are two key ways to help with that:
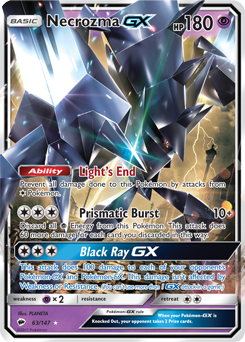
The first is to simply set up more than one threat — if your opponent deals with one, they’ll still lose to the other. Let’s take a look at a Malamar / Marshadow-GX deck as an example. If that deck has three or more Malamar in play, and enough Energy and a Necrozma-GX in the discard, each of their Marshadow-GX become a threat. Even if you Knock Out one Marshadow-GX, they can power up another one for a Prismatic Burst with little-to-no effort. This can put the opponent in checkmate if the Malamar player has few enough Prize cards.
The second is to apply pressure while powering up your bigger threat. If your Zoroark-GX is taking Prizes and removing opposing Pokemon from the board at too fast of a rate, your opponent may need to devote turns to respond to it or risk losing. If they decide to devote all of their time and resources to dealing with our Zoroark-GX, no obstacles will get in your way of setting up a Lycanroc-GX. Or, if they ignore the Zoroark-GX and go after the Lycanroc-GX, they’ll also have to find a way to win before Zoroark-GX takes six Prizes.
Some threats can be made much scarier if you get to a certain Prize count prior to setting them up. Going back to the Zoroark-GX / Lycanroc-GX mirror match example, Lycanroc-GX gets two-shot by Zoroark-GX or Tapu Lele-GX, so if you take two Prizes with an undamaged Lycanroc-GX, it will likely only get two more Prizes before it goes down. If you can get two Prizes with Zoroark-GX before going in with Lycanroc-GX, your opponent will have no way to stop it from taking the remainder of your Prizes outside of their own Lycanroc-GX.
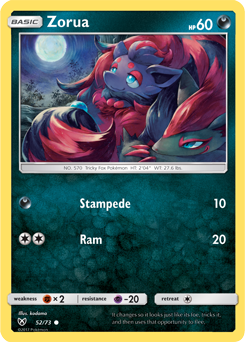
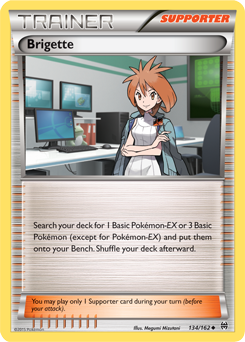
If you know what your biggest threat is in a given matchup, you can do minor things to punish your opponent for responding to it. One of the best players in my area, Isaiah Rufus, took advantage of this in one of our top cut matches at a League Cup. In the Zoroark-GX / Lycanroc-GX mirror match, on his first turn going second, he elected to set up three Rockruff and two Zorua, then attached a Fighting Energy to his Rockruff. He could have gotten a third Zorua instead of a third Rockruff with his Brigette, but he specifically wanted this setup. This confused me at first — “wouldn’t he rather try to set up more Zoroark-GX to increase his consistency? Having more than two Rockruff down at a time is unnecessary, so what gives?” After thinking about it though, this made perfect sense: he knew that I needed to remove his Energy from the board or risk going down several Prizes to a Lycanroc-GX; and, because he was going second, he assumed that I would draw the necessary cards to Knock Out the Rockruff on my following turn. This play utilizes many of the strategies I’ve gone over in this section: he knew what his biggest threat to me was, set it up, then punished me for correctly responding to it.
Now that we’re all using the same definition for these three terms, we can use each of them to help you achieve that beautiful win condition I’m sure you’re eager to get more often.
Your Two Goals
This point may be obvious, but considering the amount of players I see who don’t seem to understand this, it needs to be stated. When you’re playing a game of Pokemon, you’re not only trying to win the game, you’re trying to win before your opponent. Every path to victory will eventually win you the game; but most of them are either too slow, or — and this is the key point — don’t slow your opponent down enough in the process.
With that in mind, all of your in-game actions should either contribute to winning the game quicker, or slowing your opponent down. Ideally you want to make plays that do both at once, which, thankfully for us, often comes naturally when playing — Knocking Out your opponent’s attacker gives you Prize cards and forces your opponent to find the resources necessary to replace that attacker.
Sometimes though, either due to your opponent’s clever play or by happenstance, doing both at the same time is either a bad idea or unnecessary. If you’re faced with the decision of having to do one or the other, you’ll have to decide whether you think you will be able to win the game by taking Prizes as fast as possible before your opponent based on the way things are going. If you can, you should simply make plays that get you the win quickly. If you can’t, you’ll have to find a way to slow your opponent down and give yourself an opening to make a comeback.
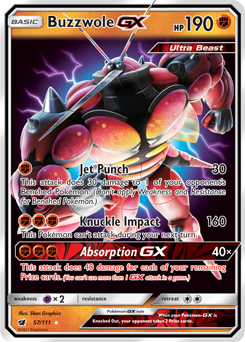
To help you get a better idea of what plays contribute to what goals, here are some examples based on a theoretical match between Buzzwole-GX / Lycanroc-GX and Gardevoir-GX:
Get You Closer to Winning
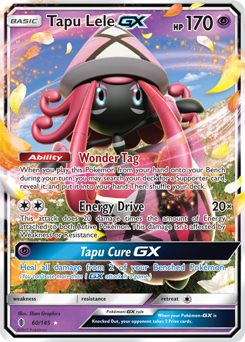
Play Example #1: Using Guzma to bring up a Tapu Lele-GX and knocking it out with Buzzwole-GX’s Knuckle Impact.
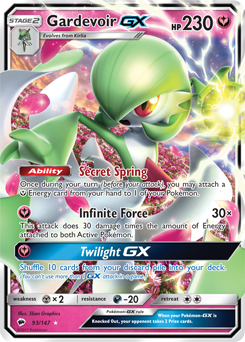
This example of a play is one that gets you closer to winning but doesn’t necessarily slow your opponent down. Tapu Lele-GX yields two Prizes, moving you one third of the way toward your win condition — awesome for us, right? In most cases, however, Tapu Lele-GX doesn’t help your opponent win faster while it’s in play; it just takes up space on the Bench. You’re also promoting a GX attacker with three Energy attached, making it susceptible to Gardevoir-GX’s Infinite Force.
So while this play isn’t necessarily bad, going after Tapu Lele-GX doesn’t slow your opponent down as much as, say, Knocking Out your opponent’s attackers or support Pokemon. It may be correct to speed the game up by taking some cheap Prizes if you think you can win before your opponent, but going for this play if your opponent is going to win faster is one of the worst mistakes I see players make. Don’t be tempted by those easy Prize cards!
Slow Your Opponent Down
Play Example #2: Instead of Knocking Out Tapu Lele-GX, using Guzma to Knock Out your opponent’s lone Kirlia with a Fairy Energy attached with Buzzwole-GX’s Jet Punch.
Now let’s take a look at what happens if you go after a potential attacker instead of a Pokemon-GX. While this play gives you less Prizes, it will apply pressure to your opponent’s board, and, as I said before, you want to apply pressure when applicable. Forcing your opponent to devote resources to replace the Kirlia makes it less likely that they will find what they need later on. Getting the Prizes is great, but your opponent missing an attack or crucial card can give you enough of a lead to secure victory.
Note here that we’re using Jet Punch instead of Knuckle Impact. By attacking with a Pokemon with less Energy attached, even if our opponent can get a Gardevoir-GX out, they are less likely to knock us out with Infinite Force.
This play would be better to go for if you’re worried that your opponent’s fully established board will overpower yours.
Both
Now we’re talking! These plays are almost always ideal over only doing one or the other, for obvious reasons. Always go for these plays.

Play Example #3: Using Buzzwole-GX’s Absorption GX to Knock Out your opponent’s lone Gardevoir-GX.
This play combines the fast win time of Play Example #1 with the disruptive nature of Play Example #2. It’s the best of both worlds!
Neither
Remember when I said that some players make plays that don’t help them in their current game? Below, you’ll find an examples of what I’m talking about. Never go for these plays. (Only villains do that.)
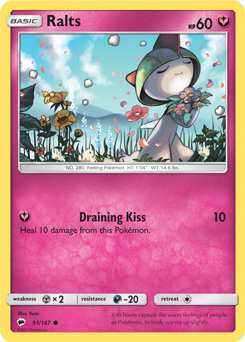
Play Example #4: Using Buzzwole-GX’s Absorption GX to Knock Out a Ralts when your opponent has a Kirlia with an Energy attached on the Bench.
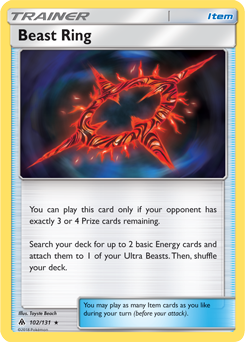
This kind of play is underwhelming at best, and game-losing at worst. Attaching three Energy to a Buzzwole-GX is a big commitment. Unless it’s done through Beast Ring, that’s three turns of attachments that could have gone onto a Lyncaroc-GX or another Buzzwole-GX. By putting all those resources into one attacker and throwing it at our opponent recklessly, we risk losing all of that hard work to one attack. As for the remainder of the game, we may be unable to take the rest of our Prizes in the face of a fully-loaded Gardevoir-GX taking Prizes every turn.
Note that we used Absorption GX here as well. Without our GX attack, we’re even less capable of responding to a 230 HP Pokemon-GX.
In conclusion, unless you have a specific purpose for making this play that I’ve overlooked here, it’s a weak play that is detrimental to both of your goals.
Figuring Out Your Win Condition
Now that we know what we need to do and have defined all of the necessary terms, how do we put it all together to help us win a game of Pokemon?
Figuring out your win condition is easier if you know generally what your opponent’s deck is designed to do. Below I will be talking about what to do in that case. If you don’t know your opponent’s deck though; either because it’s early in the game and they haven’t shown you any cards that reveal what deck they’re using, or they’re playing such nonsensical cards that you can’t figure out how they all fit together; you should have a basic win condition that is pretty good at dealing with any opposing strategy. 99% of the time that win condition should either involve preparing for a Prize trade as quickly as possible or applying pressure.
If you do know what deck your opponent is playing, you can use theory or your own testing results to formulate a strategy…
The Prize Trade: Avoid It or Embrace It?
Your starting point for figuring out your best strategy should be to play out a Prize trade scenario in your head where both decks are set up perfectly and don’t whiff anything for the remainder of the game. In this scenario, which deck wins first? Once you’ve figured that out, make an educated guess as to which deck is more likely to achieve this perfect board state first. Practicing the matchup can help you learn how the Prize trade will normally go, but it’s not necessary to formulate your initial gameplan.
If your deck is more likely to achieve a perfect board state and will come out on top even if your opponent does as well, your strategy should be about getting to this state as quickly as possible. Get to a point where your board is so much stronger than your opponent’s that they will be totally unable to beat you.
If your deck will always lose once your opponent’s board state and hand reach this nirvana, you have to stop your opponent from getting there. Remember what I said about our two goals? Half of winning a game of Pokemon is winning before your opponent. If your win condition is inevitable in a certain number of turns, your opponent developing the perfect board may not be enough to make them win; they will have to find a different win condition, one that their deck may not be built to achieve reliably. In this kind of matchup, you will want to apply pressure as much as possible — make plays like Play Example #2 or #3. If your pressure isn’t quick enough to stop your opponent from setting up, don’t give up just yet: they may still whiff cards they need to secure that victory. Sticking it out until the end can get you a surprising amount of extra wins just by nature of chance.
If your deck is less likely to achieve a perfect state but will come out on top if both players achieve it, your strategy can still involve going for this scenario. This may be a little harder to pull off though. You may need to make some plays that will slow down your opponent’s setup so that you’ll get to yours first, or take some risks that will allow you to set up faster. If you think there’s no hope of getting to that point before your opponent, you should simply try to win quickly. You should still be on the lookout for ways to achieve that perfect state — sometimes the opportunity presents itself when you least expect it.
A Threatening Board is a Perfect Board
The last big question that we still have to answer is how to figure out what that perfect board actually looks like.
It’s quite simple, actually: a perfect board state is a board filled with threats, and a perfect hand is one that enables them to be threatening. The best kind of win condition is one where you develop Pokemon that can snag all of your Prizes cards and develop enough of them that your opponent can’t remove all of them from play. On the flip-side, your opponent’s best win condition will be to get as many threats into play as possible as well. If you’re worried about losing to your opponent’s perfect board, stop their threats from coming into play or win before they become threatening.
In Case of Failing Strategy…
Now that we’ve got our strategy, we can jump right into the game and, as long as we follow that strategy, we’ll win for sure, right? Well, it’s not that simple. Once you add in the variables of luck and your opponent’s skill level/deck list, the strategy we came up with isn’t going to play out the same way every time; other times it won’t work at all! While you’re playing the game, you need to continually evaluate your win condition to make sure it’s still achievable. If it isn’t, don’t give up just yet! There’s almost always a different path you can take to win every game you play — you just have to find it.
Figuring out a backup strategy mid game can be done the same way you came up with the first one, but this time it needs to be in the context of the game you’re playing. This means reevaluating which player a Prize trade will favor, how you can carry out that Prize trade, what will disrupt your opponent, and which Pokemon are threats. These factors all end up being different in every individual game you play. That’s the joy of playing Pokemon: figuring out what you can do to win this time.
You may not have time to come up with a perfect new strategy during a tournament game, so you may just have to pick one that seems good and hope it works. This is where experience can be a great asset — knowing which strategies generally work and which ones don’t will be immensely helpful when creating a new one on the fly.
Alternate Win Conditions
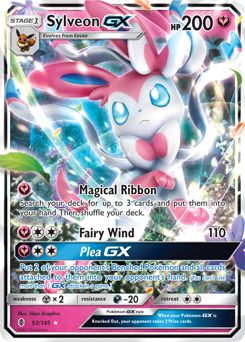
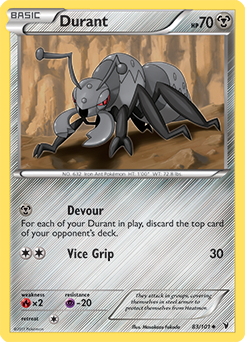
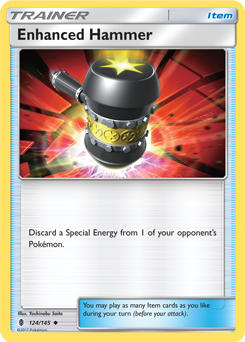
This whole article has been about how to win if your goal is to take six Prizes, but what if you want to win through another win condition? Luckily, these same fundamentals can be applied to any of the other win conditions. If your goal is to mill your opponent a la Durant, any Pokemon that discards cards from your opponent’s deck is a threat to them; if you’re trying to run them out of resources with a Sylveon-GX deck, every Enhanced Hammer or Plumeria you play is applying pressure to your opponent, since it contributes to your win condition while slowing down your opponent; even if you’re trying to win with the new Unown with the DAMAGE Ability, every Pokemon you set up to help you achieve the game-winning combo is considered a threat; and so on and so on.
Sometimes even a normal deck can go for one of these unusual win conditions. Be on the lookout for openings to use strategies involving alternate win conditions; such as decking your opponent out because they ran out of a key resource, or Knocking Out your opponent’s only Pokemon.
Summary
To summarize, this is the process you can use figure out your strategy for any matchup:
- 1) Analyze the opposing deck to figure out what the threats will be in both players’ decks.
- 2) Play out the matchup in your head: who will win if it enters a Prize trade, and how quickly will both decks get to the point where they can trade Prizes?
- 3) If…
- … your deck will win in a Prize trade scenario, your strategy should be to enter a Prize trade and win it convincingly.
- … your deck will lose in a Prize trade scenario, your strategy should be to avoid a Prize trade either by disrupting your opponent or winning before a Prize trade begins.
- 4) Continually reevaluate your strategy throughout the game. If it no longer works, go back to the first bullet.
That’s all the advice I can give when it comes to the groundwork for figuring out your win condition. Pokemon is not an auto-pilot game. Every deck is vastly different from each other; each one plays out differently against different decks; and each deck has multiple different attackers, methods of powering them up, and combos they can pull off with them. From here on out, you have to use your own knowledge of the game and the decks both you and your opponent are using to figure out the best path to victory. Practice always helps here — it will become much clearer how to play out a matchup after you’ve played it a few times.
I really enjoyed writing this first article! I love helping players improve themselves, so hopefully what you’ve learned from this article will stick with you throughout your Pokemon journey. Make sure to leave a comment and let me know what you thought. I’ve already gotten to indirectly help players by co-running this program, but doing it directly is something I get to do far less often.
Until next time,
Sam V