
“Knock Off” Shock Lock — Post-Dallas Rogue Profile and Recap
All right, readers, let's lay some groundwork: this is my first article on PokeBeach; might be my last. I have no sponsorship, as the only thing I could get from a sponsor is laughed at. Normally, I edit articles from better players, but was told by higher ups that I could write about the deck I ran at the Dallas 2019 Expanded Regional on the condition that, "I won't embarass them". They did sweeten the deal with a gift card to a place that I can't name, but rhymes with "Hot Schmopic". They didn't have to. But they did because I had my heart set on some early 2000's pants with the weird strappy things that I wouldn't stop yammering on about. All because vintage clothing is life. As you are reading this, I'll be doing housework in gaudy, psuedo-goth pants of dubious quality.
For lack of a better segue, we will go over a variant of Stoutland / Raichu Shock Lock: a deck that, if you whisper the card name "Tropical Beach" too close to your wallet, it bursts into flames. That deck can exceed over one thousand dollars--maybe more--if you were to buy it outright. That, or you can find the right person and trade a 1996 Geo Metro for the whole thing. You do not need Tropical Beach to make a successful deck that can Paralyze an opponent's Active Pokemon over and over. In fact, all you need is $50. One Ulysses S. Grant will cover the entire deck. You'll have enough left over to buy sleeves--unless you're in California. Everything there is expensive.
We will go over how this illegally-pirated version of Shock Lock works, go over over each card and their numbers used, review how the Dallas Regional went, how to metagame and review cards of consideration, and how the deck would look going forward.
How it Works
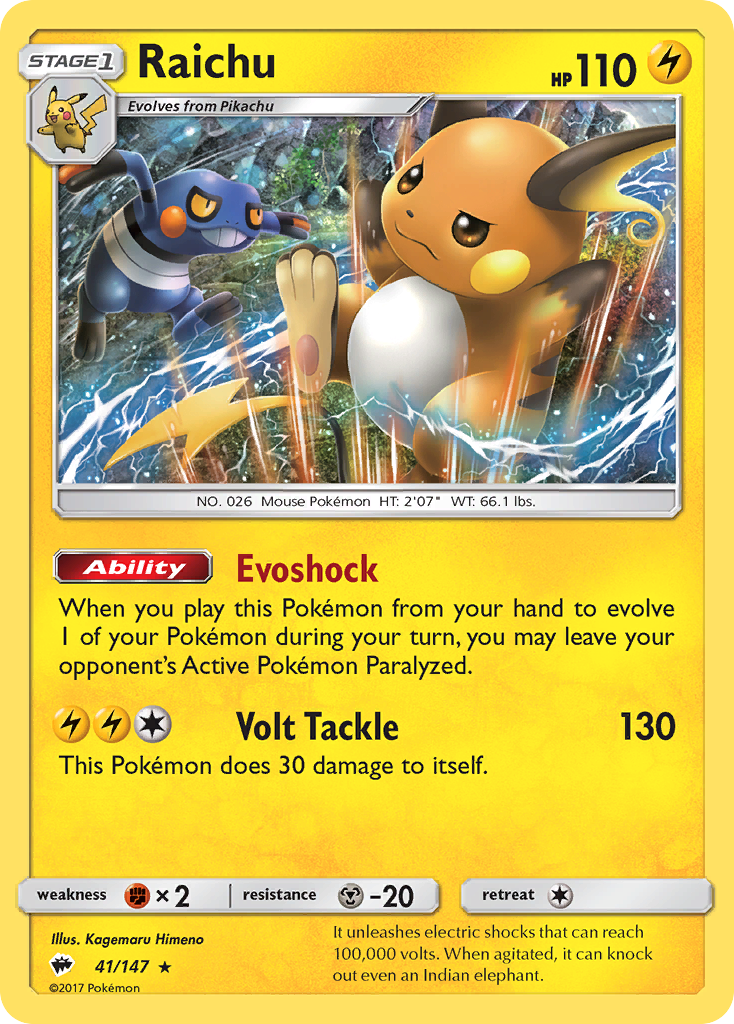
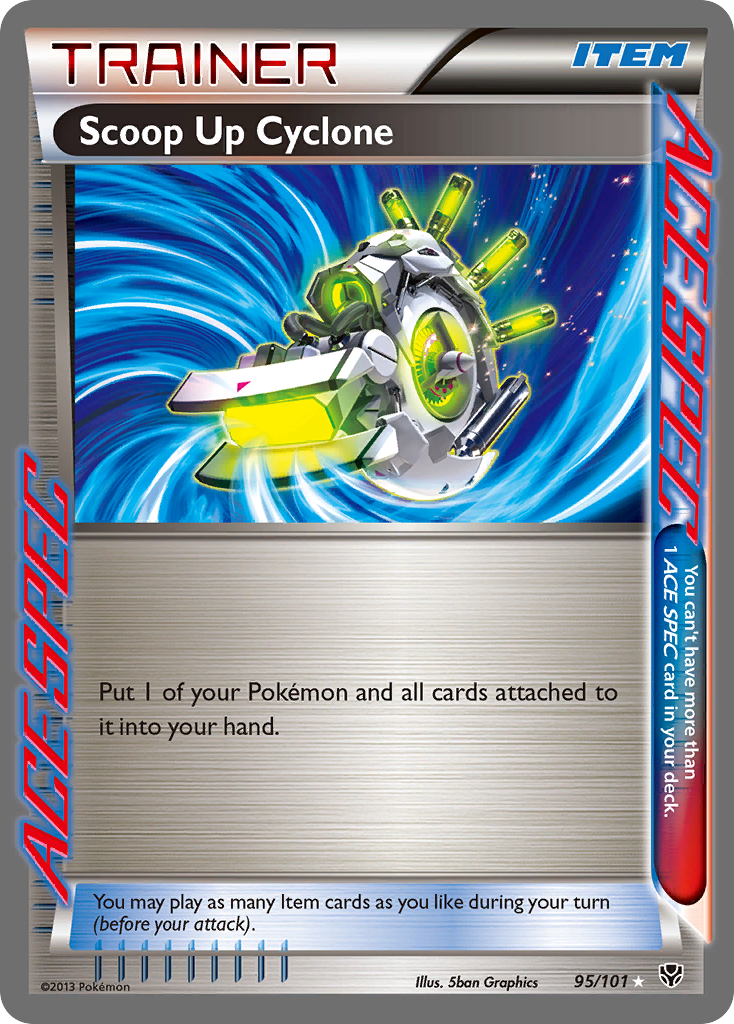
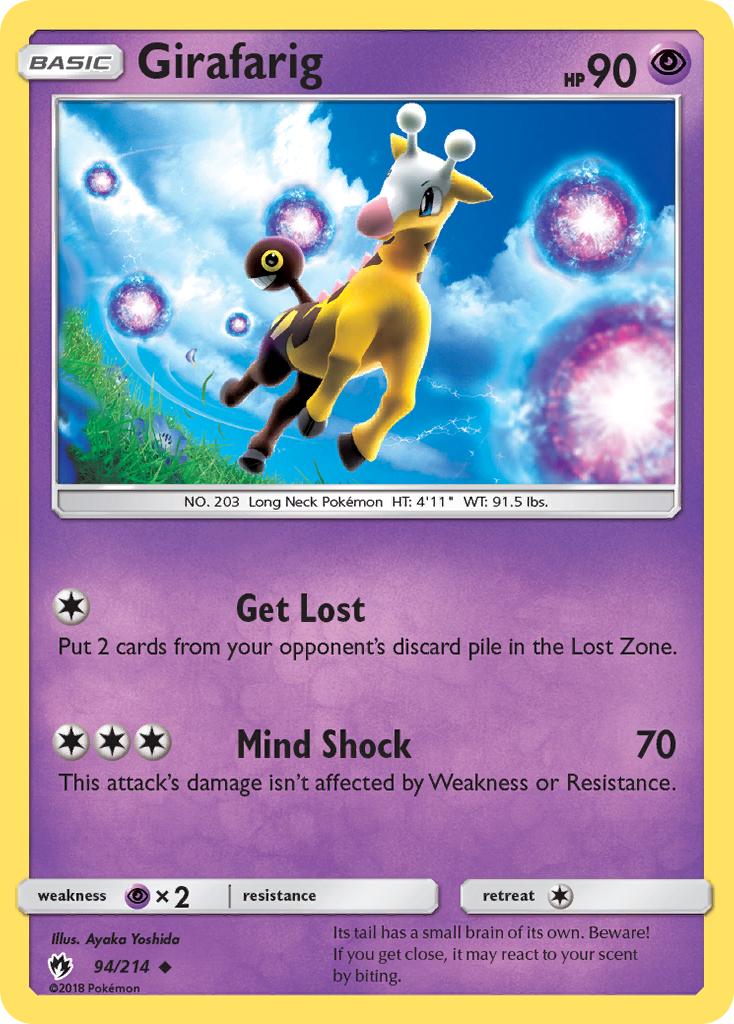
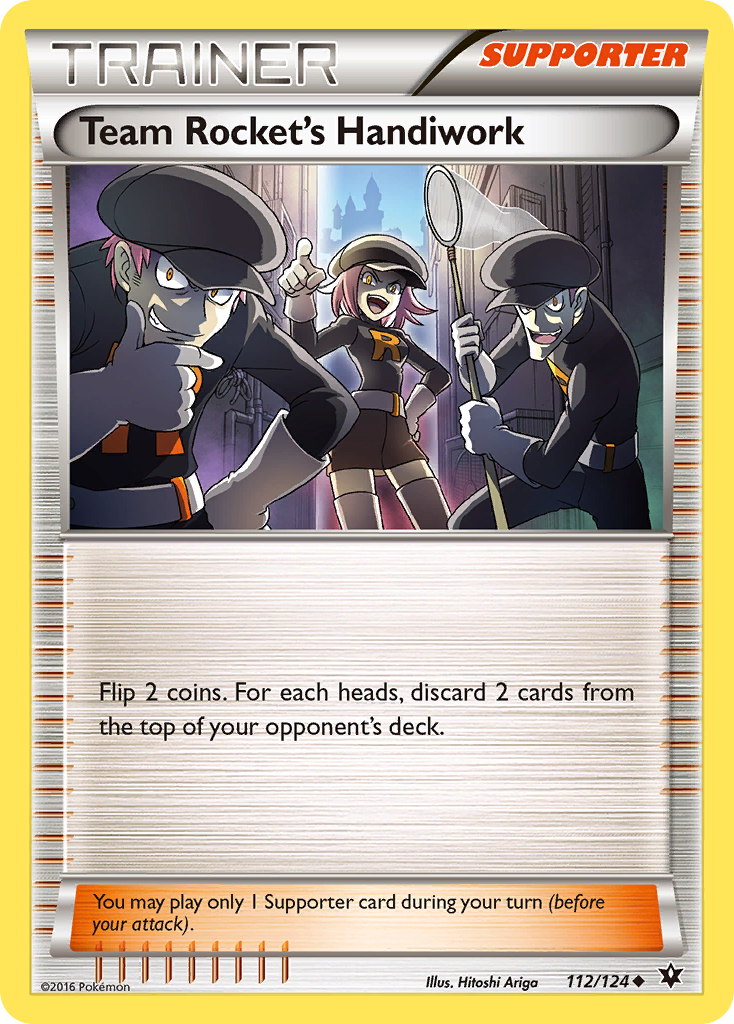
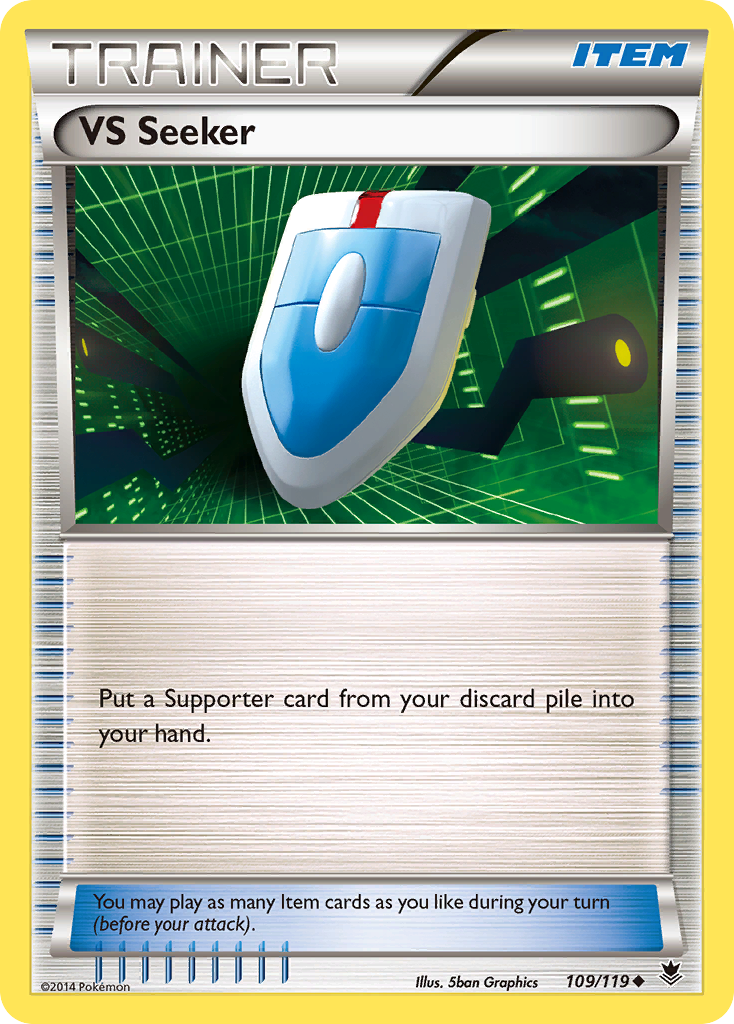
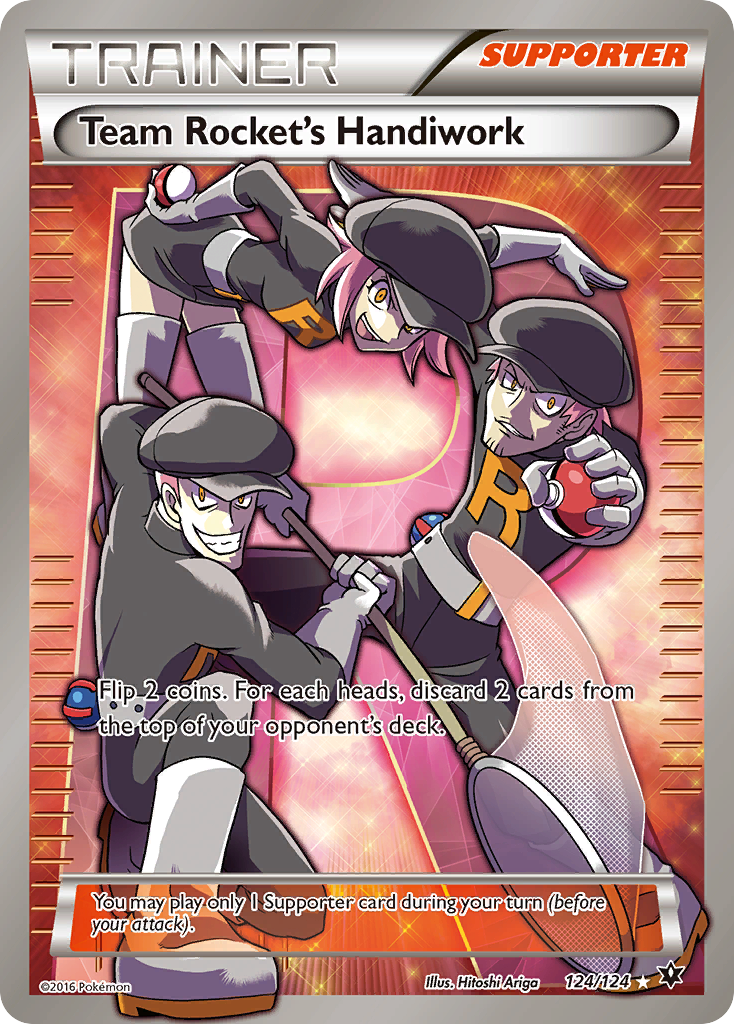
A successful Shock Lock deck has two things to make it work: a way to loop Raichu's Evoshock Ability continuously to prevent attacking. And a way to lock the opponent out of key Items or Supporters. We continuously loop the Evoshock Ability by means of Devolution Spray or Scoop Up Cyclone and using Sableye's Junk Hunt to put said Items back to your hand. We lock our opponent out of options through Girafarig and Team Rocket's Handiwork. If we use Team Rocket's Handiwork enough, we may hit several resources our opponent could use to get themselves out of Paralysis lock. It's also difficult for an opponent to use VS Seeker or Dowsing Machine on Guzma if their Guzma is in the Lost Zone via Girafarig.
Decklist
Pokémon (16)
- 4x Raichu (BUS #41)
- 4x Pikachu
- 3x Sableye (DEX #62)
- 2x Girafarig (LOT #94)
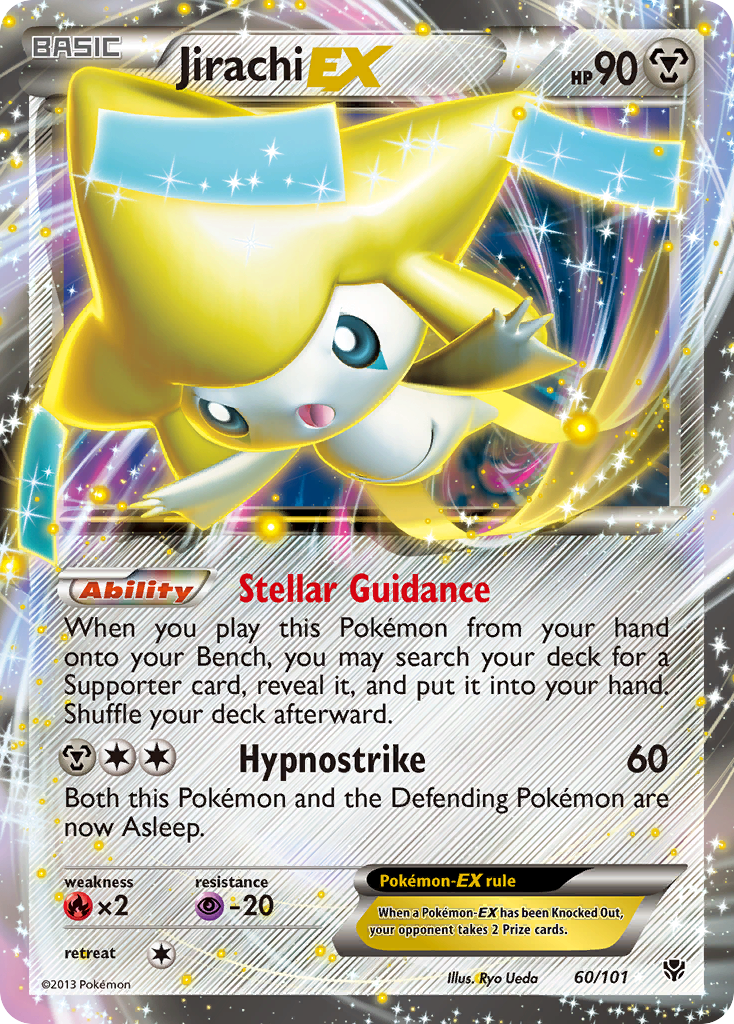
- 2x Jirachi-EX (PLB #60)
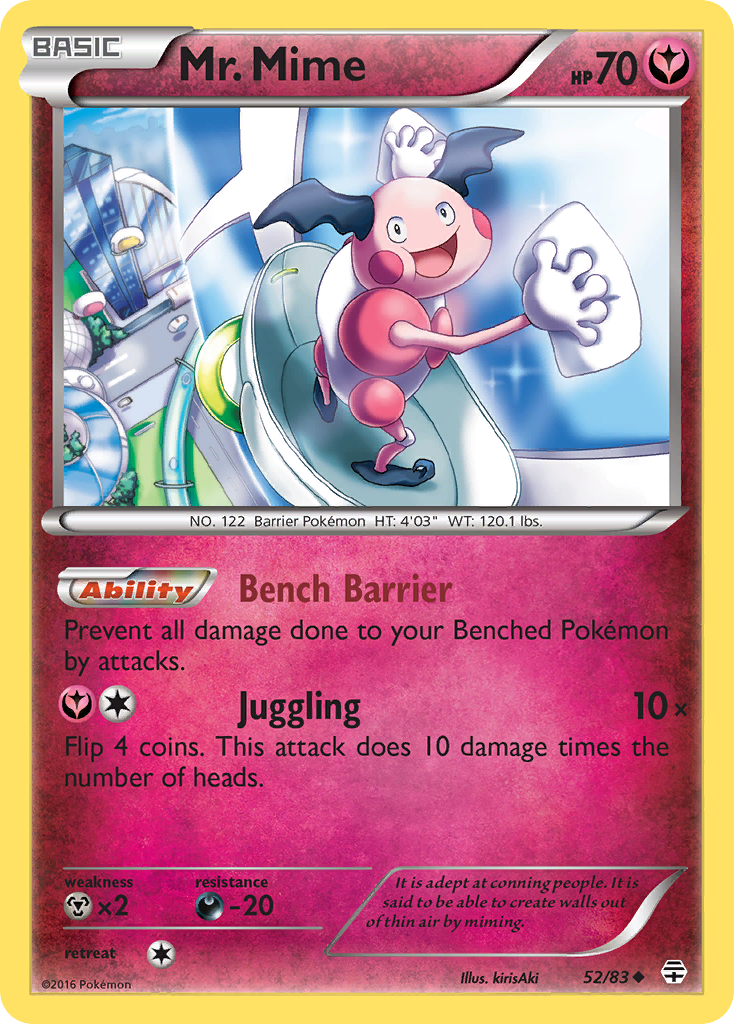
- 1x Mr. Mime (GEN #52)
Trainers (36)
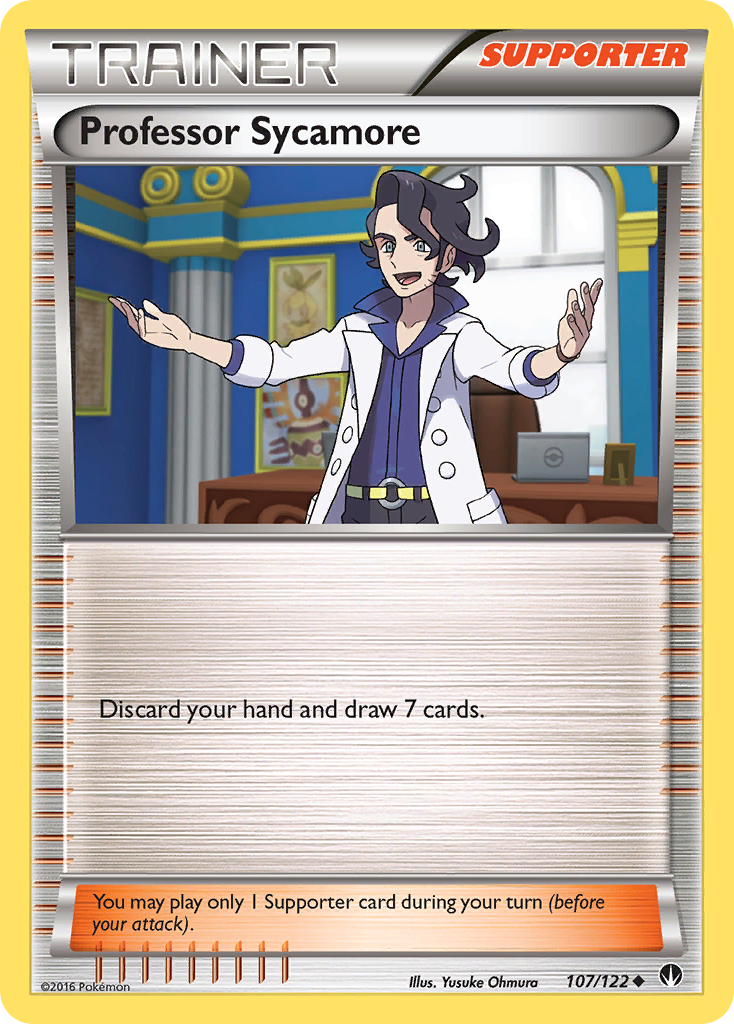
- 4x Professor Sycamore (BKP #107)
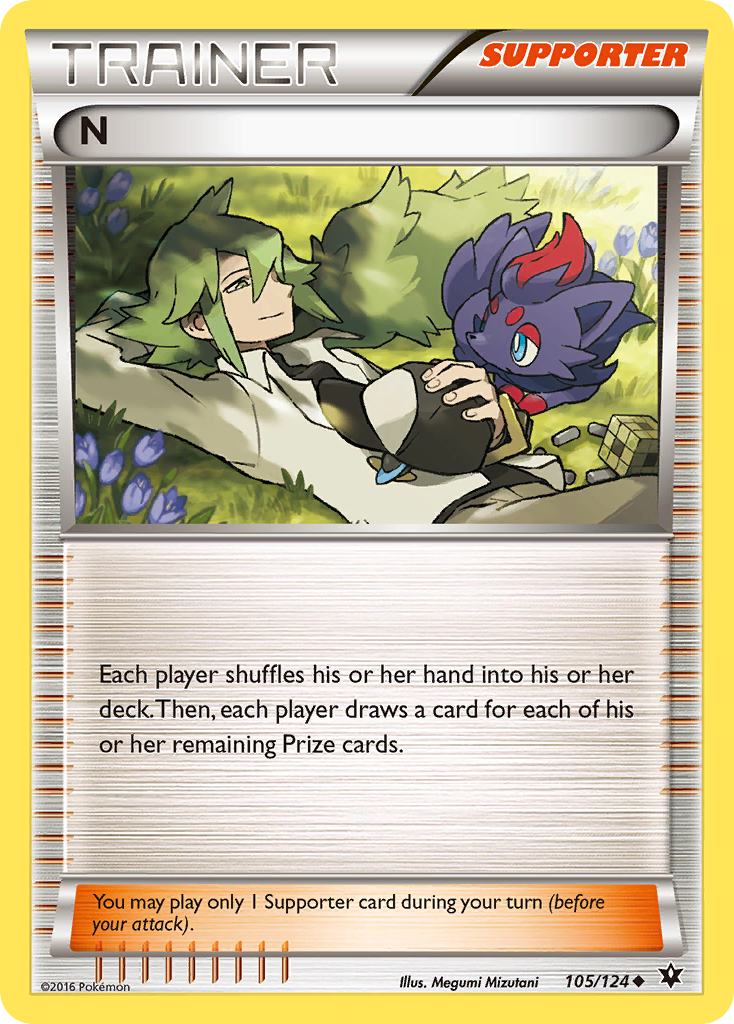
- 3x N (FCO #105)
- 3x Faba (LOT #173)
- 2x Team Rocket's Handiwork (FCO #112)
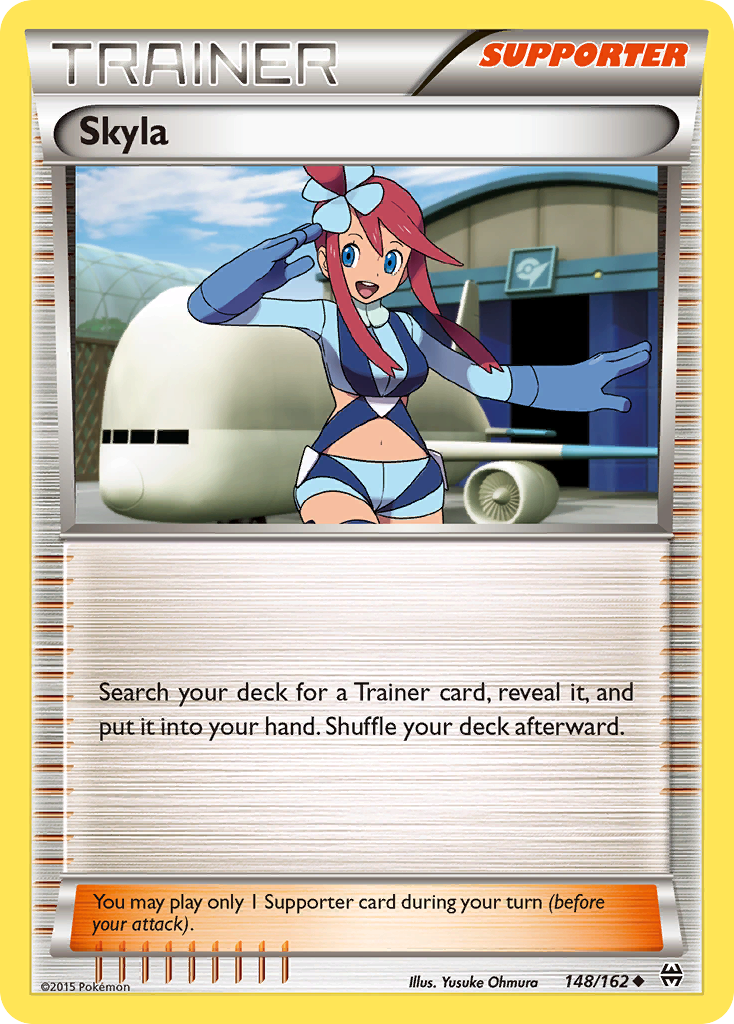
- 2x Skyla (BKT #148)
- 1x Brigette (BKT #134)
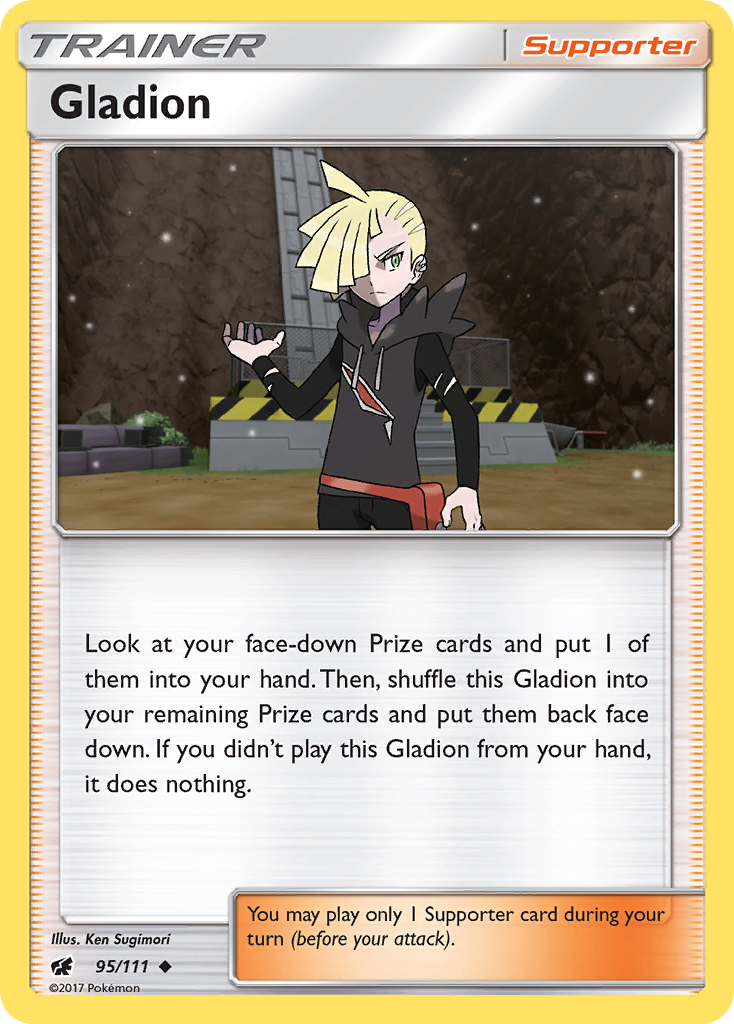
- 1x Gladion (CRI #95)
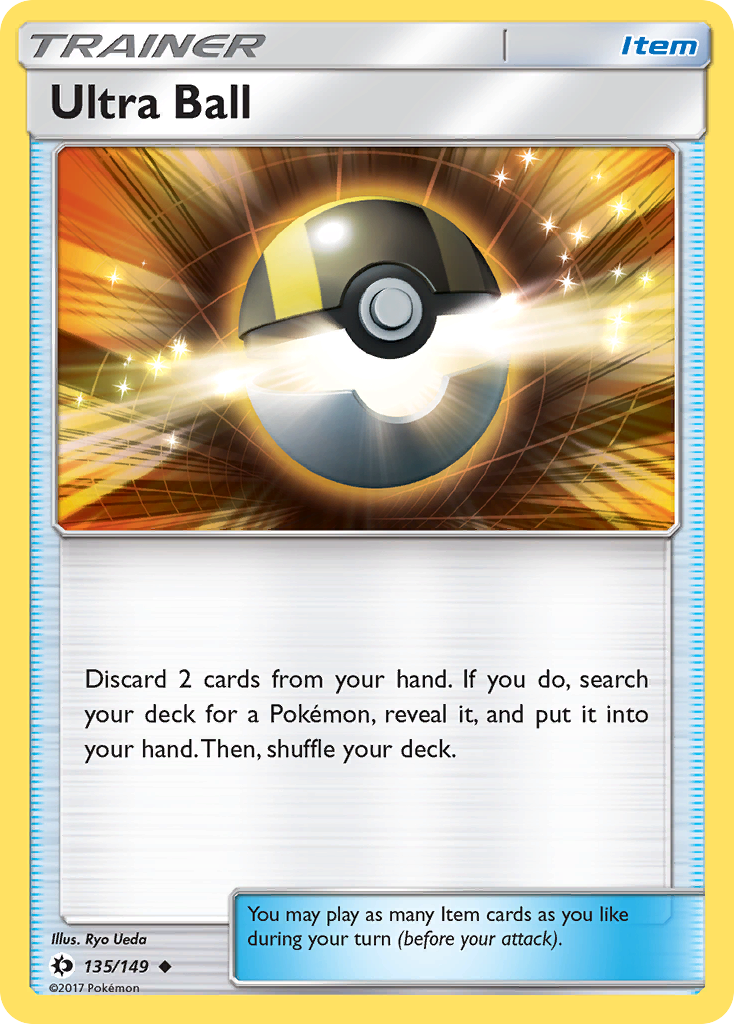
- 4x Ultra Ball (SUM #135)
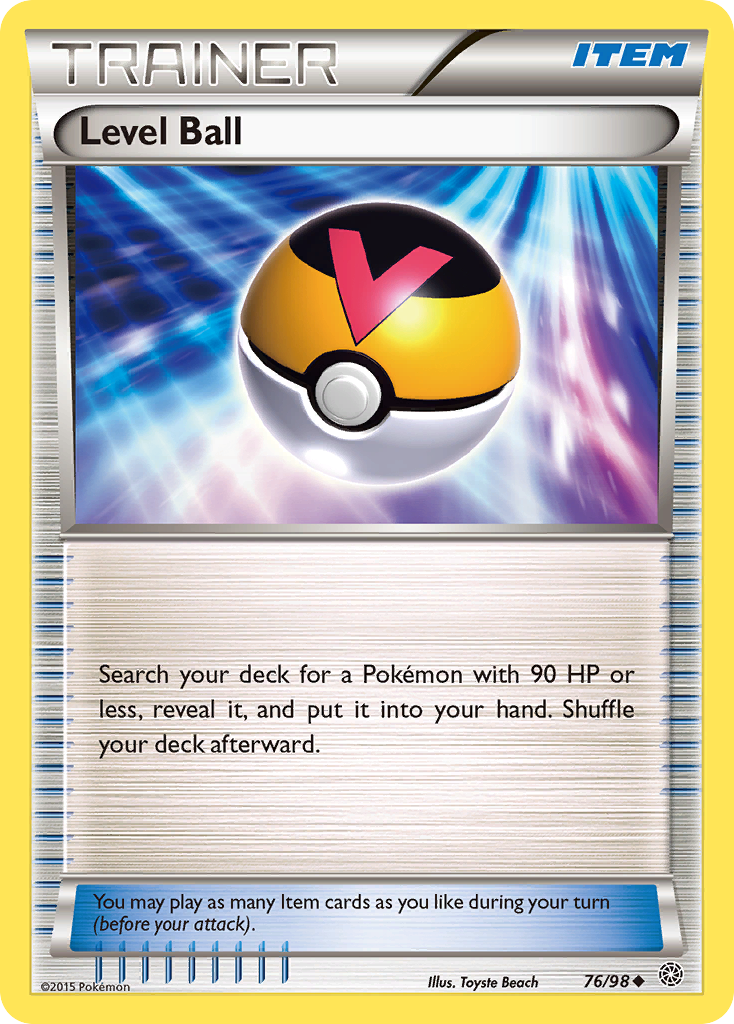
- 4x Level Ball (AOR #76)
- 4x VS Seeker (PHF #109)
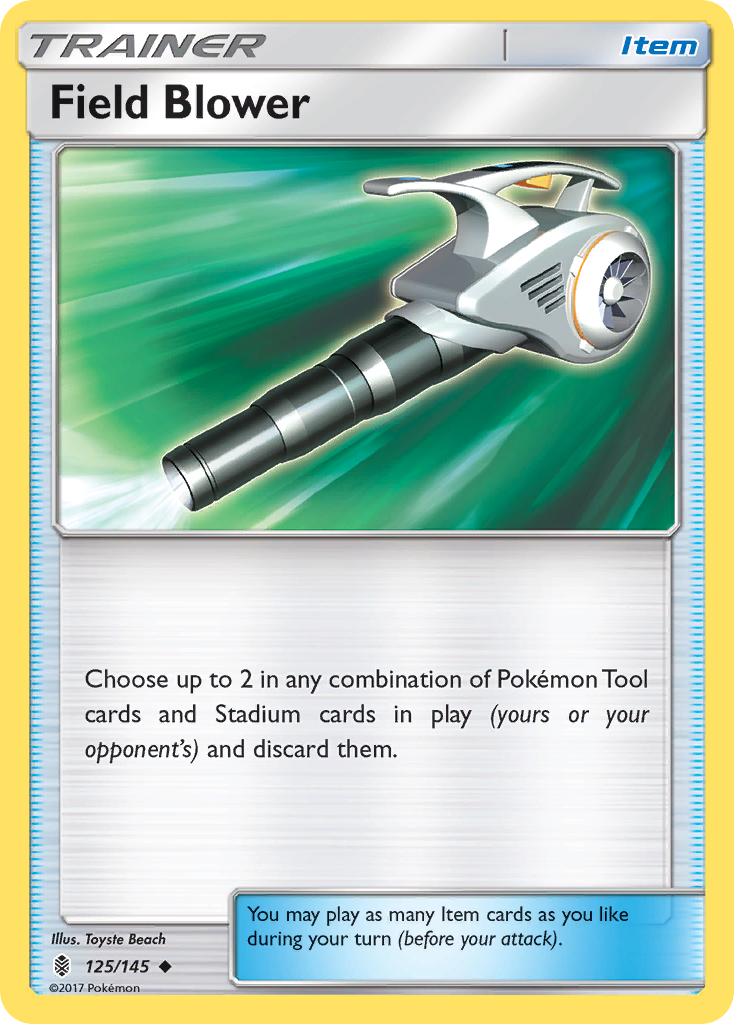
- 3x Field Blower (GRI #125)
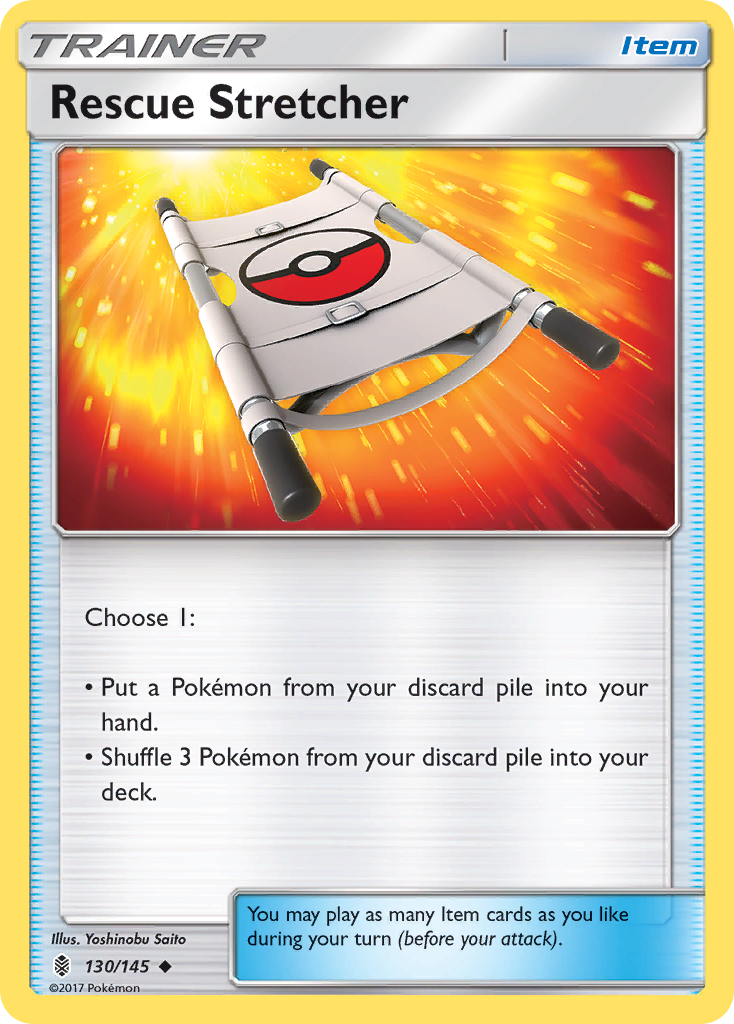
- 2x Rescue Stretcher (GRI #130)
- 1x Devolution Spray (EVO #76)
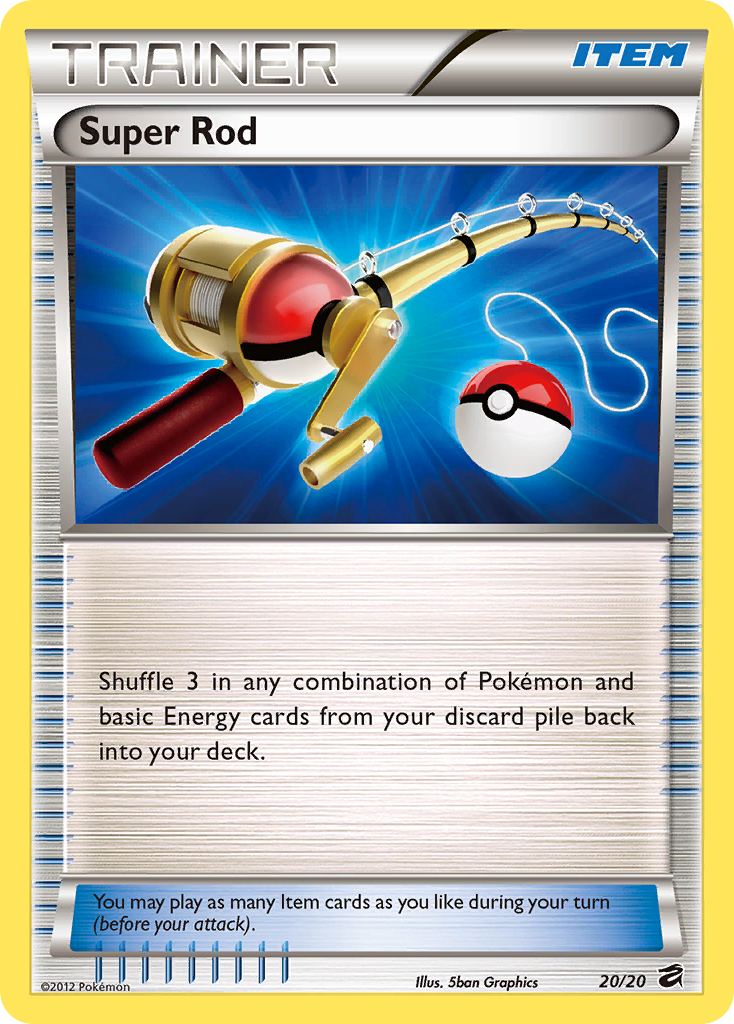
- 1x Super Rod (DRV #20)
- 1x Scoop Up Cyclone (PLB #95)
Explanations
Four Pikachu
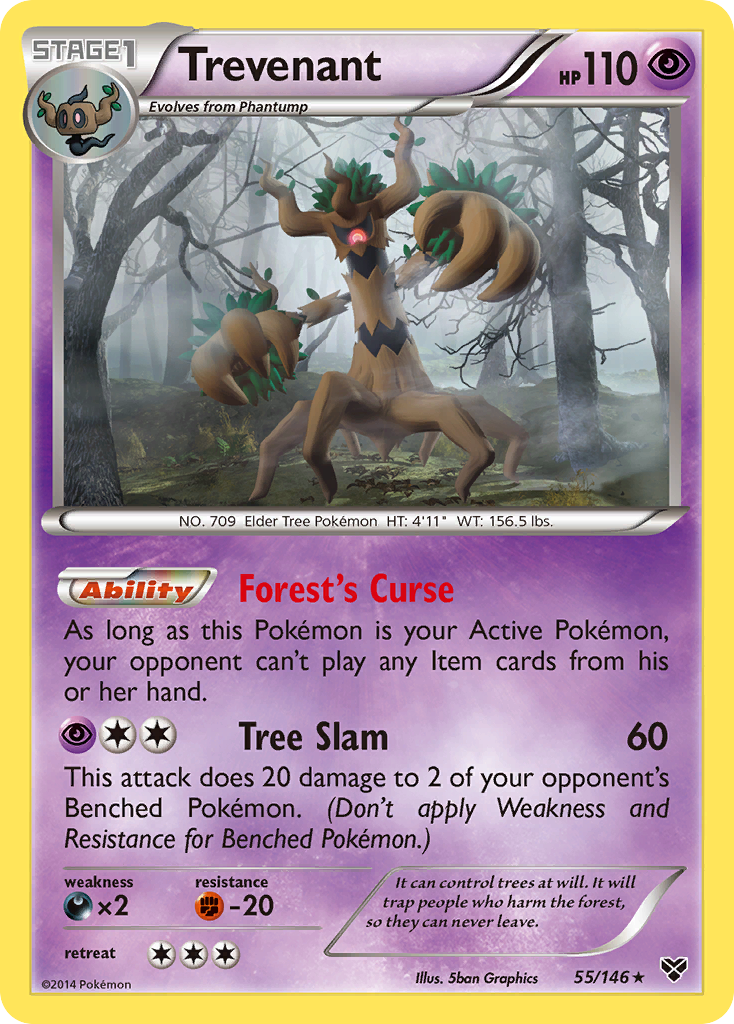
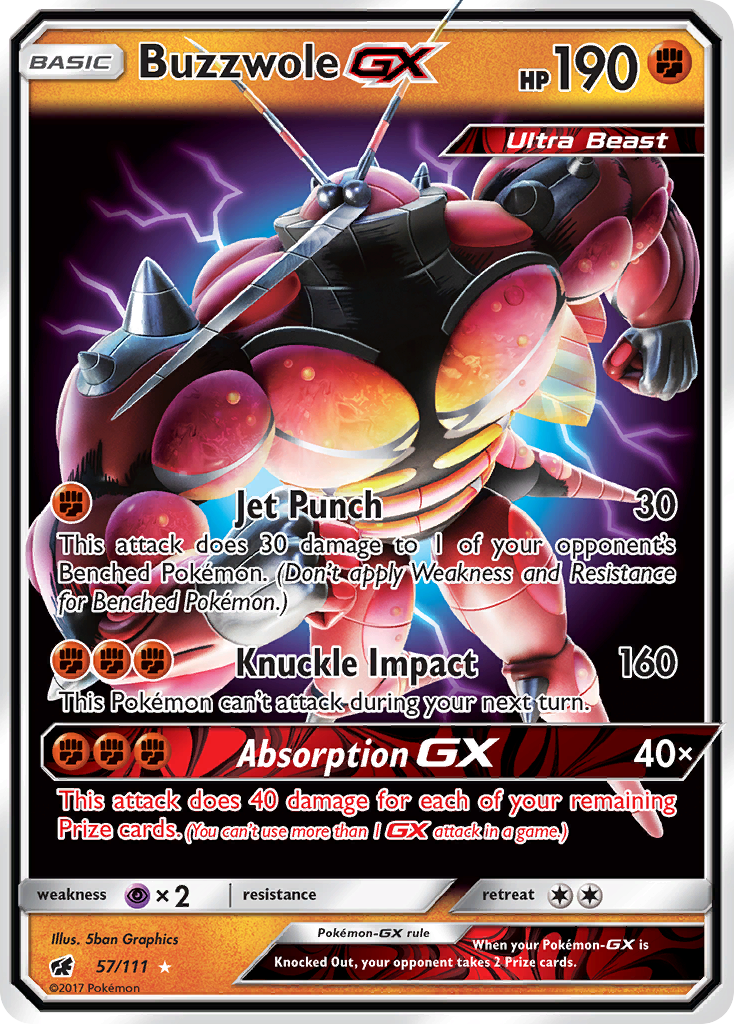
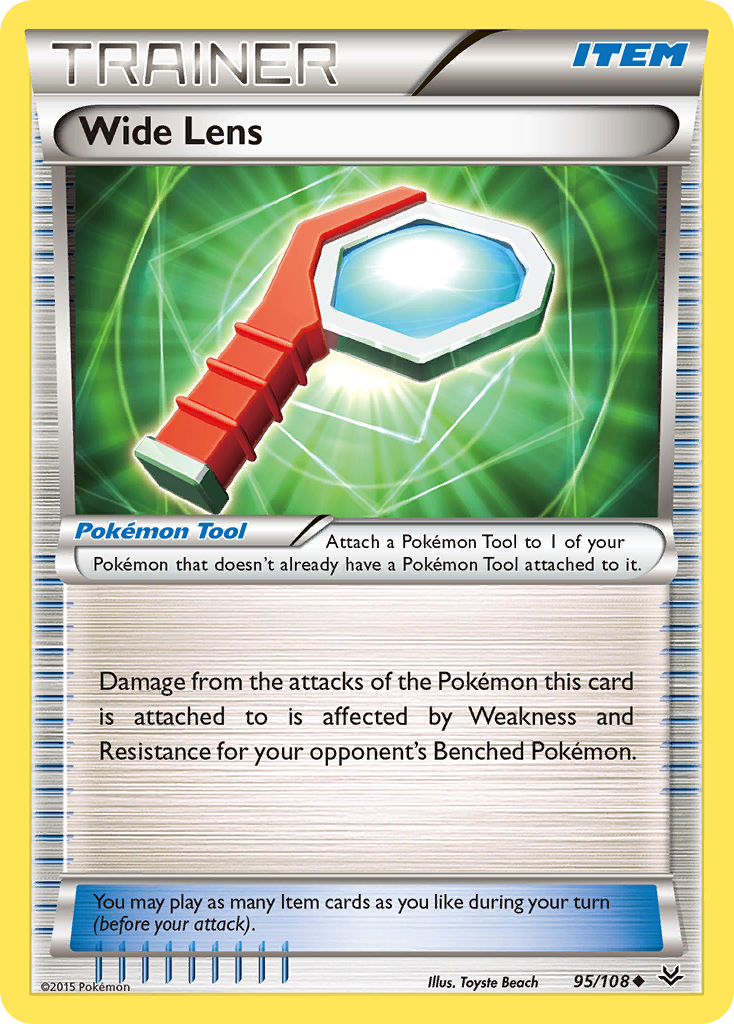
You need as many Pikachu as you can muster to get your setup, as well as have some left over in case any get KOed. The 70 HP Pikachu is the current weapon of choice because you never know if you're going to face Trevenant or Buzzwole-GX / Wide Lens. That extra 10 HP means the difference between keeping your setup or eating a KO. If you want to save a few bucks and can wait until the next set, Unbroken Bonds; there is a Pikachu there that has 70 HP and will more than likely be a common or uncommon card. You won't attack with Pikachu, so either of these options will work.
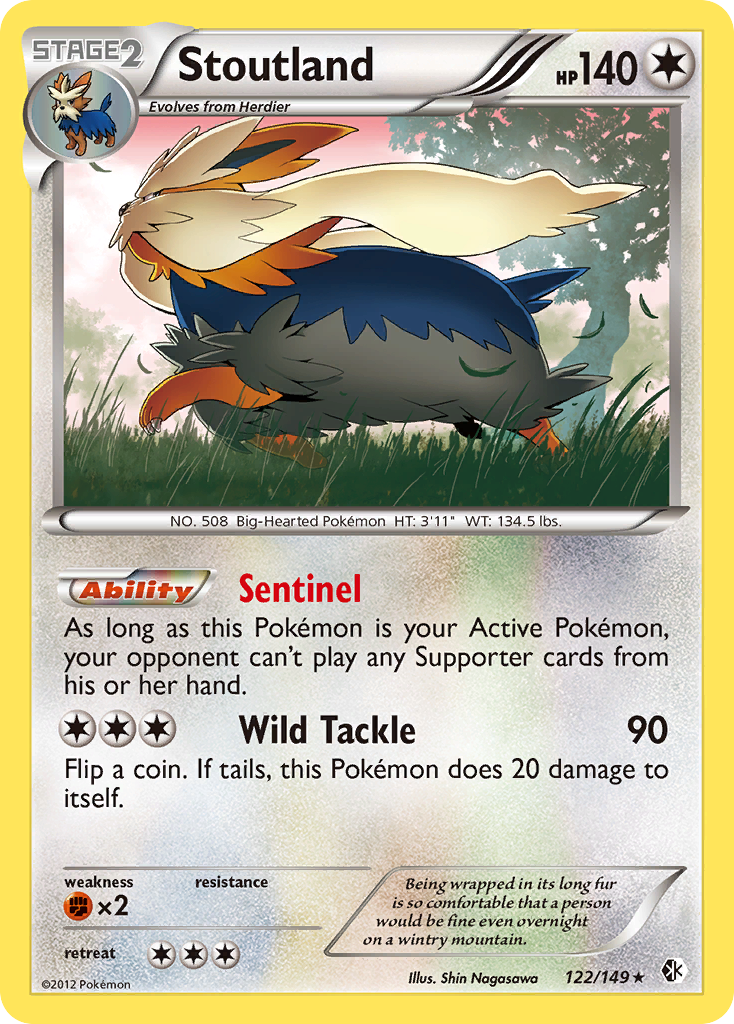
Four Raichu
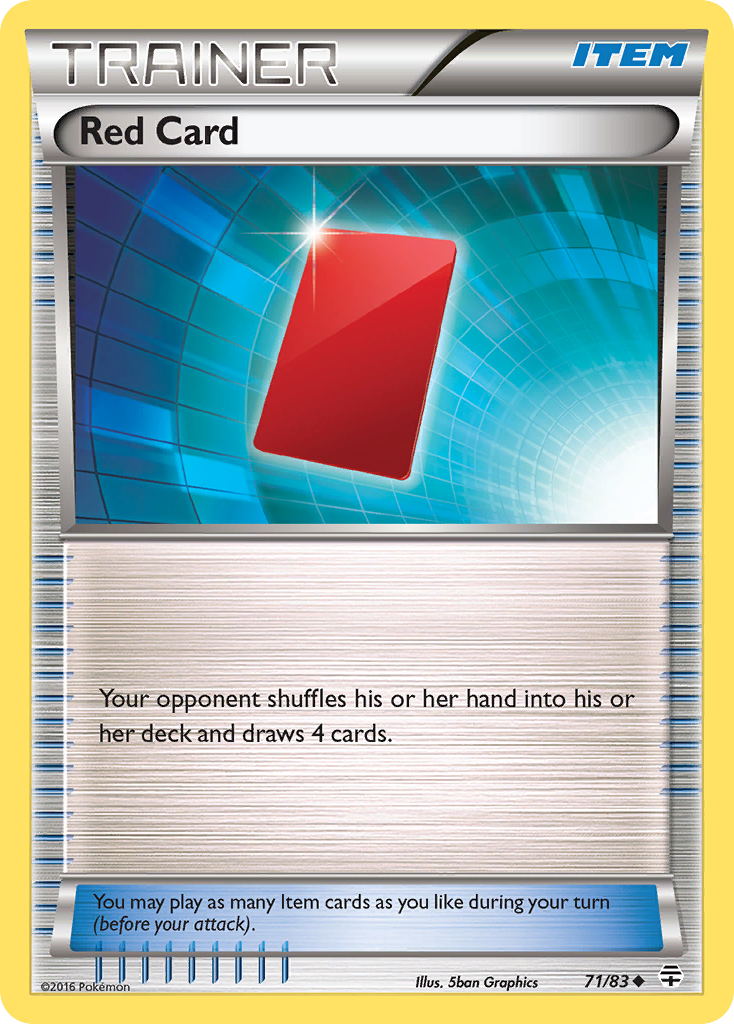
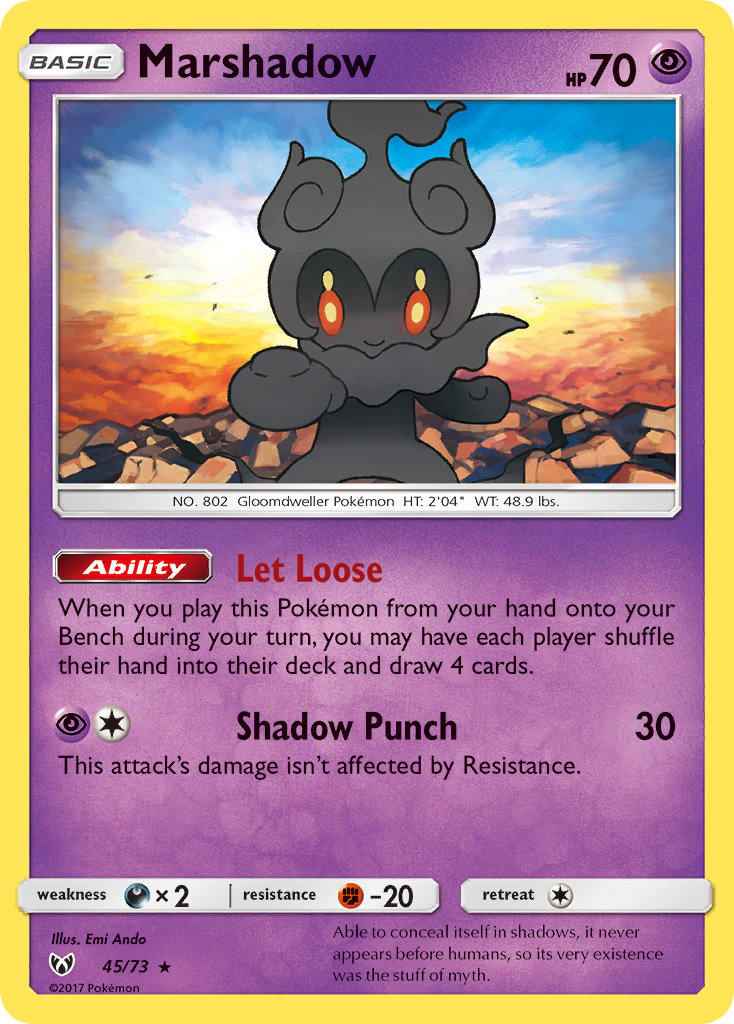
Evoshock allows you to Paralyze your opponent's Active Pokemon. We need as many as we can to consistently draw into them as a way to protect ourselves against N and other cards that would shuffle your hand into your deck. Let's face it: N is a thing, Red Card is a thing, Marshadow is a thing. In order to bust the opponent's strategy, we can't be stingy with our outs. If you're looking at making space for other cards, you can cut one Raichu. This will cut your consistency of drawing into one, but three is the minimum I'd recommend if you're making cuts.
Three Sableye
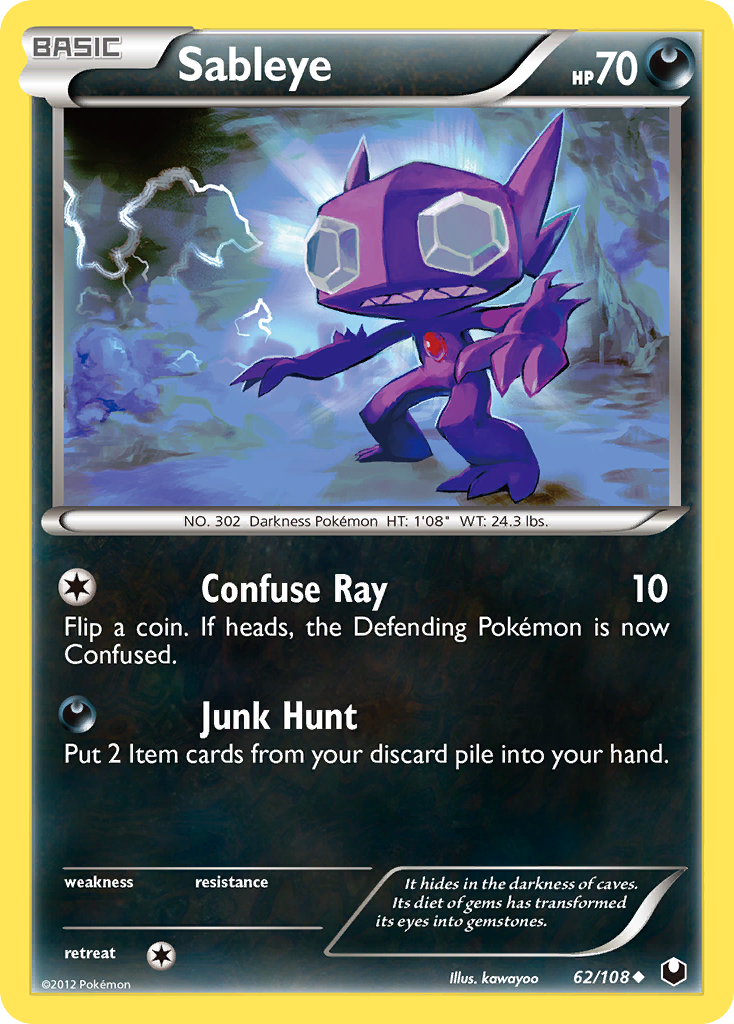
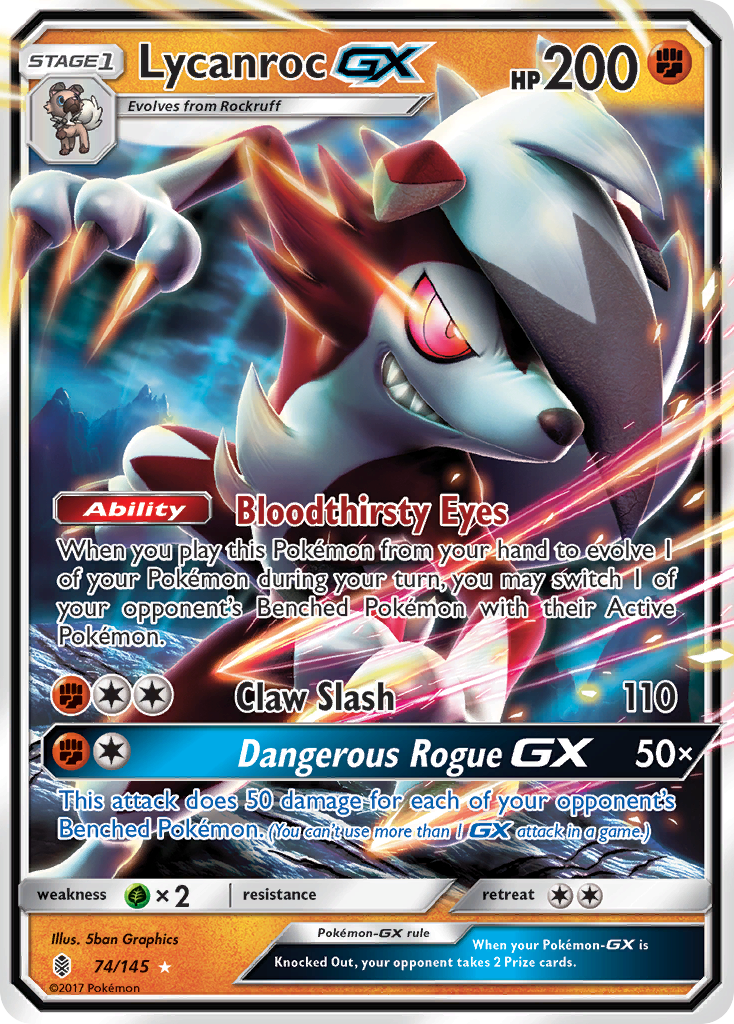
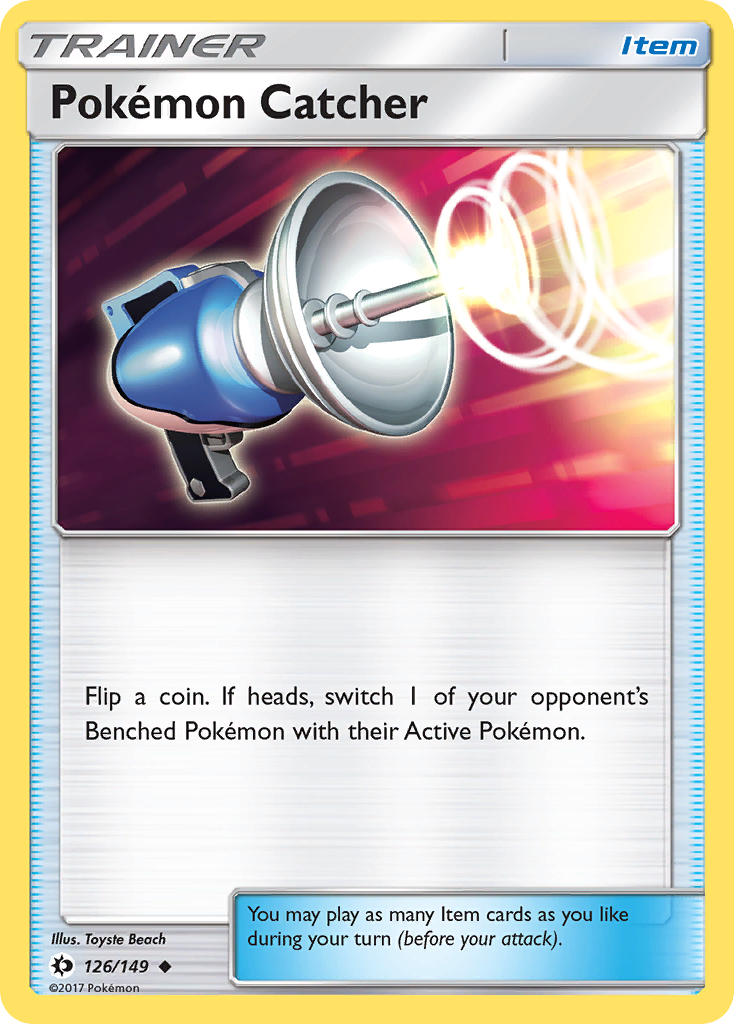
Get ready to say "Junk Hunt" a lot. Sableye allows you to get two Items from your discard pile into your hand. I would say that 90% of your Junk Hunting will consist of: VS Seeker and Scoop Up Cyclone or Devolution Spray. By doing so, you effectively loop necessary Items and uphold a sort of "infinite loop" unless its interrupted. I was running four Sableye for consistency purposes, but three turned out out to allow more deckspace as Sableye will rarely get KOed. This is because Guzma is the most common "out" opponents can use to get out of Paralysis lock. Because Guzma pushes Sableye out of the Active position, it is never in danger of being KOed unless the opponent follows up with something like Lycanroc-GX or Pokémon Catcher. I had someone use Pokemon Catcher against me once. I don't want to talk about it.
Two Girafarig
This card acts as your Item or Supporter lock. If an opponent leaves their Guzma in their discard pile all willy nilly, or leaves key Items that they could retrieve; send them to the Lost Zone with Girafarig! In practice, Guzma and N are the most common cards to target down as they affect you negatively the most. An opponent might see what you're doing and wait until they have a VS Seeker in hand before they play key Supporters. Do not worry, as they aren't able to keep that business up for long. From experience, they usually do it once, maybe twice if their resources allow them the opportunity to do so. Re-establish your lock and wait until they leave a key Supporter in their discard pile to pounce on it.
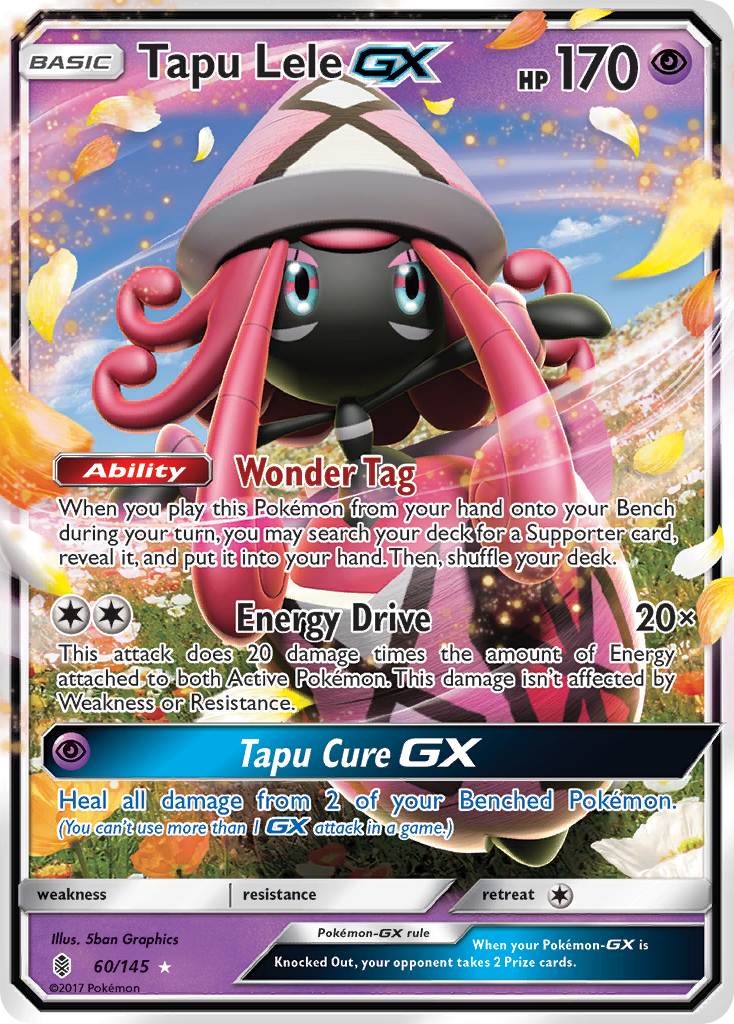
Two Jirachi-EX
The "softest" Pokemon-EX ever printed. We are using Jirachi-EX over Tapu Lele-GX because of Level Ball. Having eight outs, by means of Level Ball and Ultra Ball, to any Supporter in the deck as opposed to four Ultra Ball can get you out of some nasty jams. Is a 90 HP Pokemon-EX a two-Prize liability problem? You bet! Was it a problem for most of the Regional? How about you quit asking questions! The idea is that you'd be able to use Scoop Up Cyclone on it before your opponent could use Guzma to bring it out and force a six-Prize game. It's a necessary evil.
One "Bench Barrier" Mr. Mime
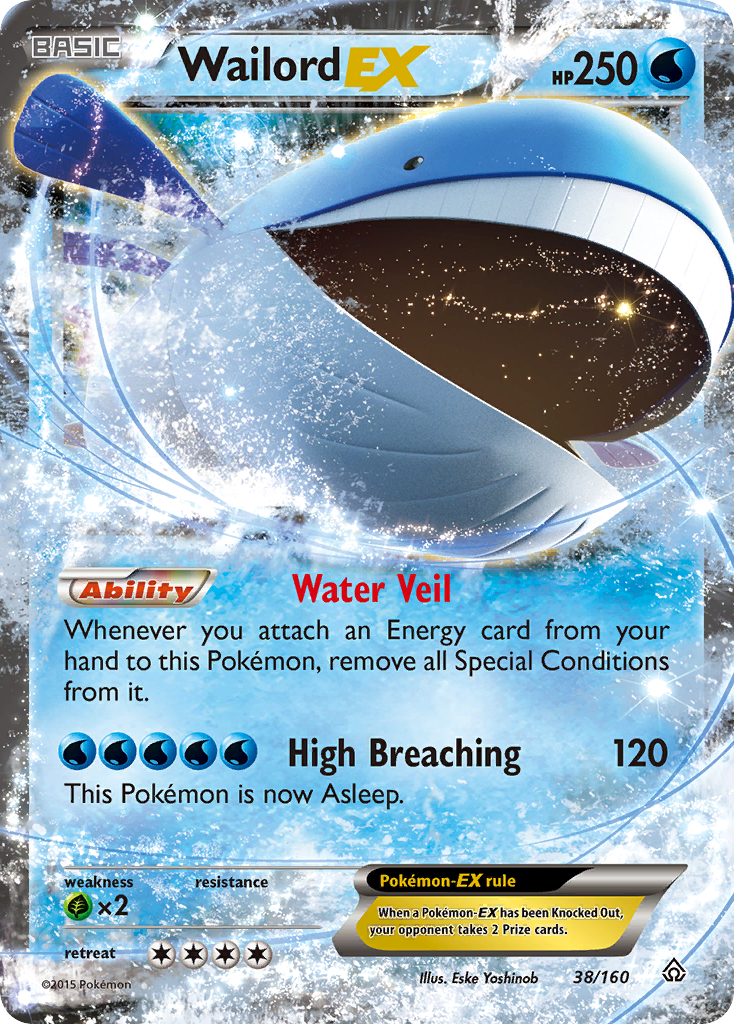
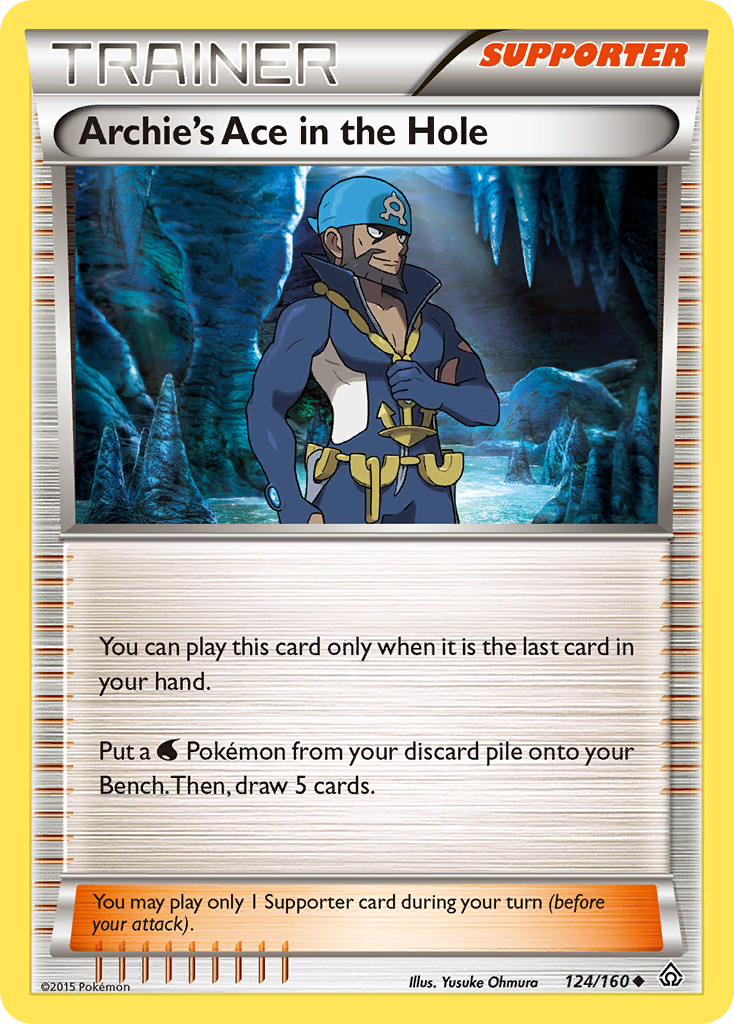
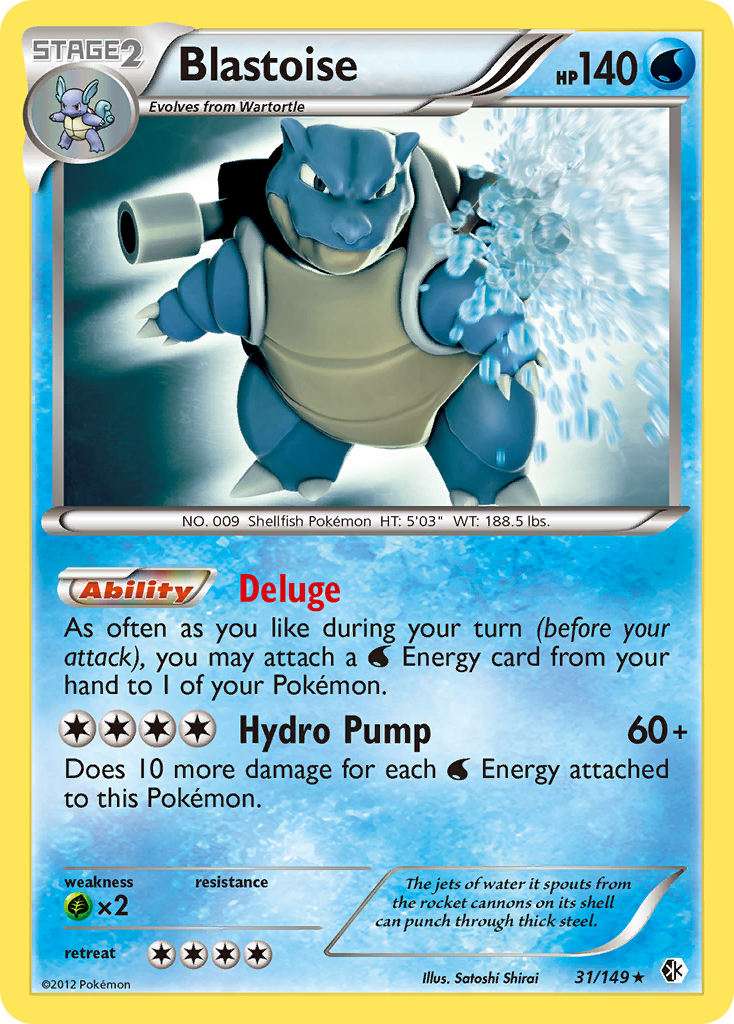
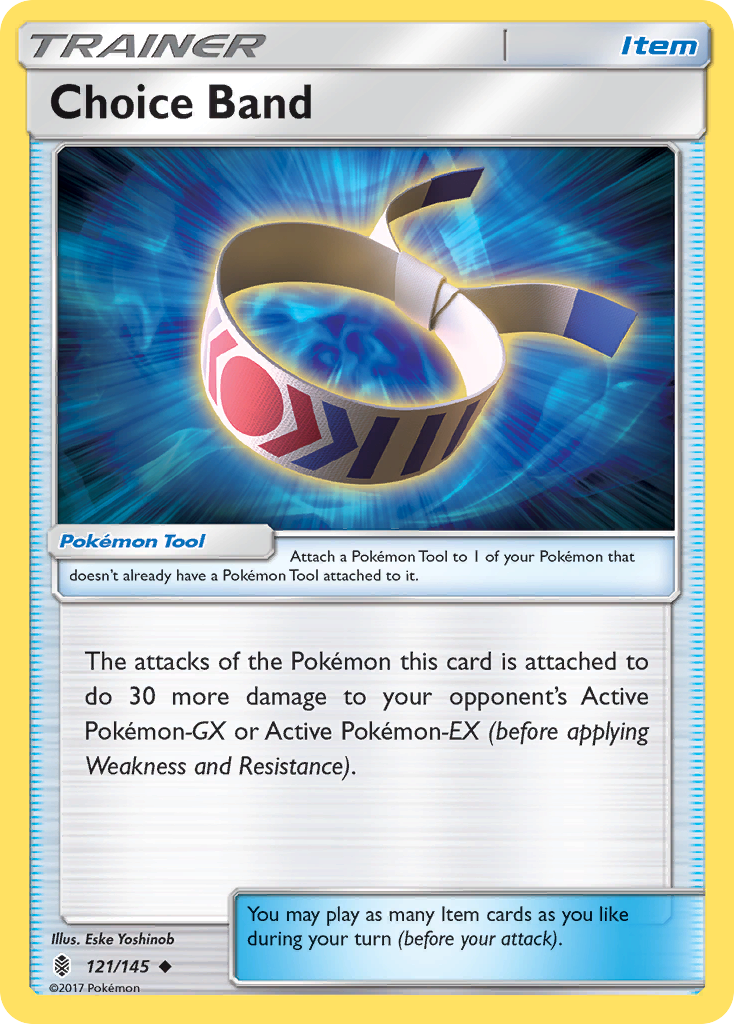
Remember when Wailord-EX was a thing? Most HP on any Basic Pokemon ever printed? Yeah, that doofy whale bellied up to the bar and said "We can do more HP. And I want to attack this time". And here we are with Magikarp & Wailord-GX. One week before the Regional, Archie's Ace in the Hole / Blastoise builds changed drastically by focusing heavily on Magikarp & Wailord-GX, intending to use it's devastating GX attack to wipe an opponent's Bench off the face of the planet. It would then play clean up with it's regular attack and swing at everything else for 180 damage; or 210 if they had Choice Band. Enter Mr. Mime.
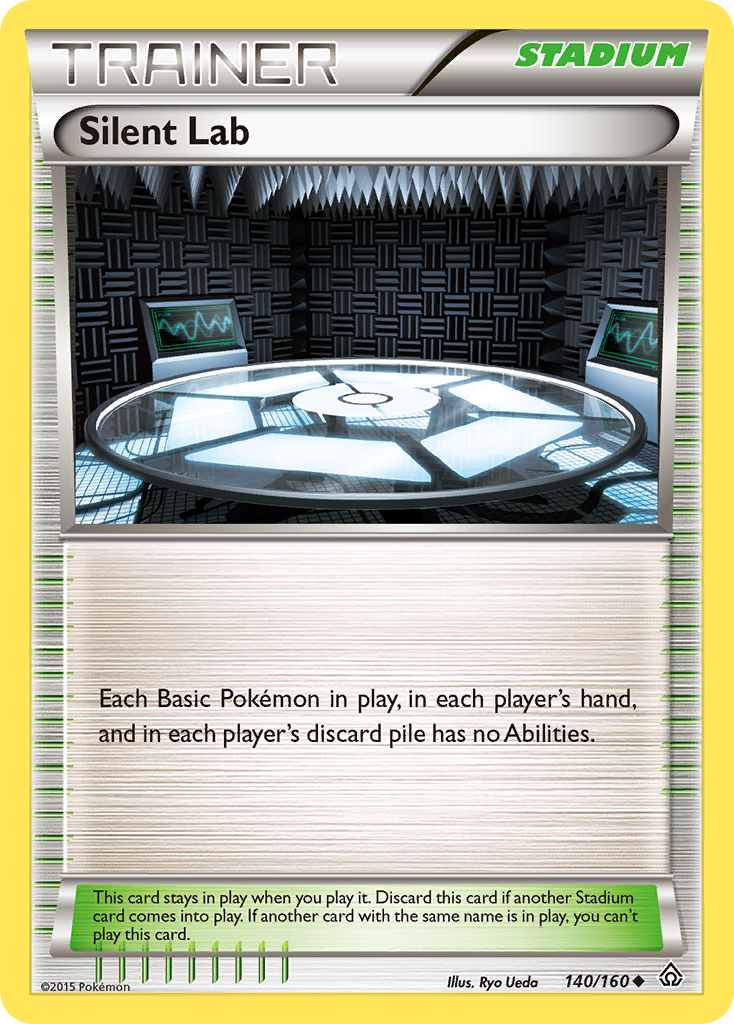
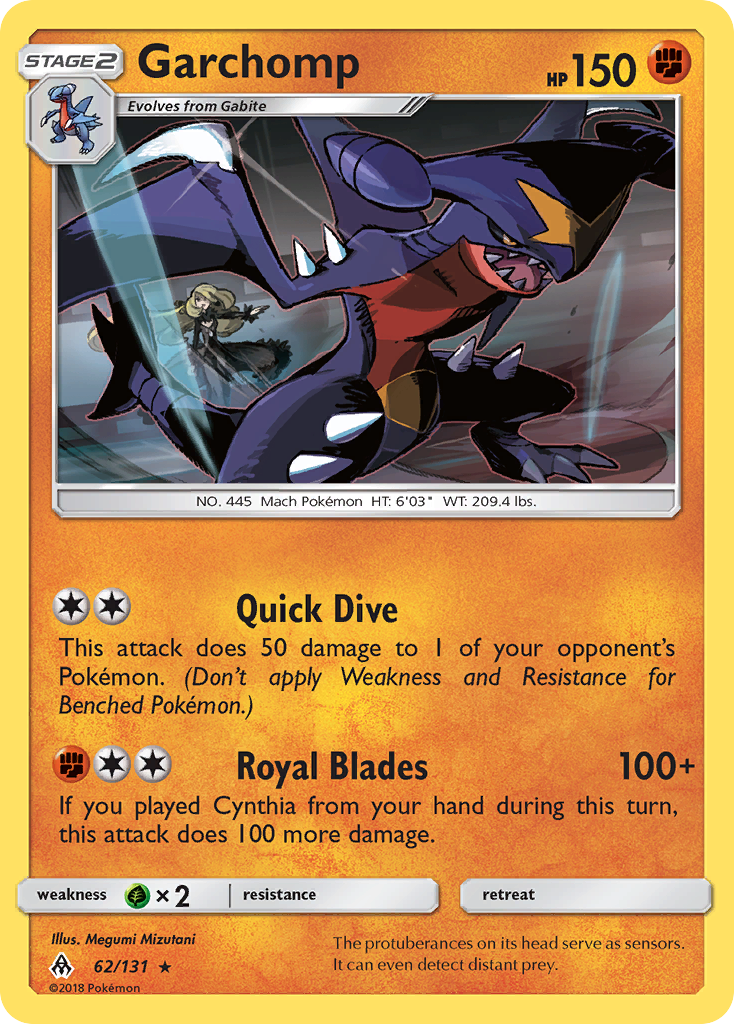
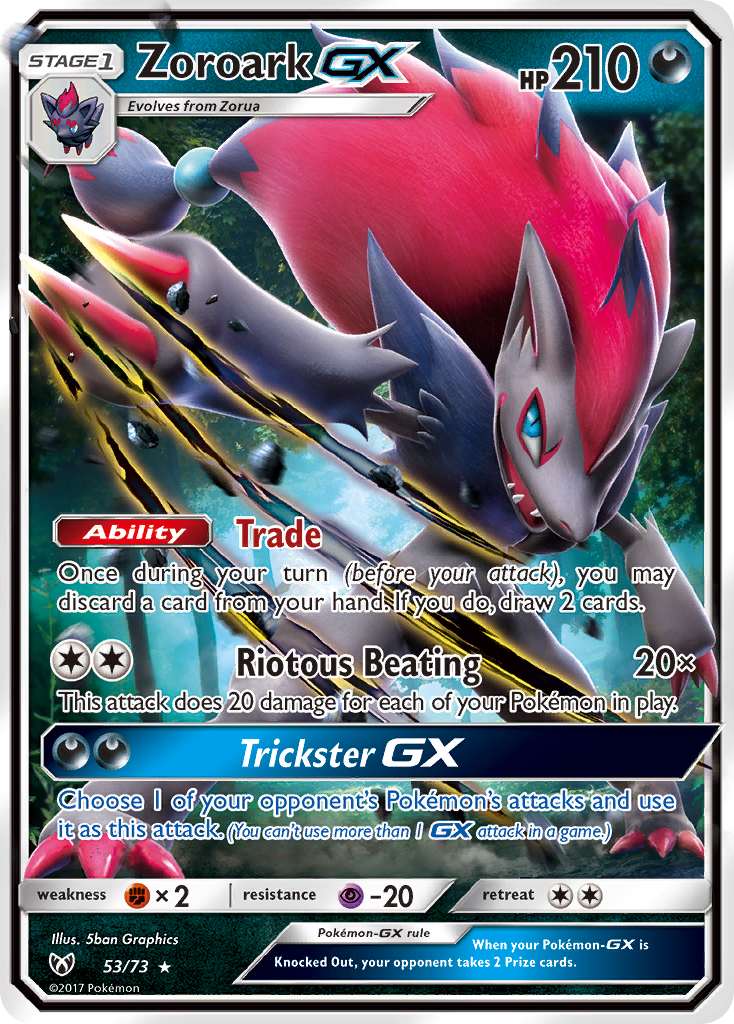
This card can block all damage that would go to your Bench and force them to target down Mr. Mime or dig harder for Silent Lab. This allows you to secure your setup and some time to hit their deck with Team Rocket's Handiwork. It also helps against Buzzwole-GX and anyone nutty enough to use Tapu Koko. If it wasn't for Magikarp & Wailord-GX, we wouldn't be using Mr. Mime. There is little difference between the Fairy-type and Psychic-type versions. I prefer the Fairy-type version because is has Darkness-type Resistance that was strangely useful against Garchomp in Round 4 that happened to use a Zoroark-GX.
Four Professor Sycamore
Draw Power. Draw Power. Draw Power. Say it loud enough for the nosebleed seats. Because Red Card and Marshadow are a thing, we need as much solid draw power we can get. And Professor Sycamore fits the bill.
Three N
Again, we need a lot of consistency in case we get hit with Red Card or Marshadow. This card is an incredible help when your opponent is low on Prizes and you are still digging for key outs with Team Rocket's Handiwork.
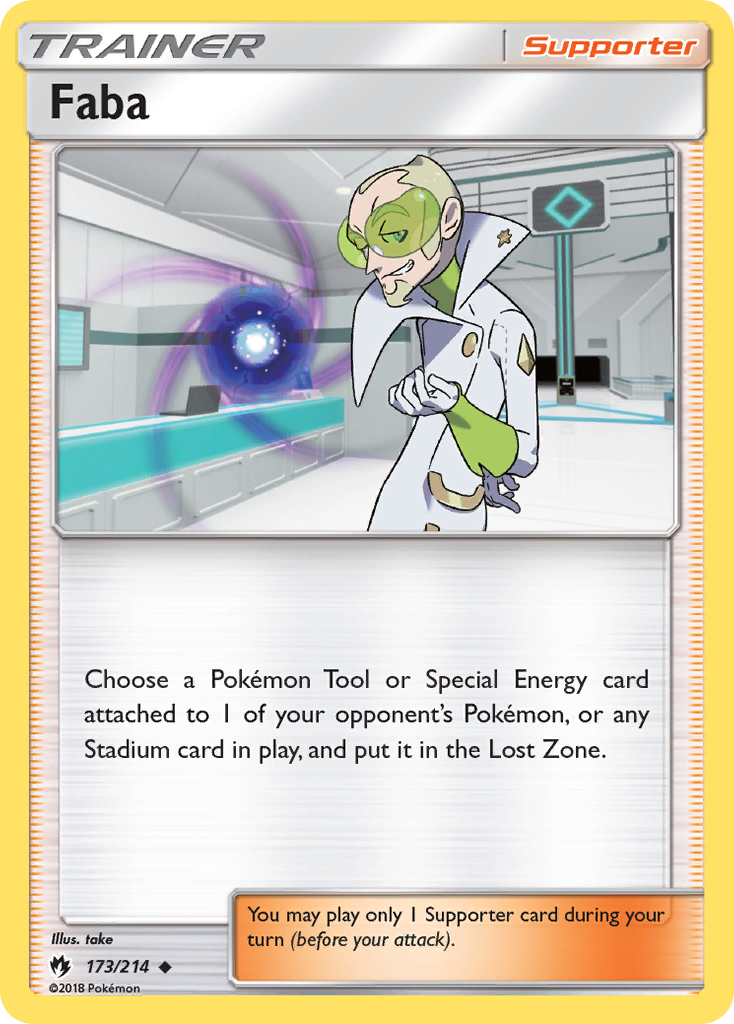
Three Faba
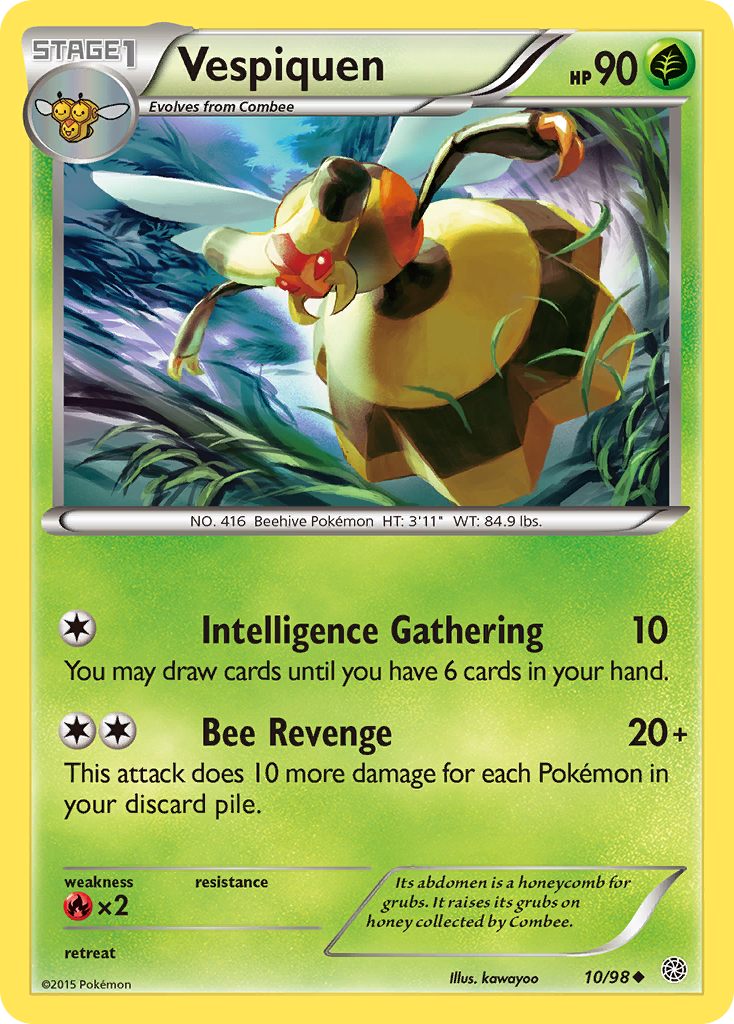
Zoroark-GX was slated to be everywhere in Dallas. And nothing made me happier than to face those decks in testing and hit their Double Colorless with Faba. If the Anaheim Regional was any measure, people teching one Faba wasn't enough to keep Zoroark-GX down. With Seismitoad-EX still a thing, being able to get rid of their Double Colorless under Item lock was the name of the game. Against Zoroark-GX, if you are having trouble plowing through their deck with Team Rocket's Handiwork, getting rid of all their means to attack is your "secondary lock". Don't believe me? Go ask a Vespiquen player on how they function without Double Colorless.
Two Team Rocket's Handiwork
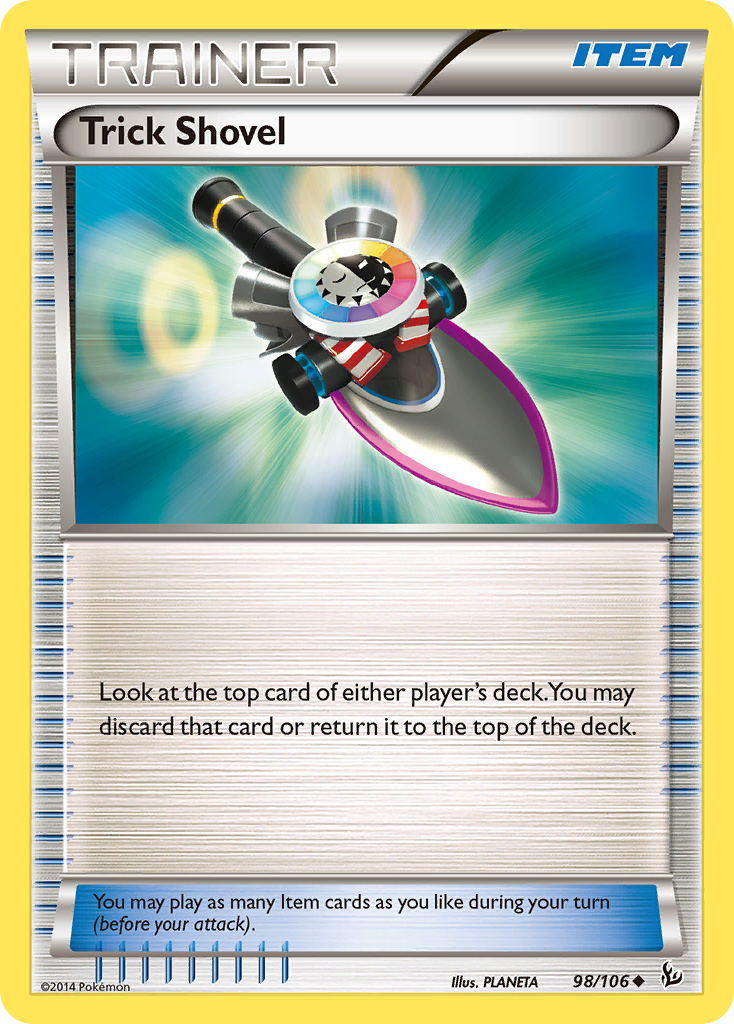
I need a card that can quickly discard cards from the opponent's deck, but I also want to feel like I'm in Las Vegas. Team Rocket's Handiwork it is! I have had some ask, "why this over Trick Shovel?" First is discarding speed. If you use Trick Shovel and the opponent would have a card on top of their deck that won't help them, you're likely to allow them to draw into it and continue using Junk Hunt into Scoop Up Cyclone/Devolution Spray and Trick Shovel until they do draw into something that is not preferred. If you're waiting for an opponent's outs to sift to the top, you're wasting valuable time in a best-of-three match in a Regional. If you look at all the cards in most of the Day 2 builds that you wouldn't want them drawing into, you're looking at anywhere from 18-30 cards. Literally roll the dice with Team Rocket's Handiwork and further yourself towards your mill condition.
The second reason is that Team Rocket's Handiwork is a Supporter as opposed to Trick Shovel being an Item. This sounds nuts. Once you have established your lock, you probably have an assortment of Supporters in your discard pile. If you are retrieving Devolution Spray/Scoop Up Cyclone and VS Seeker, the VS Seeker will give you versatility and the ability to respond to an opponent doing something unexpected on their next turn. If they used N, and you drew into VS Seeker, you can now retrieve Skyla and snag Scoop Up Cyclone and re-establish your Paralysis lock. If your opponent got the "heart of the cards" and drew into a Professor Sycamore? Use N to bring them back to a one card hand.
If you use Junk Hunt on Scoop Up Cyclone/Devolution Spray and Trick Shovel, you are committed to establishing the lock and maybe discarding one card from the opponents deck. Trick Shovel does not help when your opponent can, and will, do something unexpected. You need Supporter versatility to better guide your VS Seeker plays.
Two Skyla
Need Devolution Spray now? How about Scoop Up Cyclone? I bet Rescue Stretcher could help now! Whatever Item you need, having a Supporter retrieve any one of them at a moments notice is good business.
One Brigette
I've been working on this deck since September 2017. Until early January 2019, I never used Brigette--in anything ever. C'mon, Sylveon-GX doesn't need it, so who cares? A teammate suggested I use it in the deck to set up easier on the first turn and save resources. Needless to say, I felt an ovewhelming sense of "dumb". Brigette is an incredible tool to help set up and not eat valuable resources like Level Ball and Ultra Ball. Your goal on turn 1 is to play Brigette. Once that happens, everything flows nicely.
One Gladion
The "weirdo" Skyla. The main reason to use Gladion is in case Scoop Up Cyclone or Devolution Spray happens to hide themselves in your Prizes. When it helps, it's fantastic. When it's not, it sits in your hand and looks Gladion.
Four Ultra Ball
You need four Ultra Ball as an out to Jirachi-EX, as well as having a way to search out Raichu if need be. It's also great for thinning your hand in case you are going to play N or need key Supporters in your discard pile.
Four Level Ball
This gets you any Pokemon in your deck except for Raichu. It is handy by being able to snag Jirachi-EX in a pinch. Another cool thing to do is if you need to check your deck for a particular resource mid-game, use Level Ball to peek through your deck. Level Ball is almost dead mid to late game. It would be easier to memorize your Prizes, but my memory is terrible.
Four VS Seeker
Seeing as how the deck is reliant on Supporter looping, you need the maximum amount of the one non-Ace Spec Item that can retrieve any Supporter. As stated earlier, VS Seeker allows you Supporter utility when you Junk Hunt for it.
Three Field Blower
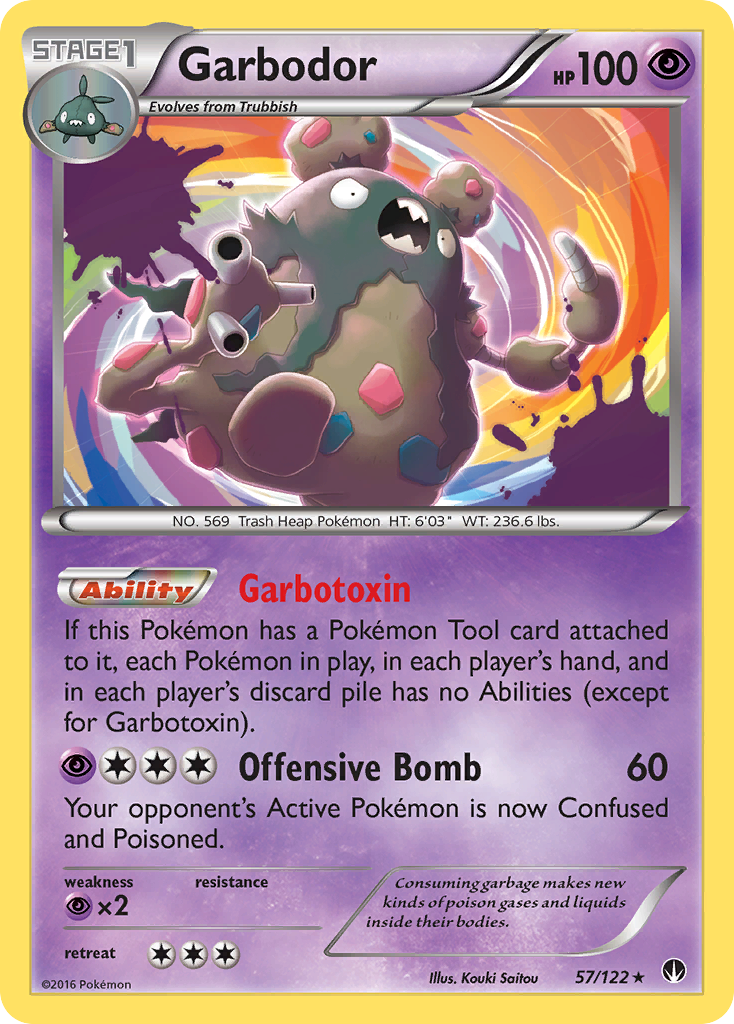
The only reason you are using Field Blower is because Zoroark-GX / Garbodor was slated to be the most played Zoroark-GX variant at Dallas. Re-establish Paralysis lock by getting rid of a Tool attached to Garbodor post haste.
Two Rescue Stretcher
This will retrieve any Pokemon that gets KOed, it also acts as an out to Raichu if you discard one in the early turns, but are unable to draw into a Raichu or Ultra Ball in the next turn or two.
One Devolution Spray
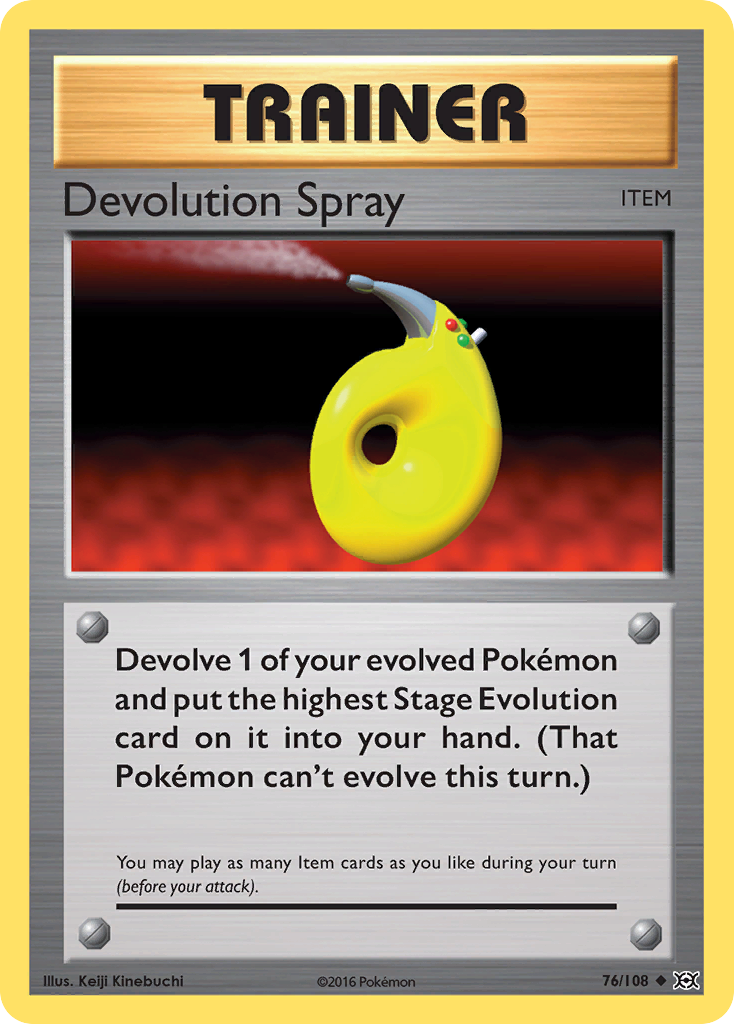
We don't want to be completely reliant on Scoop Up Cyclone. Using Devolution Spray is a second out in order to evolve and devolve Raichu and continuously use Evoshock.
One Super Rod
This is used to shuffle in some Pokemon and any Energy you have lost. Use Super Rod in conjunction with Ultra Ball and Level Ball to act as a Rescue Stretcher, but with more steps.
One Scoop Up Cyclone
This is your out to getting Jirachi-EX off the field as well as being able to evolve into Raichu, scoop it into your hand, and play the Pikachu back down. You can also make an interesting play in regards to conserving Energy. If you are going to use a Professor Sycamore and would have to forfeit a Darkness Energy, or you are about to play N, but want to draw into more outs; play the Darkness Energy on a Pikachu or Raichu. When you use Scoop Up Cyclone on the Pokemon, you get the Energy back into your hand as well. This is a useful play to keep in your bushel basket of strategery.
Eight Darkness Energy
Fairy Energy was considered at one point. Turns out you can't use Junk Hunt with Fairy Energy. You can cut the Energy count to seven if you're looking at making space for other cards. However, I felt that seven ran the risk of bricking and missing Junk Hunt, Get Lost, and retreat plays. Eight Energy felt much safer.
First Turn Sequencing
What you do in your first two turns will determine how easy or how hard the current game will go. Your primary goal on turn 1 is to set up your Bench, and there is a troubleshooting tree to do it:
- Do you Have Brigette in hand?
- If yes, use Brigette.
- If no, do you have Jirachi-EX, Level Ball, or Ultra Ball in hand?
- If yes, do you also have N or Professor Sycamore in Hand?
- If yes, then get use Jirachi-EX for Brigette, or use Level Ball/Ultra Ball for Jirachi-EX for Brigette. Use Professor Sycamore/N next turn.
- If no, use Jirachi-EX for Professor Sycamore or N. To determine which one you would need depends on if the opponent went first and you need to mess with their hand and/or what you have in your hand. Lean more towards Professor Sycamore so you draw more cards in hopes that you can achieve a good set up.
- If no, do you have N or Professor Sycamore in hand?
- If yes, use Professor Sycamore or N and shoot for Brigette next turn. If you have both Professor Sycamore and N, use Professor Sycamore unless you have a hand full of valuable resources. This is rare, but I'll put it out there.
- If no, you have a bad hand. Good luck and farewell!
- If yes, do you also have N or Professor Sycamore in Hand?
Regardless of how you get your Pokemon set up, the safe play is to have two Sableye and two Pikachu in play. This is in case they use Guzma next turn and shoot for a KO. Regardless of who they KO, you are able to establish Paralysis lock and Item loop on your next turn.
If their Active Pokemon is a Pokemon that can evolve, there is a good chance you are going to eat a KO because they can evolve out of Paralysis. Selecting a "throw away" Pokemon to start with will help out, but who do you select if you have multiple options? Here are your Pokemon of priority from top to bottom:
- Girafarig - If you have the option of starting with Girafarig, go for it, it will change the way the opponent plays their first turn or two and might slow down their strategy.
- Mr. Mime - Start with Mr. Mime if you don't have Girafarig, but have other Pokemon in your hand.
- Pikachu - You have four Pikachu in the deck. You also have a couple Rescue Stretcher to account for it being KOed. Starting with Pikachu isn't a big deal.
- Sableye - Hope your opponent's Active Pokemon isn't one that can evolve. If it can't evolve, you're fine, if it can, then you'll need to get another Sableye on your Bench while setting up.
- Jirachi-EX - This is a bad beat. The only reason it'd be your Active is if you had no other option in your opening hand.
Dallas Regional Metagaming and Matchups
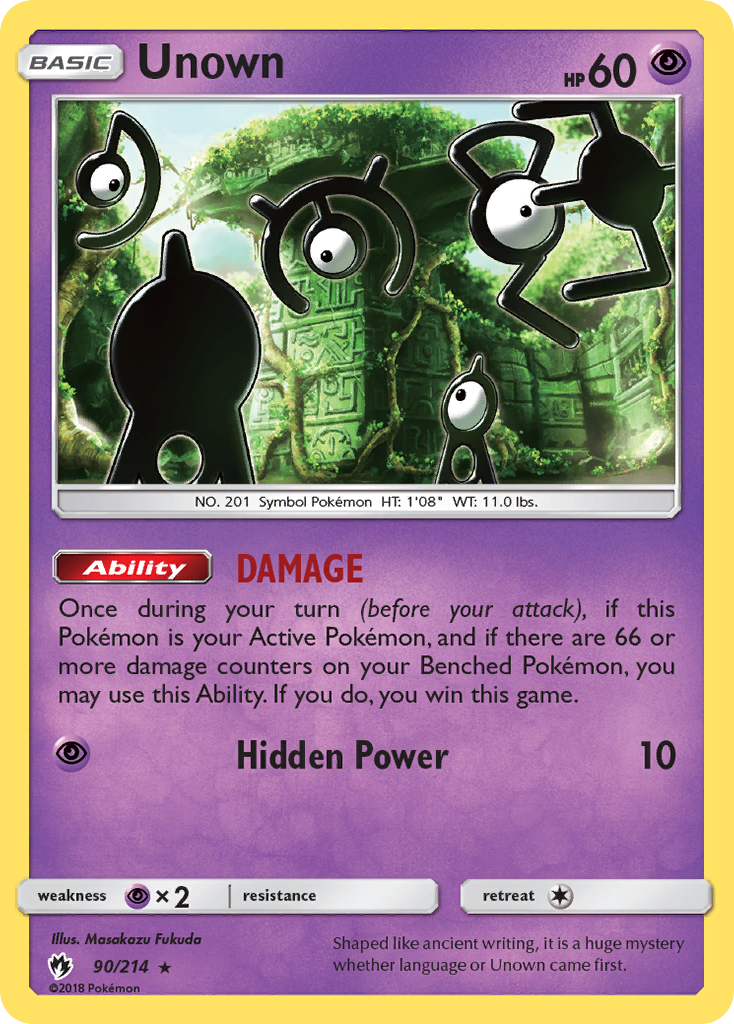
This year would make the second Pokemon Regional I have been to, but fourth huge gaming event I have taken a part in. Metagaming for any big event is no easy chore. You can watch and read all the metagame videos and articles you want, and there will always be builds that no one saw coming and place high. Looking at you, DAMAGE Unown. Running a control deck has its own "metagame checklist" to see if its viable or not. In regards to Sableye / Raichu, here's what was factored in:
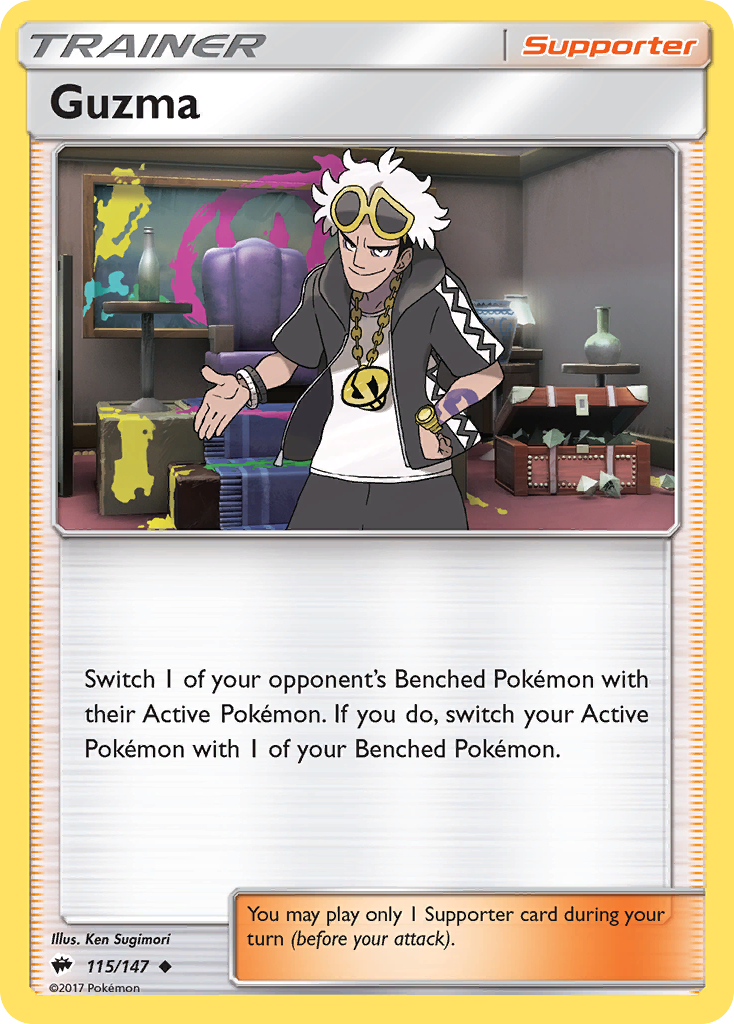
- How many Guzma every common archetype and sub-archetype running?
- If a variant is using one Guzma and another variant is using two, is there a way for me to tell by techs and other cards they play without having to see Guzma?
- How many VS Seeker are every common archetype and sub-archetype running?
- What decks are running Dowsing Machine, as they can retrieve Guzma?
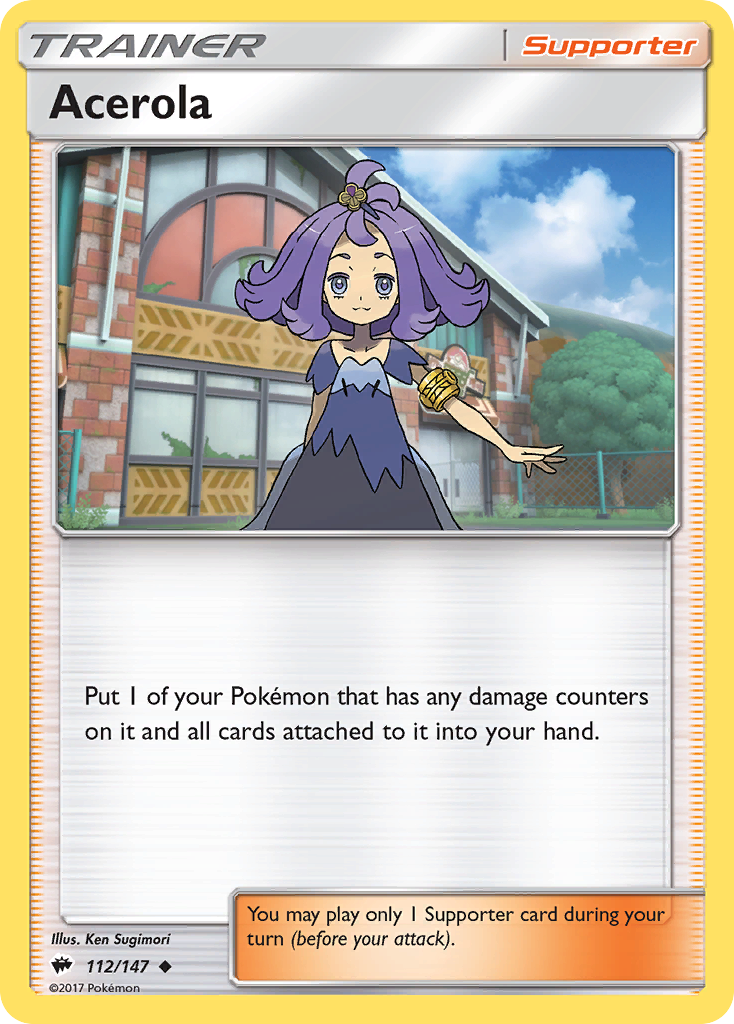
- Are any decks running Acerola and Rainbow Energy, as that can break Paralysis lock?
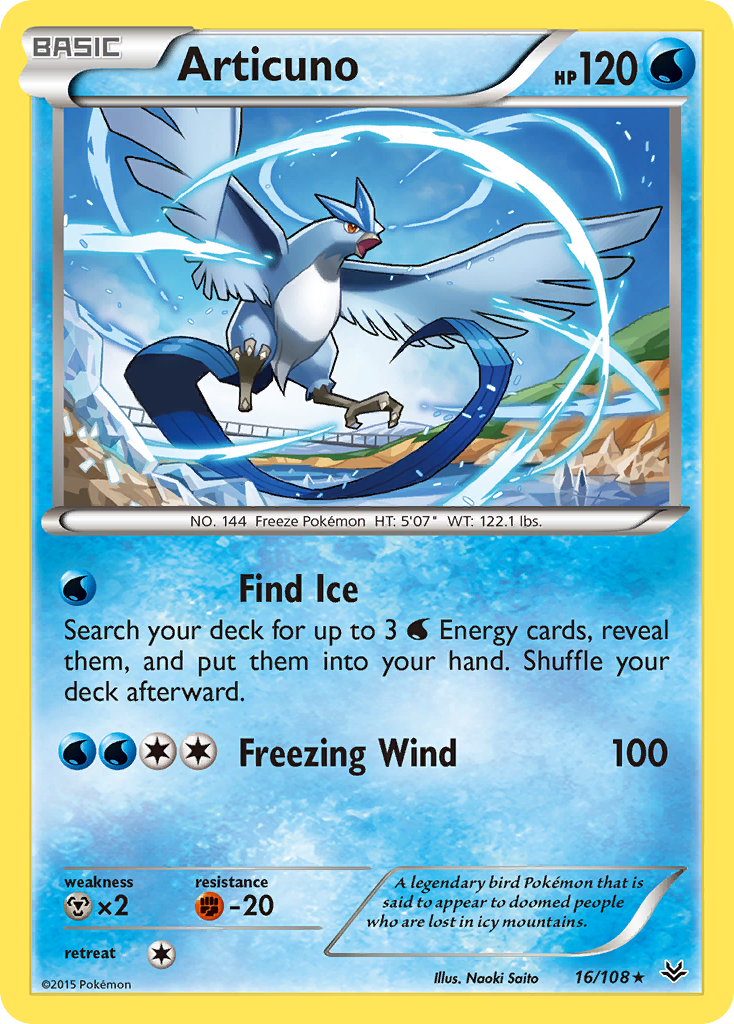
- Is Keldeo-EX run in Archie's Ace in the Hole / Blastoise if they are Magikarp & Wailord-GX-centric?
- Before Dallas, there was debate as to whether it and/or Articuno should be incorporated in the list or not.
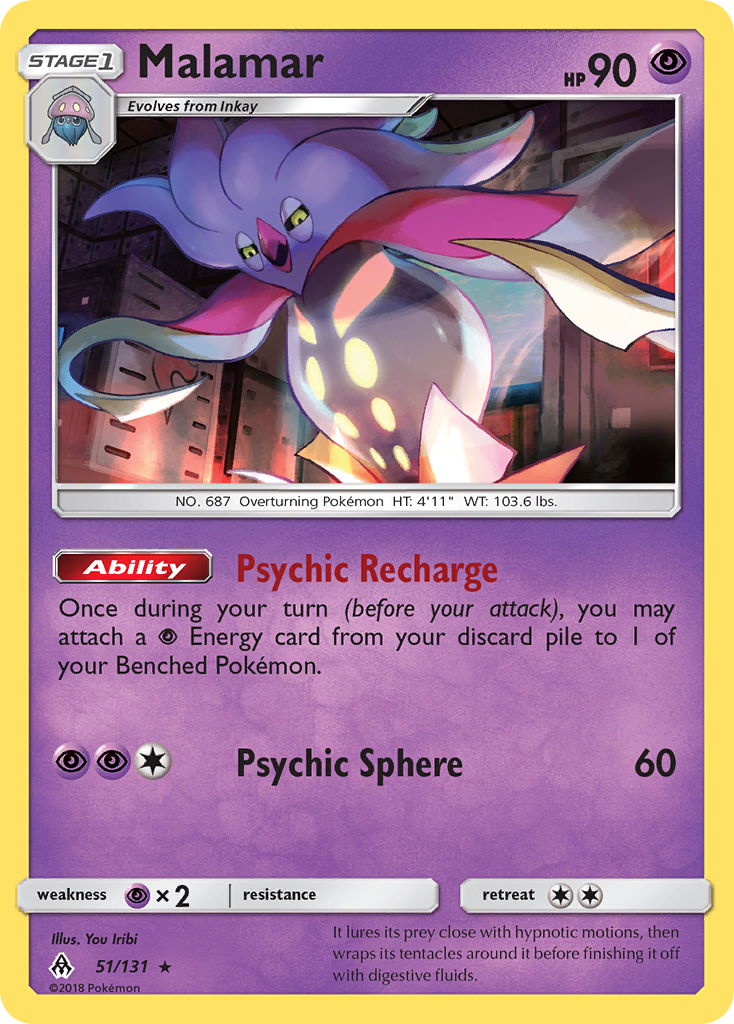
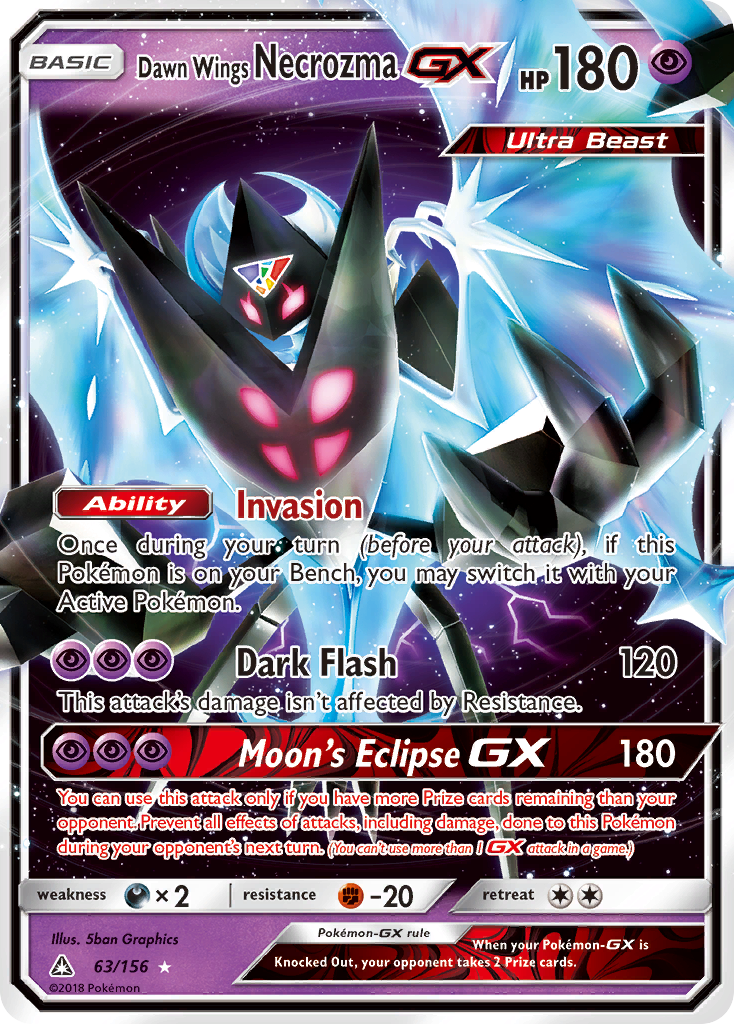
- Is Malamar a threat, as they run Dawn Wings Necrozma-GX that can break Paralysis lock?
- What Zoroark-GX decks are teching Zoroark, as it can break Paralysis lock?
- Is there a way for me to tell by the cards they use if they would have that specific Zoroark or not?
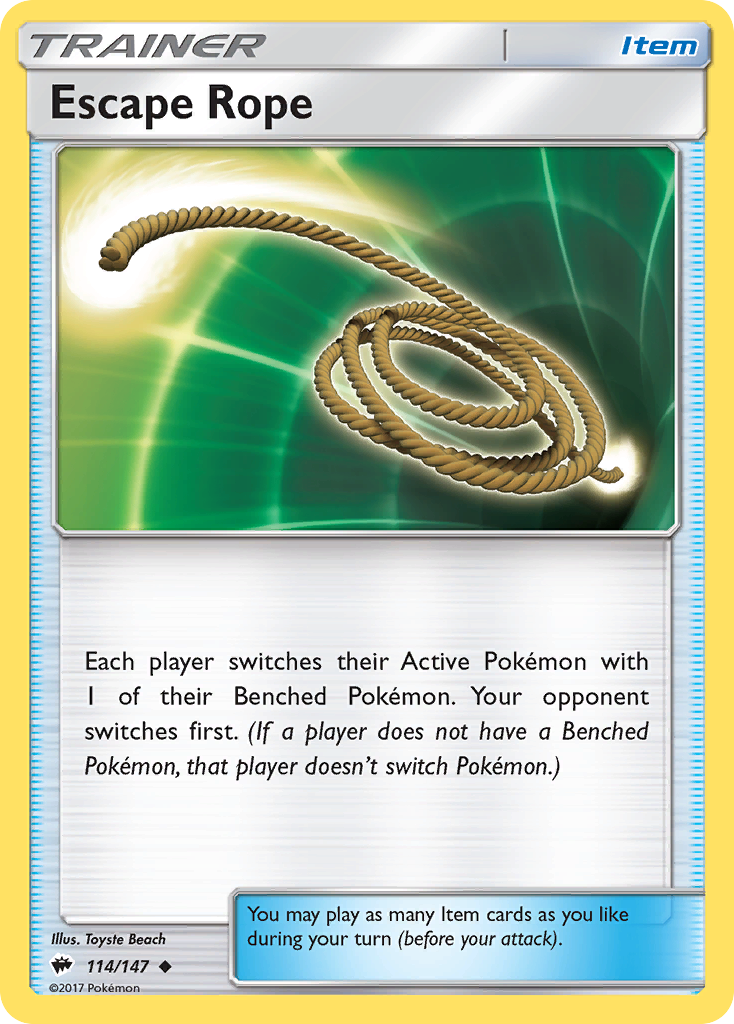
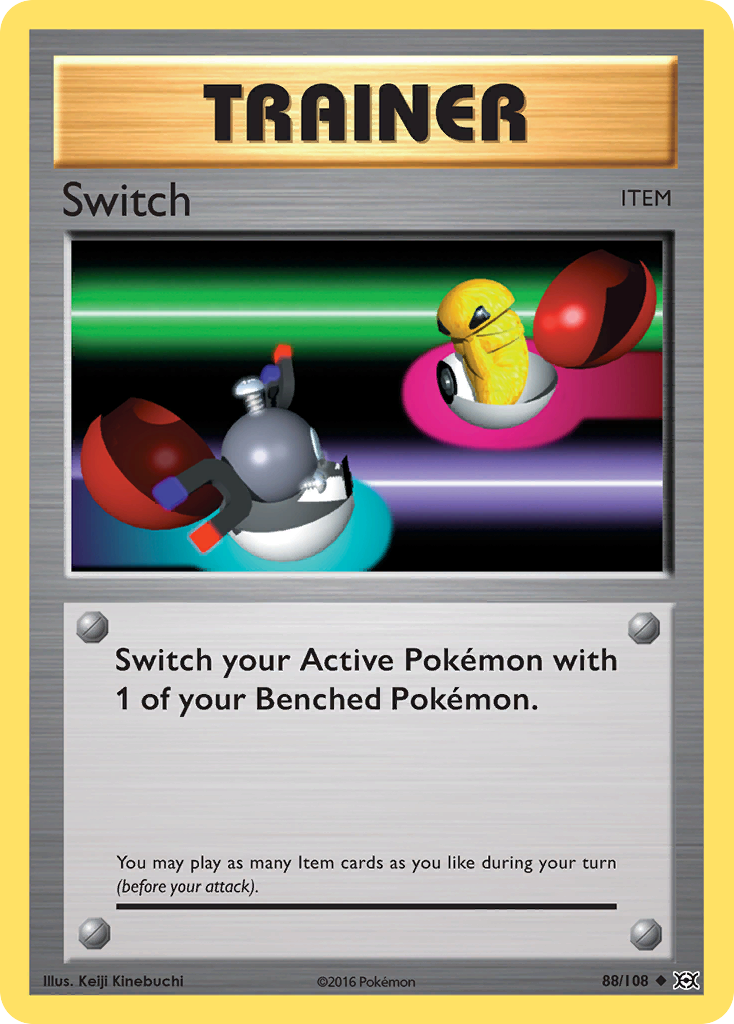
- Are any decks using less common cards to break Paralysis lock such as Escape Rope, Switch, etc.
- What are my autolosses?
- How likely am I to face a deck I naturally autolose against like Trevenant?
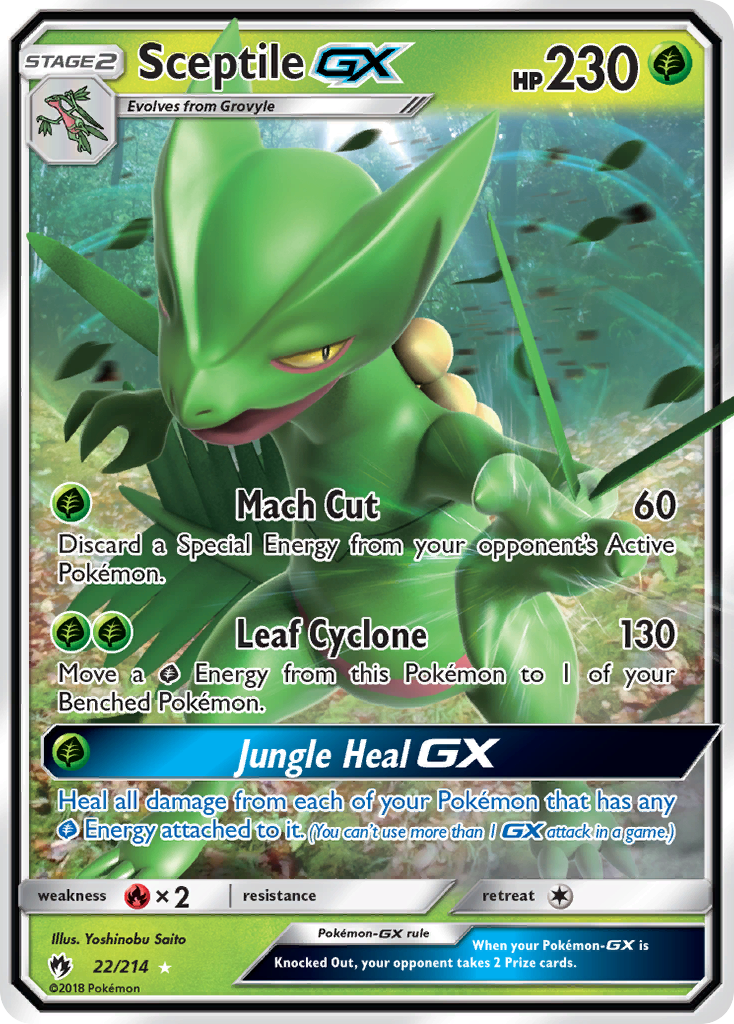
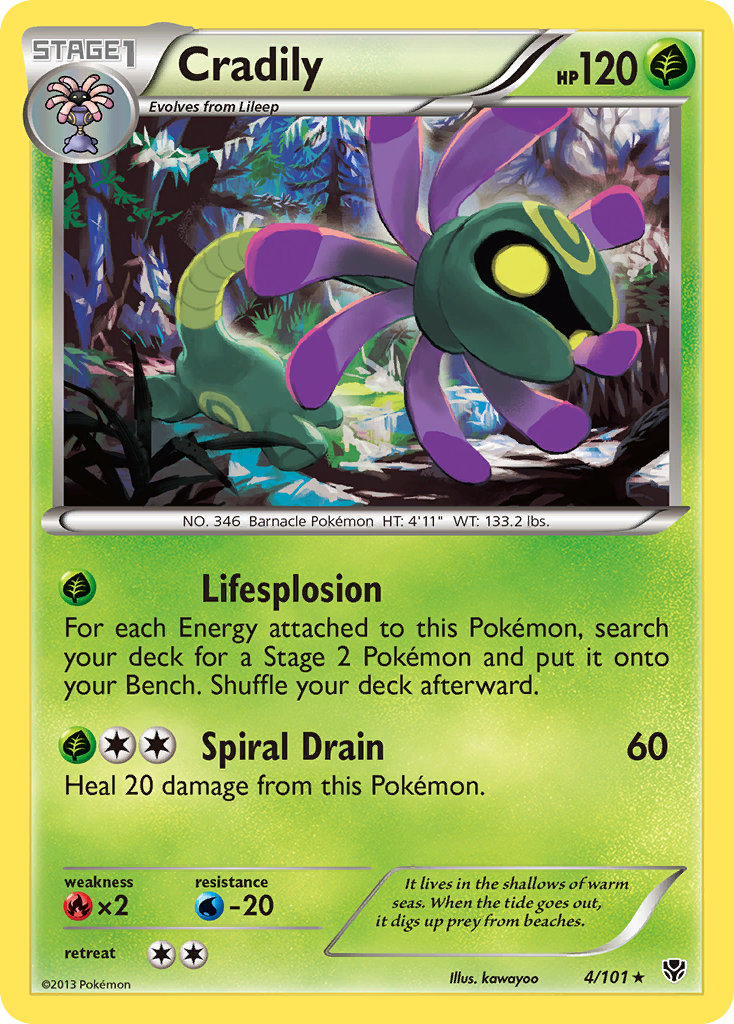
- How likely am I to face Sceptile-GX / Cradily?
- This would be figured out through metagaming articles and videos.
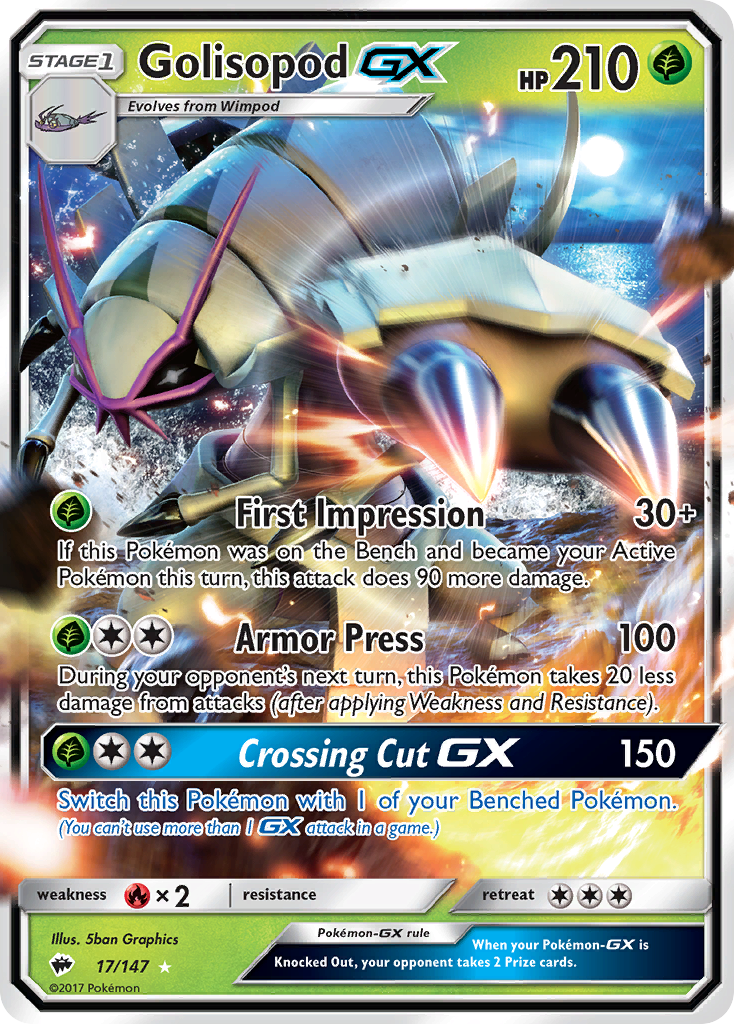
Here's what I gathered going into Dallas: Zoroark-GX / Garbodor was slated to be the Zoroark-GX deck to play. I thought Archie's Blastoise with Magikarp & Wailord-GX was going to be everywhere, Vespiquen would show up in some capacity, Zoroark-GX / "Exodia" was very much expected but not slated to do well and to expect at least one visit from it. Archie's Blastoise might be using Keldeo-EX so I'd either do terrible if they used it or great if they didn't. Zoroark-GX / Golisopod-GX was expected to see some play, but Zoroark-GX / Garbodor was seen as a better play. Egg on my face as it takes Dallas down. Finally, Trevenant was not expected to do well and Sceptile-GX / Cradily was an obscure pick that had Zoroark-GX problems, but it was another deck I had no answer for. There would be people who would run both decks, but if you did well in the first few rounds, you had a good chance of not seeing Trevenant the rest of the tournament. I went into this expecting a lot of Zoroark-GX decks and builds using mostly Special Energy. But how could it fare against hand disruption?
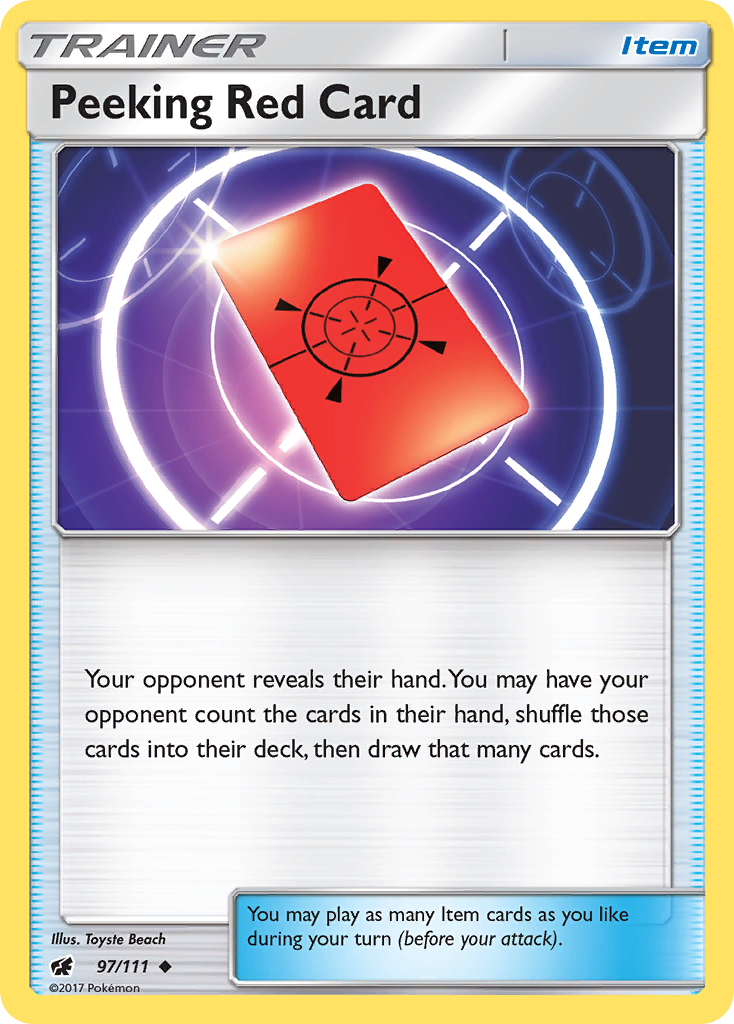
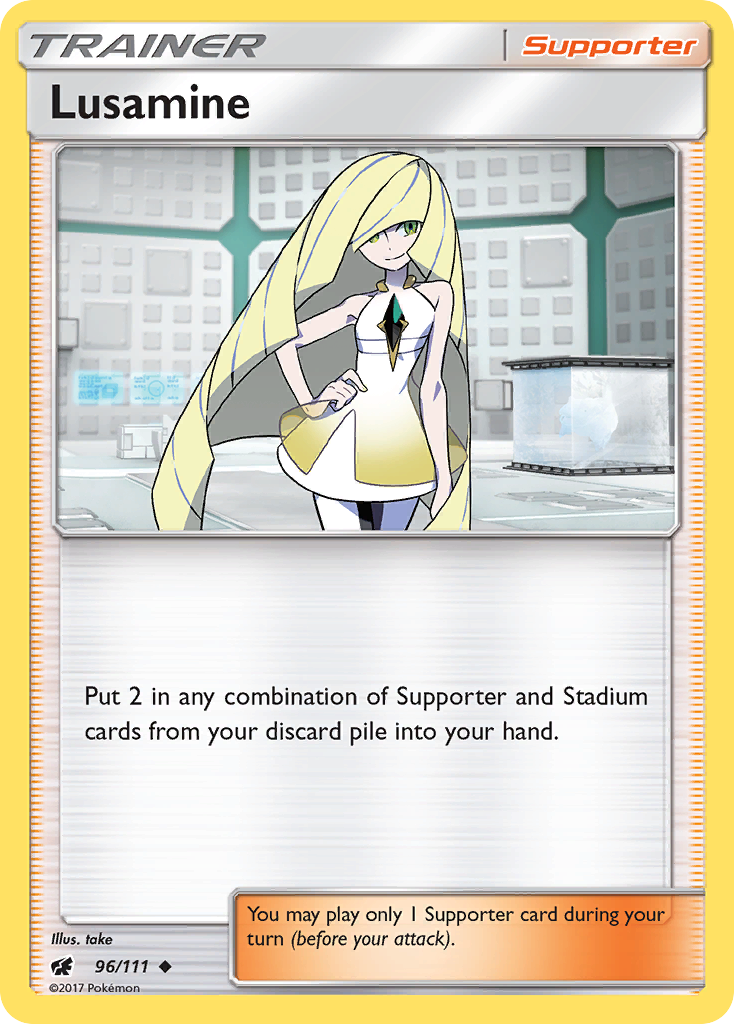
Figuring Red Card/Let Loose Marshadow Probability
Here's something funny. I had a big, spawling two thousand word spiel regarding Zoroark-GX / Red Card / Delinquent / Peeking Red Card "Exodia" and how probability is a key factor for this deck. All is going fine until, "Happy Valentine's Day, Lusamine and Delinquent are banned!" I get told the whole Exodia section is effectively D-E-A-D, and I'm here at 3 AM, cranking this out like Souja Boy. Despite being prepared for "Exodia" builds, I'll go into discussing how it can beat Red Card and Marshadow because no one cares about "Exodia" anymore; it's literally yesterdays news. Let's do this! Red Card and Marshadow probability.
Red Card and Marshadow are two cards that jar what was your hand and can turn it into a four card dumpster fire--five cards after your initial draw. At least, this is the intent of the Red Card or Marshadow user. The safest play for a large tournament like this was to add in as many consistency cards as possibe. In testing, the trick was to see if jamming as much consistency as possible would help, or if it provided a false sense of hope.
How do we figure out how many outs are available? In this decks case, we have several factors:
- Four Ultra Ball
- Four Level Ball
- Four Professor Sycamore
- Three N
- Two Jirachi-EX
Four VS Seeker can be factored in; however, you would need to go first and get a Supporter in the discard pile, which makes one less card you have available, and that makes the total number of outs at 20. Also consider that 10% of the cards in your deck will be Prize cards. For every six outs, one of them could be in your Prizes. For this, we will factor that up to two of your outs could be in your Prizes, making it a solid 15. We will also consider if you have all 17 outs available.
Let's do some math! The way we figure if we can draw out of it is factoring in four things:
- We are assuming that the opponent is going first and getting Red Card or Marshadow right out of the gate. We could factor in the coin toss for going first and their consistency/failure rate for hitting a first turn Red Card or Marshadow, but there is no way to determine how consistent their deck is until it happens. For ease of results, we will focus only on what we are able to control: our own consistency in the first turn.
- We will assume you will start with only an Active Pokemon and zero on your Bench. Having to start with Jirachi-EX drops your success rate down, but let's assume you are starting with one of any other Pokemon as that is the most likely result to happen.
- Six Prize cards.
- Additional card drawn at the start of your turn after Red Card or Marshadow.
You have your one Pokemon, six card hand, and six Prizes leaving you with a 47 card deck. If you get hit with Red Card, shuffling your hand brings your deck back up to 53. Math, math, math, and hypergeometric calculator buffoonery later. In the four cards that you would draw from a 53 card deck, you have anywhere between a 74% if we have two outs in our Prizes, and upwards of 79% of drawing into at least one of these outs in a four card hand. That's not accounting for the additional card that you would draw at the beginning of your turn. In that case, we are looking at 82%-86% of drawing into one of more outs. Not too shabby, chief!
If we go first and shoot for our setup. Let's assume again that we start with one Pokemon as the Active, six card hand, and our six Prizes with two outs in our Prizes, leaving us at 15 outs. Let us also assume that we are using a Level Ball or an Ultra Ball to retrieve a Jirachi-EX to retrieve a Brigette and fill our Bench. This will bring us to 13 outs available with a max of 15. After all is said and done, we are left with a 41 card deck and anywhere between a four to six card hand, depending on if we used Level Ball or Ultra Ball.
On their first turn, they'll use Red Card or Marshadow and shuffle back our hand, we'll draw our four and draw an additional one for our turn, so we will account for five cards.
If you used Ultra Ball for Jirachi-EX
- 42 card deck with 13 outs and draw five = 86%
- 42 card deck with 14 outs and draw five = 88%
- 42 card deck with 15 outs and draw five = 90%
If you used Level Ball for Jirachi-EX
- 44 card deck with 13 outs and draw five = 84%
- 44 card deck with 14 outs and draw five = 86%
- 44 card deck with 15 outs and draw five = 89%
If you can get a first turn Brigette, that should give you an additional 10% increase to draw into an out from Marshadow or Red Card. If you want to get really wacky with the numbers. Having all 20 outs available in deck, using one Jirachi-EX, and discarding something like Professor Sycamore to Ultra Ball to make VS Seeker a live play to make 18 outs; that will give you a staggering 95% of drawing out of Marshadow or Red Card. Unlikely, yes, but numbers are fun. Point here is that you have enough outs to where your opponent is taking a massive gamble in using Red Card or Marshadow against you without knowing it. I got hit with Let Loose somewhere between 13-16 times in Day 1 and only dead drew once--and it cost me the game. Every other time, snaked out of it like a boss.
Probability is fun, but doing the longhand is enduring; there's a reason why "long" is in the name. If you are interested in working more with probability and hypergeometric calculations, there are some calculators online and a lot of good reading out there for it. It's a criminally underused tool in deckbuilding, look into it!
Dallas Regional Matchups
All the metagaming, months long research, solitaire testing, following trends, and collaborating with teammates and asking a bunch of dumb questions because I don't play enough; want a good laugh? Here's how Day 1 went down:
- Round 1: Rayquaza-GX (WW)
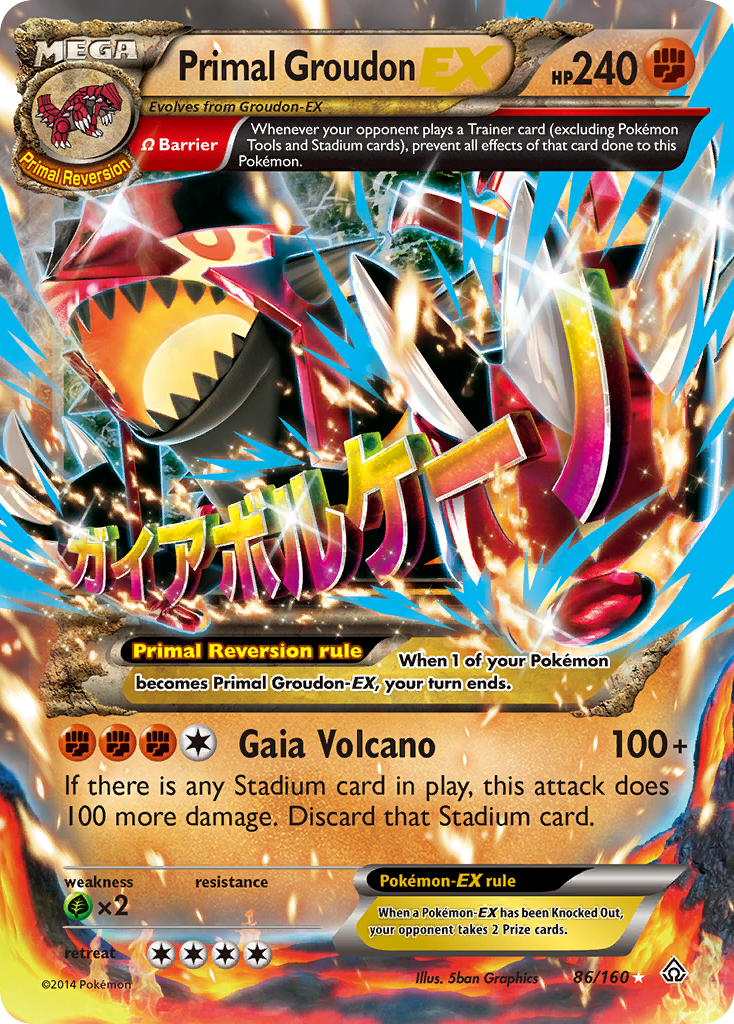
- Round 2: Primal Groudon-EX (LL)
- Round 3: Zoroark-GX / Golisopod-GX (LL)
- Round 4: Garchomp (WW)
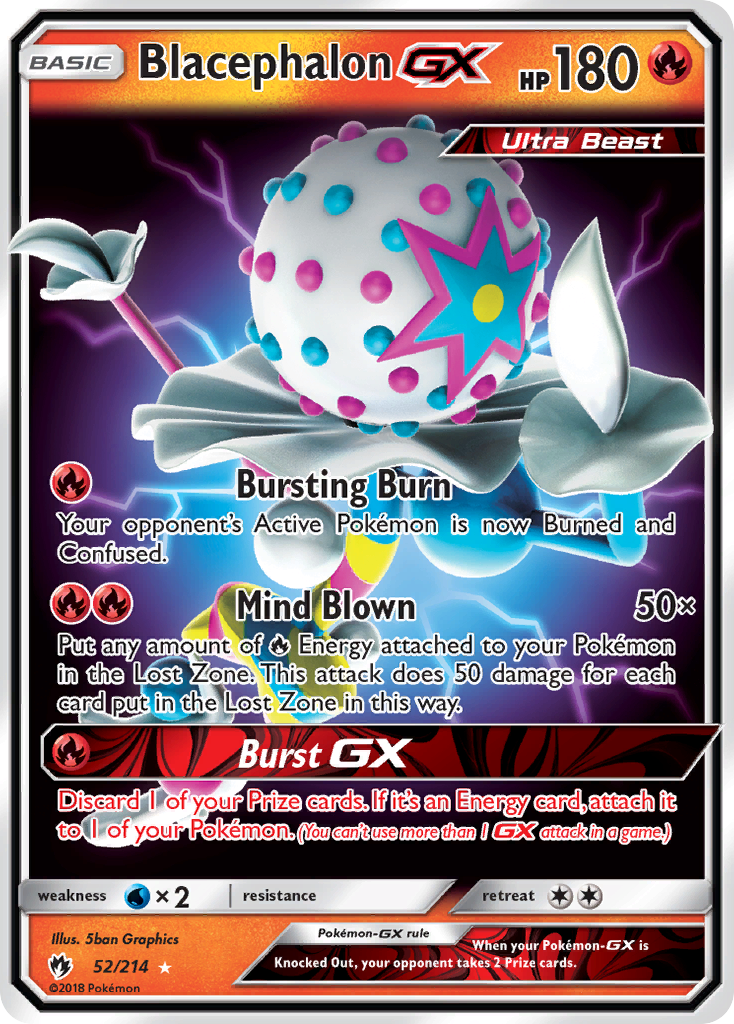
- Round 5: Blacephalon-GX (WLT)
- Round 6: Rayquaza-GX (LWW)
- Round 7: Rayquaza-GX (LWW)
- Round 8: Buzzwole-GX (LWL)
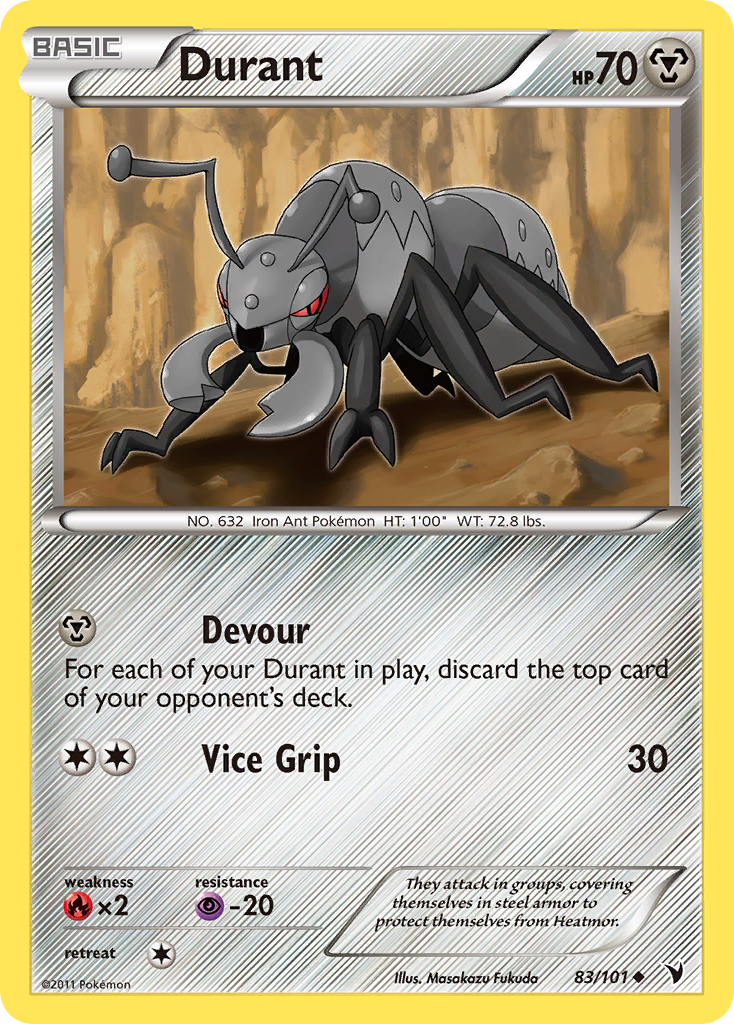
- Round 9: Durant (W)
Finished Day 1 with a 5-3-1 record, and crash landed at 157th place. Not bad for an ambitious nobody.
That's my luck for you: prepare a "silver bullet" and never see the decks you would want to see. To make matters worse, the one Zoroark-GX deck I face is a variant that I didn't have a good matchup against. Here are the takeaways from playing this for nine rounds:
- The draw and search engine was superb, especially against three Rayquaza-GX decks. I'd leave the draw and search engine as-is, even with Zoroark-GX / "Exodia" out of the format. I think Marshadow and Red Card will still be used quite a bit.
- The deck needs a second Brigette, I had it in my Prizes in three games and I lost all three games. That looks like an omen.
- A third Team Rocket's Handiwork is necessary. I felt I could establish Paralysis lock and then I couldn't do much with it. Had I used a third Team Rocket's Handiwork, I felt like my third game against Blacephalon-GX could have been a win and I could have milled into the Primal Groudon-EX deck faster, maybe securing a tie. Zoroark-GX / Golidopod-GX is a slightly unfavorable/unfavorable matchup because of how many outs they run, but being able to mill into their deck quickly will improve the matchup.
- Skyla was not as useful as I'd have hoped.
- My opponents used Jirachi-EX as two free Prizes all day. I've racked my head and dry-ran some draw and search engines that could function without it. As much as I'd like to go Jirachi-EX-less, I think it's a necessary evil until Unbroken Bonds and its risks need to be accounted for until then.
- I was worried I wasn't running enough Girafarig. I cut a third one for a Mr. Mime three days before. Two is the minimum amount of Girafarig I would run if you're going to run it.
- Whenever you start the game with Girafarig, it throws opponents for a loop. All of a sudden, they have to be careful with what they discard on their first turn. Or face the fact that they could lose some vital discard pile tools early if they have no other choice. Yet another reason to run three. Girafarig is amusing to lead the game with.
- Faba was useless all day, the only time it got used was against the Primal Groudon-EX matchup. I was able to Faba away two "Top Sixteen" stamped Tropical Beach cards which slowed the game into an agonizing crawl. We both had a good laugh that we would have the most expensive Lost Zone at the Regional. That's what? Over a thousand dollars in two cards?
- I wish there was a card that helped coin flips in regards to Trainers. Against Durant, I flipped at least 20 double tails in Game 2. I wish I was exaggerating, because I'm now in therapy for it. I won Game 1 in 15 minutes, but Game 2 was a 35 minute slog. He still had a little over 1/3 of his deck left when time was called.
- I spooked myself out on the Archie's Ace in the Hole / Blastoise matchup. Miraculously, I didn't face second most-used deck all day. A month ago, this deck would have been handed an autoloss against the traditional Archie's Blastoise build. The way they are built now, the matchup can swing all the way to favorable. The only common way they can win is if they power up Magikarp & Wailord-GX, get Silent Lab out, and use Towering Splash GX. If you set up and mill fast enough, you could hit Silent Lab. Between that and potentially putting their one Guzma in the Lost Zone, it should go okay.
Consider the Following
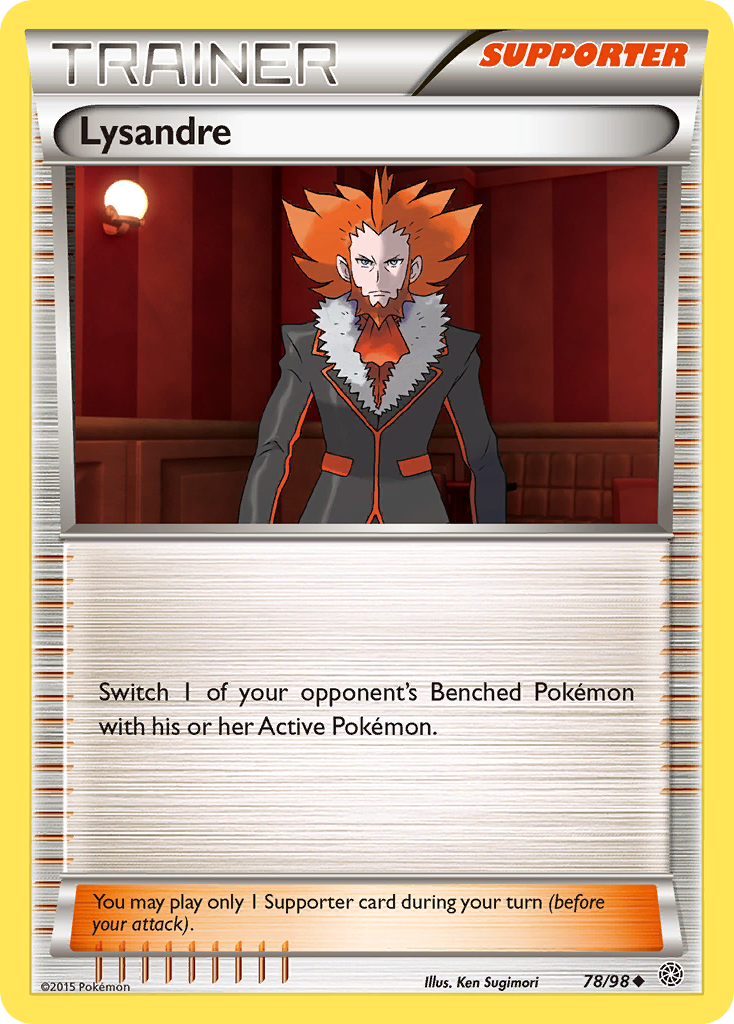
Guzma/Lysandre
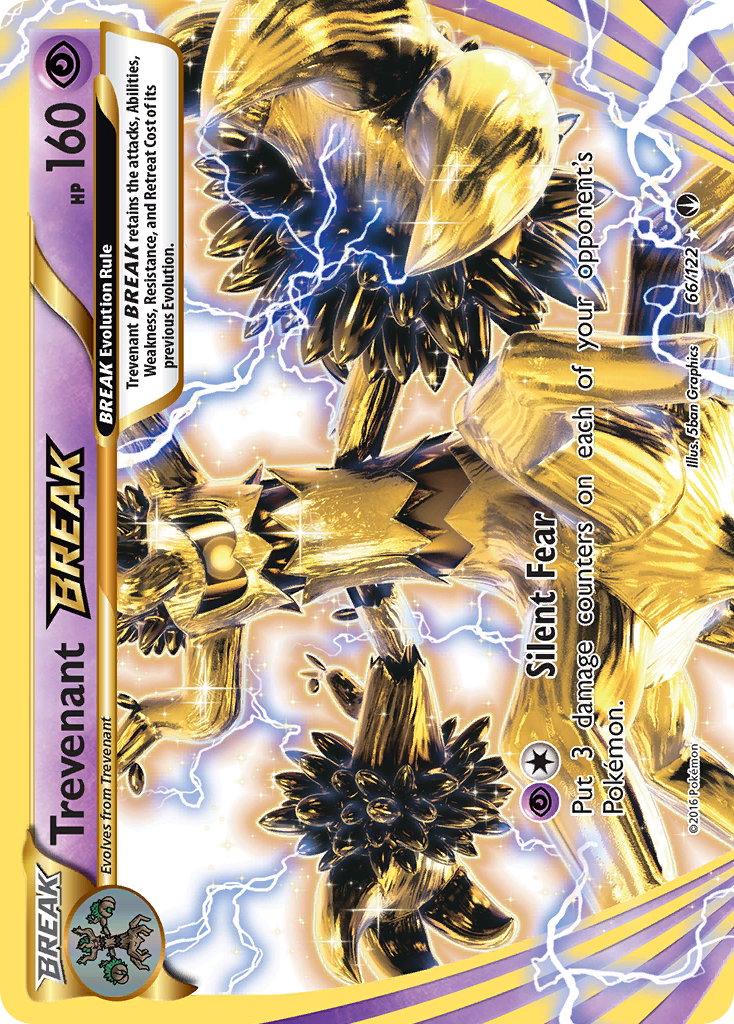
If Trevenant BREAK is a problem in your area, you can combat it. The problem is that you need three to four Guzma or Lysandre to do it. Agruments can be made over which of these two Supporters will best serve you. I'd lean towards Guzma first because if they get Paralyzed, they can use their own Guzma to get from under Paralysis, but they more than likely won't KO anything with their damage output and your HP, but still do some spread damage. You would use your own Guzma to put Sableye back in the Active position as well as push their Trevenant back. From that point, you need to play defensively and use Scoop Up Cyclone and Devolution Spray to re-establish the lock and erase all the spread damage Trevenant dishes out. Once your board is cleared of damage, start hitting their deck with Team Rocket's Handiwork, but make sure that you are using VS Seeker to put Guzma back in your hand. Trevenant decks use multiple N and could put you into a hand without Guzma and possibly re-establish Item lock to ensure you can't VS Seeker for Guzma. Having as many Guzma available in your hand and in your deck is the key to beating Trevenant. The nice part is that Trevenant is one of the few attacking decks that is almost unable to OHKO anything in this deck. As long as you can use Guzma then immediately use a VS Seeker to put it back in your hand, as well as playing defensively, the match should go well. If you don't use Guzma or Lysandre, the match is an autoloss.
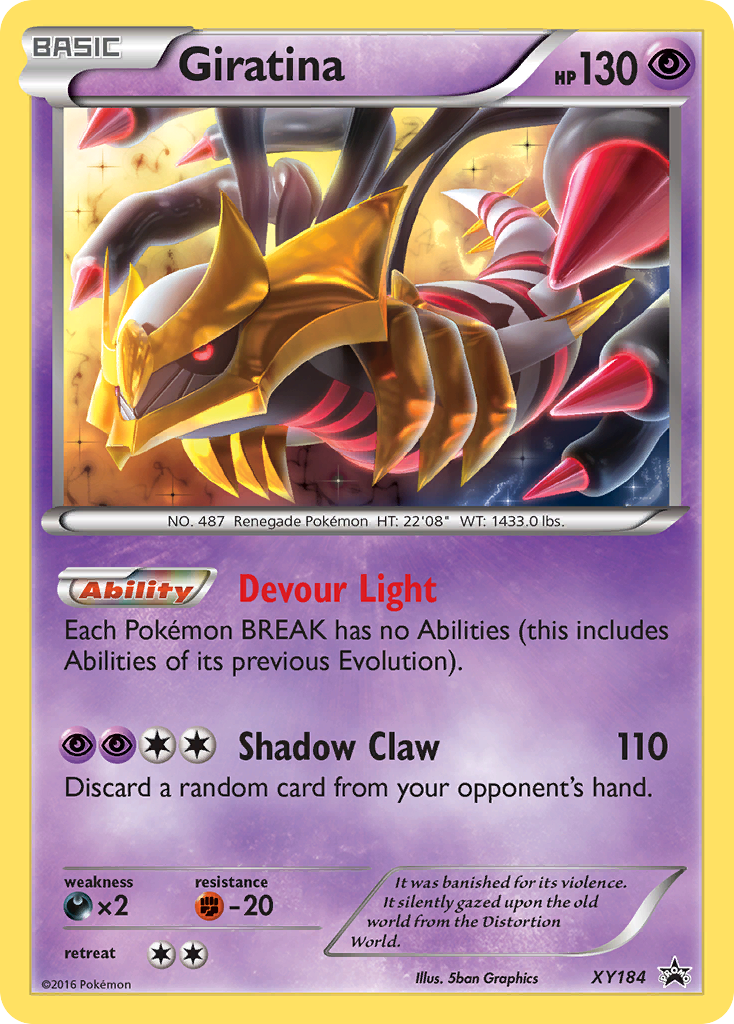
And don't get me started on teching Giratina. I have tried. It does not help. Between its Retreat Cost and how unlikely you are to face Trevenant, as well as a skilled player being able to play around it; it's not worth the trouble.
Lysandre Prism Star
I like what Lysandre Prism Star can do. But it has some drawbacks. I tested this as an alternative to Girafarig as I felt having to dedicate an attack to Get Lost would result in an awkward board state because you would have a turn where you couldn't use Sableye to Junk Hunt.
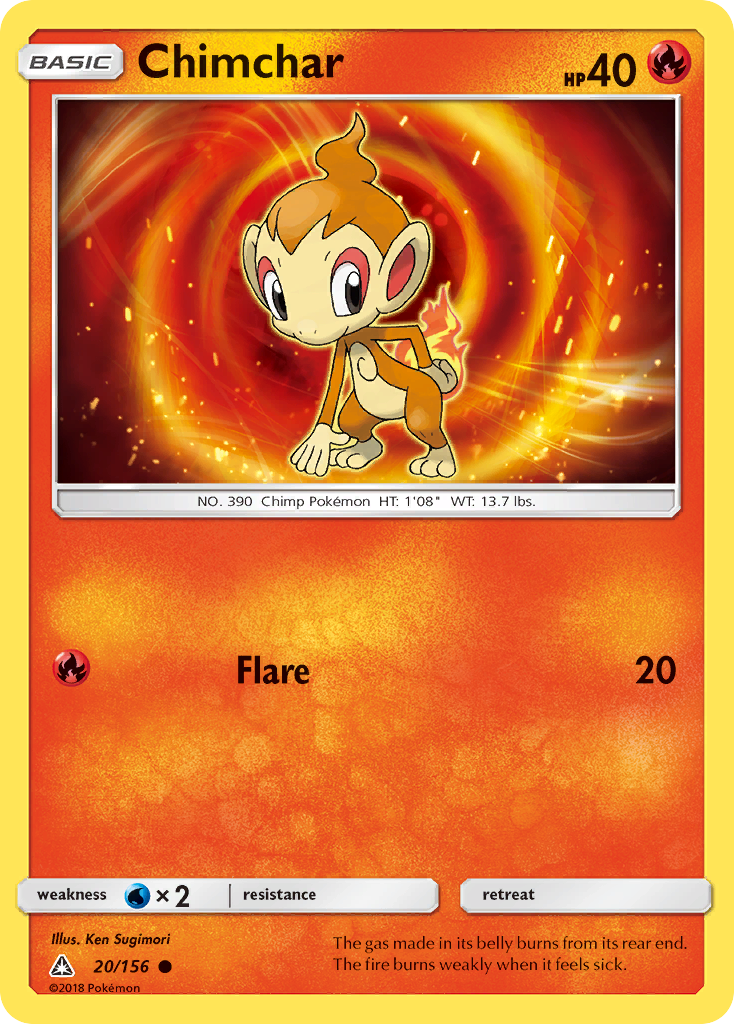
I tested Lysandre Prism Star with a couple of Chimchar because it's the only Basic Fire-type Pokemon in Expanded with zero Retreat Cost; Chimchar is a good pivot in a pinch. Once you have Paralysis lock established and your opponent leaves some of that beautiful bean footage in their discard pile, you can unleash Lysandre Prism Star and get rid of it without having to mess up your board state.
While the "not messing up your board state" is nice, in a best-of-three match at a Regional setting, a smart opponent will see this trick coming a mile away for Game 2 and Game 3. They will use VS Seeker and retrieve their necessary Supporters from their discard pile and start targeting down your Chimchar unless you can attack their deck aggressively with Team Rocket's Handiwork and hit those VS Seekers.
The biggest problem with Lysandre Prism Star over Girafarig is, say, you use two Chimchar and Lysandre Prism Star. You have a three card investment that can, at most, remove two cards from their discard pile into the Lost Zone; and it's a one-time deal. Girafarig is a two card investment, itself and an Energy, and it does the same thing for one turn. If it's still alive after the first Get Lost, you can do it again until it's KOed or as long as you're in a position to do so.
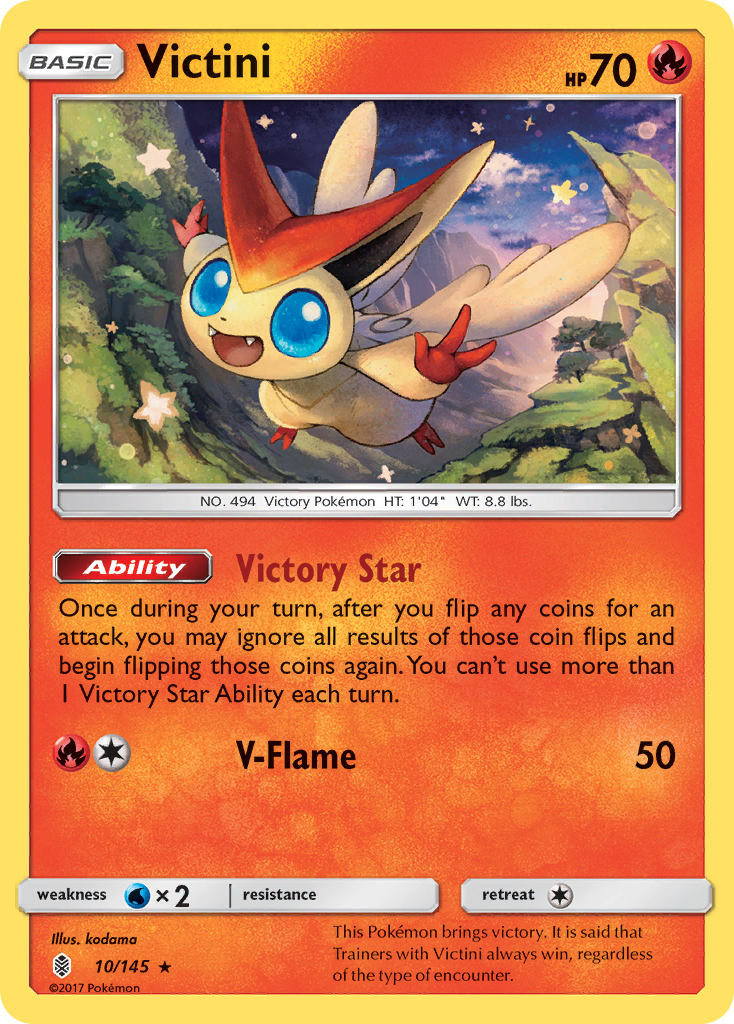
If you do want to test Lysandre Prism Star, I'd suggest changing up the Pikachu line to the "Nuzzle" Pikachu and using one to two Victini. This way, you have a way to "soft lock" by using Victory Star and having two coin flips for Nuzzle to keep Paralysis on their Active Pokemon. This isn't an ideal way of keeping Paralysis lock going as it's completely luck-based, but it's bizarrely synergetic.
And I made you read three paragraphs on considering Lysandre Prism Star. I win.
Celebi Prism Star
I have memory problems. And Celebi Prism Star fully exploits this fact. One look at its first attack, Time Distortion, and you'll see that it's tailor-made for this deck. It goes in the deck without hesitation; to which testing proves otherwise. Three days will pass and I will forget why Celebi Prism Star is not in the deck, and the cycle repeats. It took about seven go-arounds before I had to physically hide the card and forget where I put it before further testing could continue.
Celebi Prism Star is on the cusp of being a good addition to the deck as there are several big draws to it to it:
- Celebi Prism Star can be searched by: Brigette, Level Ball, and Ultra Ball
- Time Distortion can be used for one Colorless Energy. We run all Darkness Energy. It's splashable goodness!
- If you aren't able to draw into Devolution Spray or Scoop Up Cyclone and you have a Bench with two or three Raichu in play and you're at the end of your rope. Celebi Prism Star can jump all those Evolution Pokemon back to your hand as a "board reset".
- If you're under Item lock, you can still establish Paralysis lock.
The problem with Celebi Prism Star is you have no way of advancing board state if you are attacking with it. You can evolve into a Raichu, you can use Team Rocket's Handiwork, you spend your attack getting the Raichu back into your hand; but you aren't able to loop Items or Supporters this way.
I did consider using this with Lusamine to keep Supporter loops going. But, you know. The new ban makes that idea kinda sorta useless.
While it's not near the top of my list of cards to add into the deck if the metagame changes; it's a card that, if you are considering it, will require a lot of testing to determine if it will help further your strategy as opposed to other techs and consistency cards.
Silent Lab
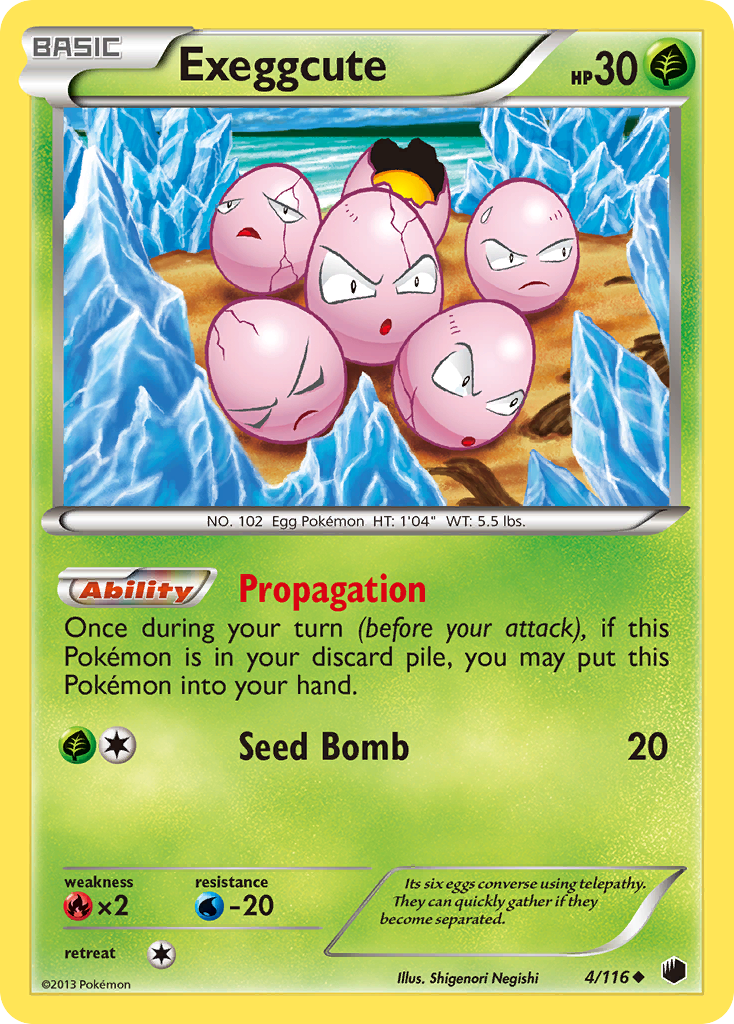
Back when Archie's Ace in the Hole / Blastoise was running Keldeo-EX, Running several Silent Lab was a way to make the matchup go from autoloss to even. Icing on the cake is that the card also helps against the likes Marshadow and Exeggcute. The problem is that the Stadium war in Expanded is real and intense; keeping a Stadium on the field is tough. I wouldn't consider Silent Lab unless Keldeo-EX makes its way back into Archie's Blastoise decks or Malamar decks suddenly flood the meta and use Dawn Wings Necrozma-GX. And if that is the case, I would consider three to four Stadiums.
Battle Compressor
You can make a lot of interesteing plays with this weird toy. If you have no access to Level Ball or Ultra Ball, you can Battle Compressor a Jirachi-EX and use a Rescue Stretcher to fetch a Supporter. Or use it to discard a key Supporter and retrieve it with VS Seeker. If it wasn't for the uncanny fear of "Exodia" in Dallas, it might have stayed in the deck. That said, Battle Compressor was the most complicated card to use in the deck. If you do include it in your build, I'd get familiar with opening hands and how to set your discard up for future plays.
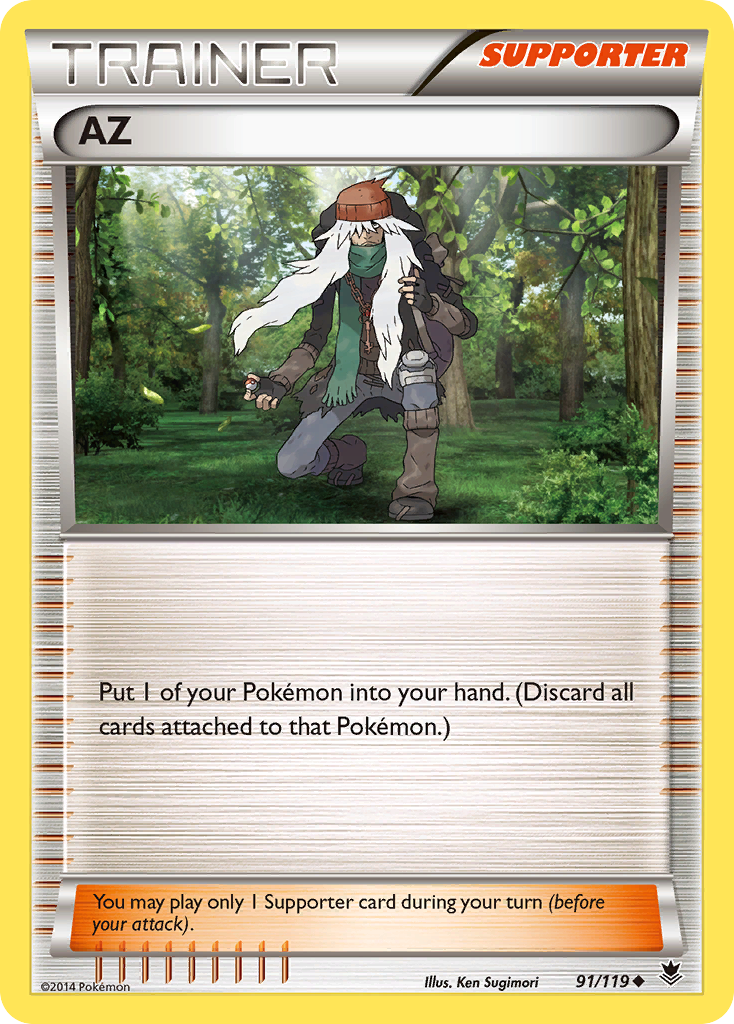
AZ
If Jirachi-EX is a necessary evil, then we need more ways of getting it out of danger. In this case, AZ can guarantee that safety at the cost of using up a Supporter for the turn. This can be problematic if we had to use something like N or Professor Sycamore earlier in the turn. However, in addition to Scoop Up Cyclone and Devolution Spray, it's another way of looping Paralysis lock.
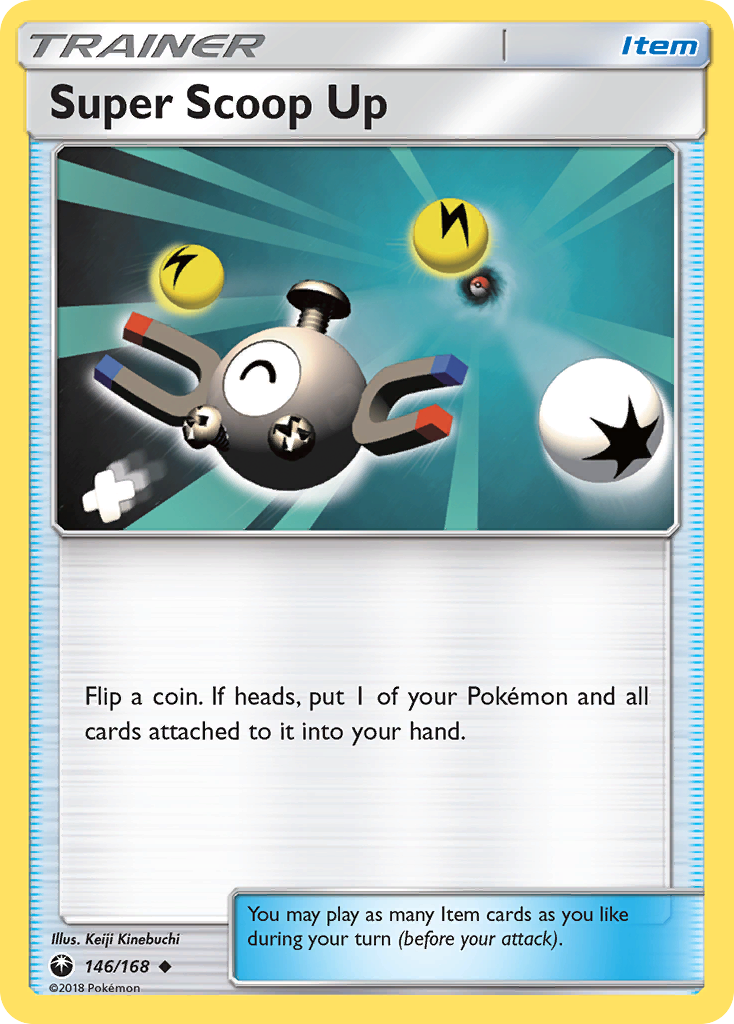
Super Scoop Up
In the same vein of AZ, Super Scoop Up would be to retrieve Jirachi-EX in a pinch. It requires a coin toss, which makes me leery of suggesting it, but it's an Item and can be used after Professor Sycamore and N, which is the sort of urgency the deck needs.
Parallel City
The final suggestion to get Jirachi-EX off your Bench is Parallel City. If you start your turn by using Jirachi-EX into Brigette, you'll have four Pokemon on your Bench. Throw down Parallel City and knock your Bench to three and get Jirachi-EX out of there. The deck is capable of functioning with a three-Pokemon Bench, but you will need to select your Pokemon with Brigette carefully. An added bonus is that, by doing this, the other side of the Stadium will nerf down Seismitoad-EX's Quaking Punch to a 10 damage attack and allow you some breathing room to set up. The downside of using Parallel City is that you have to way of retrieving it once it's in the discard pile.
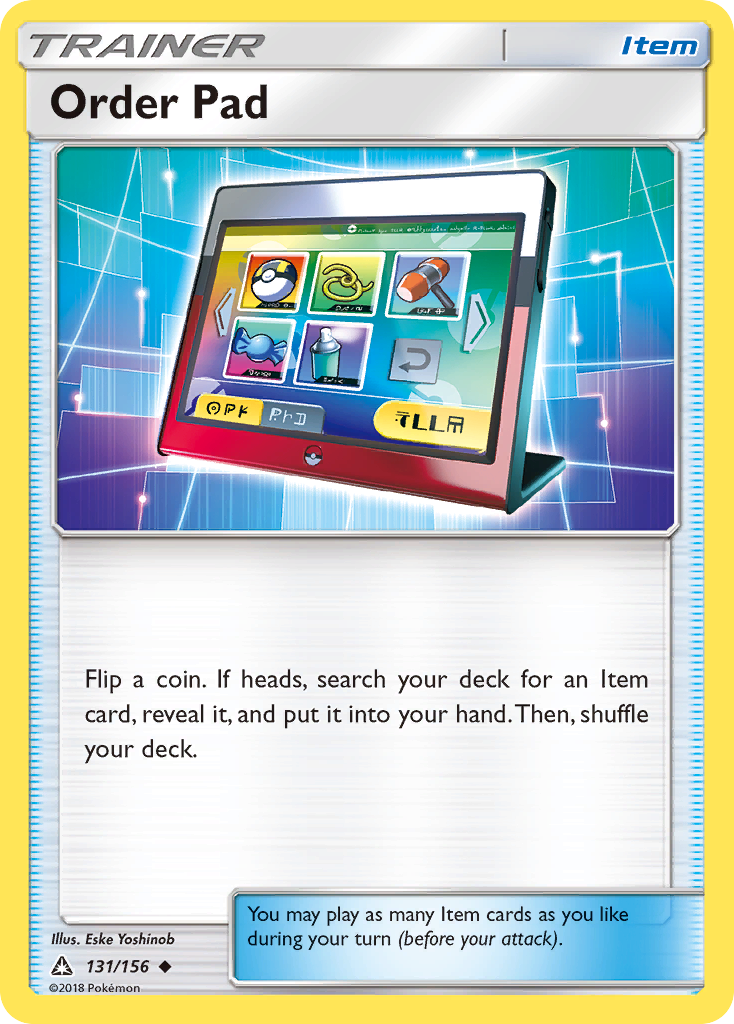
Xtransceiver
If you're looking at making a build that doesn't use Jirachi-EX, look to this oldie-but-goodie. It's the same as Order Pad, but gets Supporters instead. It does require a coin toss, which can put you in a bad situation, but Xtransceiver is retrievable by Sableye and can get you Supporters like Faba and Team Rocket's Handiwork quickly. It's a card that is fantastic for your mid-game once you're set up, but it's risky if you rely on it for your early turns.
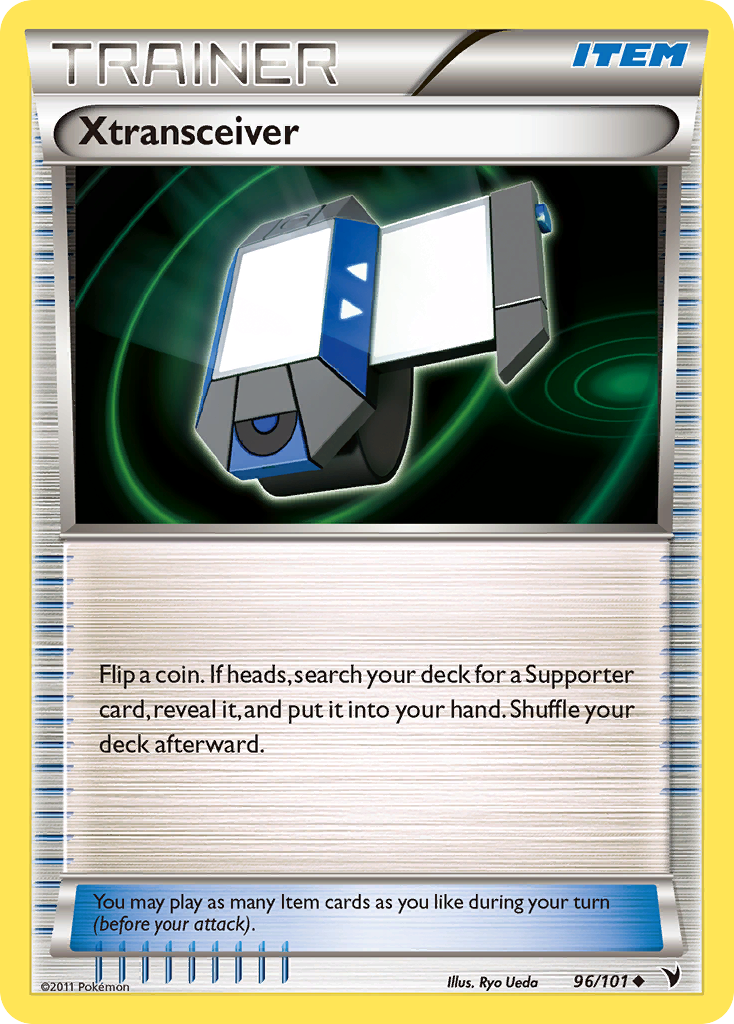
Poke Gear 3.0
If there is any hope in constructing a Jirachi-EX-less build in the future, it's going to involve Pokégear 3.0. The last time this card saw play was before "Item" was a Trainer sub-type; and its getting a reprint in Unbroken Bonds. It allows you to peek at the top seven cards of your deck and snag a Supporter from there. Without Jirachi-EX, you'll have to max out on Professor Sycamore, N, and this. The big problem by cutting Jirachi-EX out is you'll be taking a concession in being able to bust Red Card and Marshadow. Pokegear 3.0 also lends itself to some hypergeometric number play.
The first scenario is easy to calculate. If we are shooting for any one of our four Professor Sycamore or one of our four N; Pokegear 3.0 not being a factor. We are looking at a 65% chance of that happening. Not bad, not the greatest either. If we factor Pokegear 3.0, we are looking at 80%. The reason why the numbers are lower is because we are only looking at the opening hand before we throw Prize cards on the table, so we have every out, as well as every non-out, available in calculations.
The probability of any of our outs of being in our Prizes is 77% of one or more, and 36% if it's more than one. We will account for one as that will be the more likely result.
Assuming we have one Active Pokemon, no Professor Sycamore or N in hand or after the initial draw, but we have a Pokegear 3.0; we are left with a 46 card deck. If we use Pokegear 3.0, and we have all four Professor Sycamore and all four N in the deck, we have a 76% chance of snagging one of them. If one N or one Professor Sycamore is in our PRizes, we have a 71% chance of getting one.
If you have any cards in your hand that can thin out your deck like Level Ball and Ultra Ball that can slightly increase your chances of landing a Supporter with Pokegear 3.0. Assuming we have seven Supporter outs and a 46 card deck, using one Level Ball bumps our consistency up by .92% and makes it a 72.18%. This isn't much. If we use a second search, our probability goes up another .95% and leaves us with 73.13%. Not the biggest increase in the world, but it's good brain candy to think about.
Along with being able to delve into your deck to grab offensive Supporters like Faba and Team Rocket's Handiwork, you can use Pokegear 3.0 to snag the aforementioned two Supporters early on and discard them to Professor Sycamore or Ultra Ball for later use with VS Seeker.
The problem with Pokegear 3.0 in this scenario is that in order to have it work effectively, you need to run thick Supporter lines of a few different Supporters and forego techs and smaller lines like Brigette and Gladion
I'm currently working with a couple Jirachi-EX-less draw and search engines. Using Pokegear 3.0 is the way to move forward to mitigate the liability of using two-Prize Pokemon, as well as simultaneously avoiding any issues that Deserted Power Plant could have thrown our way.
Post-Dallas Fixes
I thought I was going into dallas with a perfect 60-card deck. The course of the day would show that I had somewhere around a good 55. Going forward, here's what could get cut and what would get added and why.
Two Brigette. Don't Ask Questions, Just Do It!
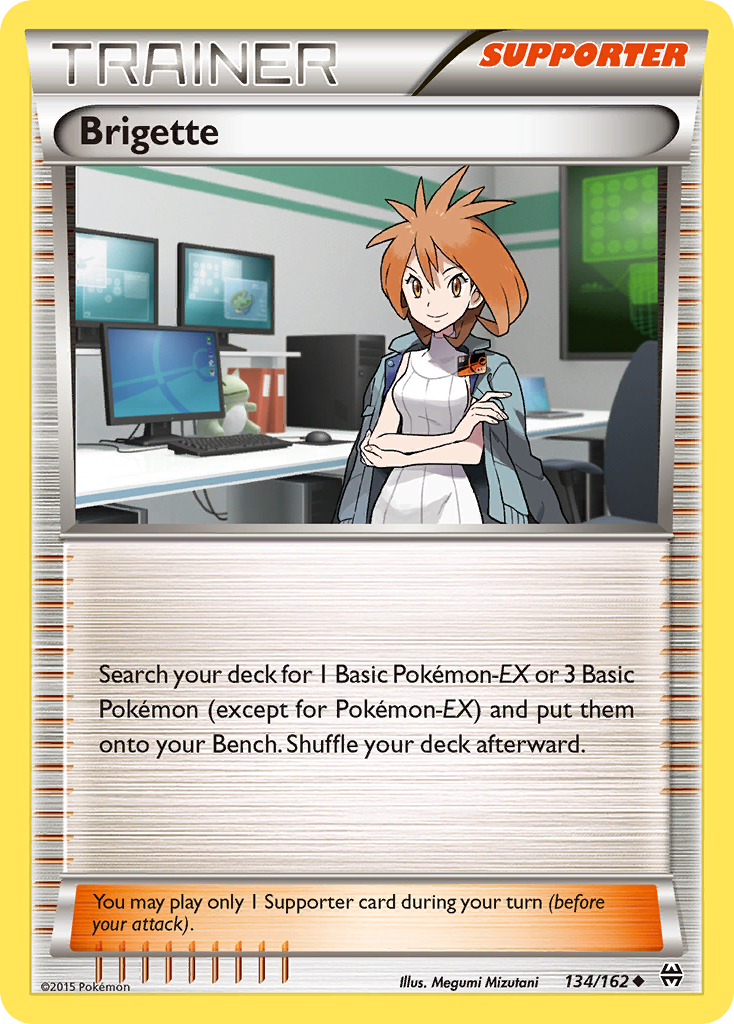
Over the course of the regional, I played a total of 22 games. I lost nine games over the course of Day 1; three of those games were because Brigette was in my Prizes. Having Brigette is vital to a proper setup and the affects of not having it available in the early turns was felt in a terrible way. The "losing" kind of terrible. Going forward, two Brigette is the standard.
Zero/One Skyla
I like what Skyla can do, but I secretly hate it. It's handy in getting Devolution Spray and Scoop Up Cyclone in a pinch, but through the entire course of Day 1, almost every Skyla play was for one of those two cards. I had three other instances where I got something else. One game I used it for Ultra Ball, another for Rescue Stretcher, and another one for VS Seeker. Going forward, if I were to use Skyla, it would be at one. But I'd rather use more Devolution Spray. At least more Devolution Spray doesn't eat up Supporter spots in the deck.
Zero Gladion
This card teeters on the fine line of "necessary evil" and "dead card". I think that if you were to add more outs to the deck by means of more Devolution Spray and/or AZ, your reliance on Scoop Up Cyclone wouldn't be as daunting and would render Gladion near-useless. I don't want to rule it out yet, but over the course of the Regional, I used it twice: Once to get a Girafarig, to which it had little outcome of the match. And the other. I think it was for a Super Rod when I faced againt Durant in Round 9. Arguably, it helped the most against Durant.
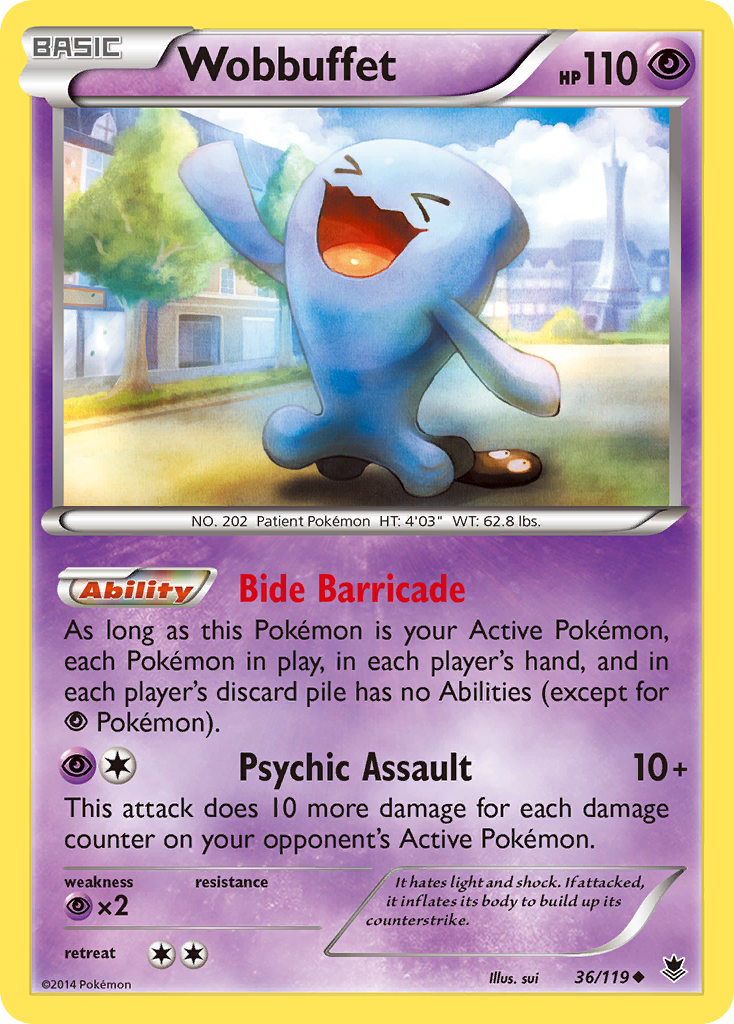
Three Team Rocket's Handiwork
My match against Blacephalon-GX in Round 5 could have been a win if I was able to get into Team Rocket's Handiwork a bit faster. I might have been able to pull a tie against Primal Groudon-EX if I was able to draw into it faster as Wobbuffet blocked my Jirachi-EX plays. Better rolls for said Supporter would have helped too. But as far as things we can control, I felt that I could establish Paralysis lock quickly, but ended up waiting for Team Rocket's Handiwork to pop up because I was afraid of benching Jirachi-EX and leaving it open for Guzma plays. Going forward, three Team Rocket's Handiwork gives you better odds of drawing into it and being able to drill into your opponent's deck faster, which is something this deck needs against unfavorable matchups like Zoroark-GX / Golisopod-GX.
AZ? Super Scoop Up? Parallel City?
If we are getting rid of Skyla, might as well add cards that serve the purpose of scooping your Pokemon or getting Jirachi-EX out of the fray. One of the biggest problems the deck has is removing Jirachi-EX from your Bench. AZ also helps scooping up Raichu and allows you some of that beautiful Supporter versatility that VS Seeker allows. Using Super Scoop Up is faster than AZ as you can use it after a Professor Sycamore or an N, but it's a coin flip and will backfire on you at some point. Using Parallel City guarantees a way to get Jirachi-EX off your Bench, works at "Item speed", can bump other Stadiums, but is unretrievable from the discard pile. I would lean towards either AZ or Parallel City at the moment.
Faba or Field Blower?
Neither card was useful in any capacity due to the matchups I had. Going forward, I would lean to going all the way on one or the other. A lot comes down to if you are expecting Seismitoad-EX in your next Regional, Cup, or Challenge. Without Faba, Seismitoad-EX will crush you. However, against Zoroark-GX / Garbodor, you may find yourself in a position where you need to get rid of a Tool attached to Garbodor and need Field Blower because you would need to draw into it. At the moment, I'm leaning more towards a heavy Faba line and doing away with Field Blower altogether. More decks that are reliant on using Double Colorless are starting to incorporate some basic Energy so Faba doesn't put them in a pine box. This diminishes the use of Faba to a degree, but not everyone has seen this memo, and Sableye / Raichu isn't on anyones radar. I'd go with all Faba unless you find that your own testing reveals Field Blower has a place in your particular meta. Here is what I would have the current iteration, and decklist I wish I ran at Dallas, look like:
Pokémon (16)
- 4x Raichu (BUS #41)
- 4x Pikachu
- 3x Sableye (DEX #62)
- 2x Girafarig (LOT #94)
- 2x Jirachi-EX (PLB #60)
- 1x Mr. Mime (GEN #52)
Trainers (36)
- 4x Professor Sycamore (BKP #107)
- 4x Faba (LOT #173)
- 3x N (FCO #105)
- 3x Team Rocket's Handiwork (FCO #112)
- 2x Brigette (BKT #134)
- 2x AZ (PHF #91)
- 4x Ultra Ball (SUM #135)
- 4x Level Ball (AOR #76)
- 4x VS Seeker (PHF #109)
- 2x Rescue Stretcher (GRI #130)
- 2x Devolution Spray (EVO #76)
- 1x Super Rod (DRV #20)
- 1x Scoop Up Cyclone (PLB #95)
Conclusion
I almost made Day 2 with this thing. And if I can do it, I'm positive that much better players like you can make Day 2 with this. It's been a gas! I hope that something in this helped you in some capacity and showed some of you budget players that you don't need to break the bank to make something good from improvised weapons. As for me, I am not chasing a World invite with my 42 points that keep me warm at night. If you have any questions I'll be in the editors office, drinking day old coffee and stealing sandwiches from the writers office. Good luck to you all!
--Hurley